# Delete a server
Source: https://docs.hyra.io/api-reference/activity/delete-activitysessions-server
delete /activity/sessions/{workspaceId}/{eventId}/server/{serverId}
Delete a server for an event
# Get Session Calendar
Source: https://docs.hyra.io/api-reference/activity/get-activity-calendar
get /activity/{workspaceId}/calendar
Get the calendar for the workspace
# Retrieve Leaderboard
Source: https://docs.hyra.io/api-reference/activity/get-activity-leaderboard
get /activity/{workspaceId}/leaderboard
Get a workspace's leaderboard
# Get User Activity
Source: https://docs.hyra.io/api-reference/activity/get-activity-user
get /activity/{workspaceId}/user/{userId}
Get a user's activity for this week, and the last 25 activities
# Get Sessions by Day
Source: https://docs.hyra.io/api-reference/activity/get-activitysessions
get /activity/sessions/{workspaceId}
Get sessions for given day
# Get Session Event Logs
Source: https://docs.hyra.io/api-reference/activity/get-activitysessions-logs
get /activity/sessions/{workspaceId}/{eventId}/logs
Get sessions for given day
# Get Upcoming Sessions
Source: https://docs.hyra.io/api-reference/activity/get-activitysessions-upcoming
get /activity/sessions/{workspaceId}/upcoming
Get upcoming sessions
# Creating an exporter
Source: https://docs.hyra.io/api-reference/activity/module/creating-an-exporter
If you're using multiple scripts for your Activity Tracking Events, you'll need to create an exporter module to ensure instance persists across scripts. Please follow the instructions below:
```lua
local activity = require(126591263956758)
return return activity
```
Require the module in your Loader Script, and `init` the module as normal.
In all locations where you want to use the module for event tracking, simply require the exporter module. You only need to run `init` in one location.
# Using the Activity Module
Source: https://docs.hyra.io/api-reference/activity/module/using-the-module
Hyra's Activity Module is used to track in-game activity and sessions.
Hyra provides a ready-made module for tracking in-game activity. This comes preloaded with tracking of friends, messages and more.
To begin installing the module, please follow the instructions below:
Before using the Activity Module, you must enable the HTTP Service in your
game settings. This allows the module to communicate with Hyra's API. You can
enable this by going to Game Settings > Security > Enable HTTP Requests.
Also note that your game must be published to access these settings.
Each Workspace has a unique tracking ID, so you'll need to download a
ready-made module for your workspace.
You'll need to download the module for your workspace.
Once you've downloaded the place, open it in Roblox Studio.
Copy over the loader script to your ServerScriptService.
Once you've copied the loader script, paste it into your
ServerScriptService.
Once you've published the place, your module will be ready to use.
# Adding Events to Hyra
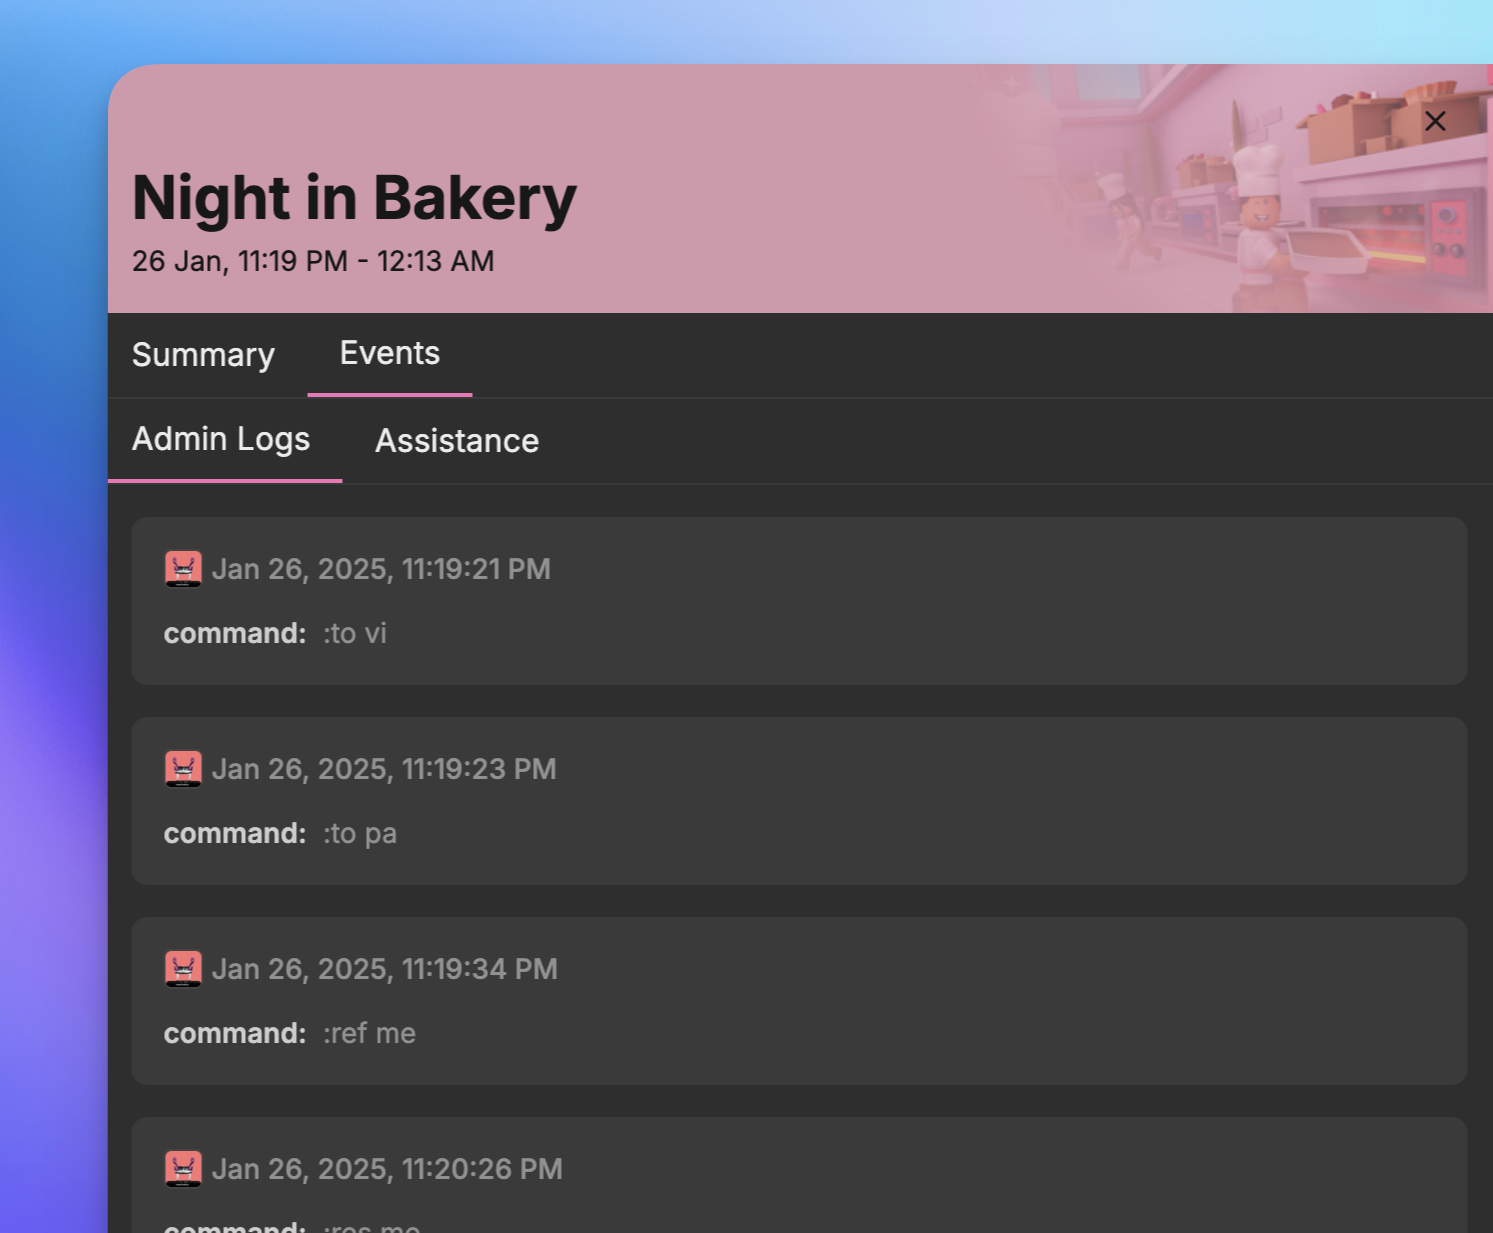
In the latest version of Hyra's module loader, you can now send custom events to Hyra, which will appear in the Activity tab.
 ## What Are Events?
Events allow you to log specific activities within your system, making them visible and organised under the Activity tab. Common types of events include:
* **Admin Logging:** Track administrative actions, such as user commands.
* **Assistance/Help Logging:** Log help requests or assistance actions.
* **F3X Logging:** Monitor building or tool usage events.
Events are grouped by type for easy browsing, and you can ingest any custom event you need - Hyra takes care of the rest.
## Sending Events to Hyra
To send events, use the `trackEvent` function provided by the module. This function is tied to the module instance, meaning you'll need to ensure it operates within the same instance. If your scripts require sharing data, you can use [exporters](/api-reference/activity/module/creating-an-exporter) or bindable events for seamless integration.
```lua
module.trackEvent(player, eventType, eventData)
```
* `player`: The player associated with the event (e.g., `game.Players.melodrvma`).
* `eventType`: A string representing the type of event (e.g., `"Admin Logs"`).
* `eventData`: A table containing event-specific details (e.g., `{ command = ":kick xyeda" }`).
## Example: Tracking an Admin Log Event
The following example demonstrates how to log an admin action using the `trackEvent` function:
```lua
module.trackEvent(game.Players.melodrvma, "Admin Logs", {
command = ":kick xyeda"
})
```
In this example:
* The event tracks an admin's use of the `:kick` command.
* The `eventData` table includes the specific command executed.
By following this structure, you can easily add, organise, and track events in Hyra, ensuring all relevant activities are logged and accessible within the Activity tab.
# Change a Session Role
Source: https://docs.hyra.io/api-reference/activity/patch-activitysessions-change
patch /activity/sessions/{workspaceId}/{eventId}/change
Change session user
# Create User Activity
Source: https://docs.hyra.io/api-reference/activity/post-activity-user
post /activity/{workspaceId}/user/{userId}
Create a new gifted activity
# Create a Server
Source: https://docs.hyra.io/api-reference/activity/post-activitysessions-server
post /activity/sessions/{workspaceId}/{eventId}/server
Create a server for an event
# Redirect to Roblox Game
Source: https://docs.hyra.io/api-reference/connections/get-connectrobloxplay
get /connect/roblox/play
Redirect to Roblox game
# Delete a Post
Source: https://docs.hyra.io/api-reference/intranet/delete-workspaceposts-
delete /workspace/posts/{workspaceId}/{postId}
Delete a post from the intranet.
# List Posts
Source: https://docs.hyra.io/api-reference/intranet/get-workspaceposts
get /workspace/posts/{workspaceId}
Get all the posts from the intranet.
# Update a Post
Source: https://docs.hyra.io/api-reference/intranet/patch-workspaceposts-
patch /workspace/posts/{workspaceId}/{postId}
Update a post from the intranet.
# Introduction
Source: https://docs.hyra.io/api-reference/introduction
A quick introduction to the API reference documentation
Hyra's V2 monothlyic API allows you to securely interact with Hyra from outside applications. Every day, we see new and exciting integrations with Hyra, from automation from within games to interaction via Discord bots.
Our API is REST based, and uses JSON and Bearer authentication. It's the exact same API we use to power our website.
At the moment, Hyra's website uses two APIs.
* **V1 API (api-staging)**: Our original API is no longer being actively developed, but is still used by our website for some features. This API uses a different authentication method, and is not documented or supported. We cannot guanratee that this API will not change or be removed at any time.
* **V2 API (api)**: Our new API is being actively developed and more and more features are constantly being added to it. This API is the one you'll find documented here.
A full technical API reference can be found [here](https://api.hyra.io/docs/static/index.html), but the documentation here is based on the API reference, and is more user friendly.
## Authentication
Our V2 API uses Bearer authentication, which you can pass in via the `Authorization` header. You can get your API key from your Workspace Settings, under Developer API.
```http
Authorizaton: Bearer
```
## Rate Limiting
On most of our API the global rate limit is 100 requests per minute, but you can check the ratelimit for every endpoint by using the `X-Ratelimit-Limit` and `X-Ratelimit-Reset` headers on all responses. If you exceed the limit, you will receive a `429 Too Many Requests` response. If you need a higher rate limit, please contact us.
## Errors
Our API uses conventional HTTP response codes to indicate the success or failure of an API request. In general, codes in the `2xx` range indicate success, codes in the `4xx` range indicate an error that failed given the information provided (e.g., a required parameter was omitted, a charge failed, etc.), and codes in the `5xx` range indicate an error with Hyra's servers.
### Example Error
```json
{
"statusCode": 400,
"error": "Bad Request",
"message": "Bad Request"
}
```
# Revoke a Ban
Source: https://docs.hyra.io/api-reference/players/delete-playersbans
delete /players/bans/{workspaceId}
# Delete Comment
Source: https://docs.hyra.io/api-reference/players/delete-playersbans-comments
delete /players/bans/{workspaceId}/{banId}/comments/{commentId}
Delete a comment
# Get Bans
Source: https://docs.hyra.io/api-reference/players/get-playersbans
get /players/bans/{workspaceId}
Retrieve a list of bans
# Get Ban by ID
Source: https://docs.hyra.io/api-reference/players/get-playersbans-
get /players/bans/{workspaceId}/{banId}
Retrieve a specific ban
# Get Comments
Source: https://docs.hyra.io/api-reference/players/get-playersbans-comments
get /players/bans/{workspaceId}/{banId}/comments
Retrieve comments for a ban
# Retrieve Orders
Source: https://docs.hyra.io/api-reference/players/get-playersorders
get /players/orders/{workspaceId}
Retrieve orders
# Retrieve Order Timeline
Source: https://docs.hyra.io/api-reference/players/get-playersorders-history
get /players/orders/{workspaceId}/{orderId}/history
Retrieve order history logs
# Search Orders
Source: https://docs.hyra.io/api-reference/players/get-playersorders-search
get /players/orders/{workspaceId}/search
Retrieve orders
# Creating an exporter
Source: https://docs.hyra.io/api-reference/players/module/creating-an-exporter
If you're using multiple scripts for your utilities or order system, you'll need to create an order log exporter module to ensure authentication persists across scripts. Please follow the instructions below:
```lua
local orderLog = require(15254660066)
return orderLog
```
```lua
local orderLog = require(game.ServerScriptService:WaitForChild("OrderLogModule"))
```
# Using the Order Logging Module
Source: https://docs.hyra.io/api-reference/players/module/using-the-module
Hyra provides a Roblox Lua wrapper for its Order Logging system
The Hyra Order Logging API is an advanced, real-time solution for monitoring and managing the lifecycle of an order. It offers comprehensive visibility from the moment an order is placed to when it's ready for pickup, tracking each participant involved.
## Ready made scripts
Hyra provides some out of the box solutions for order logging for popular solutions.
* [HandTo System by r\_r](https://create.roblox.com/marketplace/asset/15281167443/HandTo-System)
* [EasyPOS Cafe](https://create.roblox.com/store/asset/138387535633314/EasyPOS-Hyra-Order-Logging-Addon)
## Order Status Lifecycle
Each order must have a status associated with it. Depending on your system, you may decide to use different statuses. The following statuses are available:
* `handed_to` - The order has been handed to the customer
* `submitted` - The order has been submitted by the cashier
* `waiting_for_preparation` - The order is waiting for preparation by a chef or other staff member
* `finding_new_colleague` - The order is waiting for a new colleague to take over preparation (for example, if the previous chef left the game)
* `preparing` - The order is being prepared by a chef or other staff member
* `completed` - The order has been completed
* `waiting_for_pickup` - The order is waiting for pickup by the customer or a delivery person
* `cancelled` - The order has been cancelled
## Requiring the module
The module used for Order Logging is stateful and persists its authentication state with the Hyra API. If you use a single script order solution, you can directly require the module as follows:
```lua
local orderLog = require(15254660066)
```
If you use multiple scripts, you can [create a module script exporter](/api-reference/players/module/creating-an-exporter). You need one of these to maintain the state of the module across several scripts.
## Authentication
To authenticate, input your unique `apiKey` and `workspaceId` at the beginning of your main script:
```lua
orderLog.setupAPI(apiKey, workspaceId)
```
You only need to do this once per game server.
## Interacting with the module
To log a new order, input the customer and actor as player objects, along
with an argument table that can include an array of `items` and the initial
`status`.
The `customer` and the `actor` are both [Player instances](https://create.roblox.com/docs/reference/engine/classes/Player).
```lua Using Player Instance
orderLog.createOrder(customer, actor, {
items = {"item 1", "item 2"},
status = "waiting_for_preparation",
})
```
```lua Using User Object
orderLog.createOrder({ UserId = 1}, { UserId = 2}, {
items = {"item 1", "item 2"},
status = "waiting_for_preparation",
})
```
Once an order has been created, you will receive a response object that includes the unique `id` and `order_number` for the order.
```lua
{
error = false,
id = "653db4bb1e3727cc1851ac07",
order_number = "1001",
}
```
If there is anything wrong with the request, you will receive an error message.
```lua
{
error = true,
message = "Customer is required",
}
```
When creating an order, you will need to specify a valid `actor`. In some cases, you may not have a valid player, for example if the order was submitted via a kiosk. In this case, there are a few system IDs you can use:
* `1` - POS (Point of Sale System)
* `2` - Kiosk
* `3` - Mobile Ordering
* `4` - NPC
Using the unique order `id` (not the order\_number) you can update the status of an order
```lua Waiting for Preparation
orderLog.setWaiting("653db4bb1e3727cc1851ac07")
```
```lua Preparing
orderLog.setPreparing("653db4bb1e3727cc1851ac07", game.Players.Roblox) -- Or spoof a player object (see docs - Creating an Order, Using User Object)
```
```lua Finding a new colleague
orderLog.setReprepare("653db4bb1e3727cc1851ac07")
```
```lua Ready for pickup
orderLog.setReadyForPickup("653db4bb1e3727cc1851ac07")
```
```lua Completed
orderLog.setComplete("653db4bb1e3727cc1851ac07")
```
```lua Cancelled
orderLog.setCancelled("653db4bb1e3727cc1851ac07")
```
# Update Order
Source: https://docs.hyra.io/api-reference/players/patch-playersorders-
patch /players/orders/{workspaceId}/{orderId}
Modify an order
# Create a Player Ban
Source: https://docs.hyra.io/api-reference/players/post-playersbans
post /players/bans/{workspaceId}
Create a new ban
# Post Comment
Source: https://docs.hyra.io/api-reference/players/post-playersbans-comments
post /players/bans/{workspaceId}/{banId}/comments
Create a comment
There is a more advanced version of this endpoint that allows for uploading
files and videos.
However, this API uses multipart encoding instead of JSON,
so it has been omitted from this documentation and the Swagger reference.
# Create Order
Source: https://docs.hyra.io/api-reference/players/post-playersorders
post /players/orders/{workspaceId}
Create a new order
# Set Player Rank
Source: https://docs.hyra.io/api-reference/ranking/patch-ranking-set
patch /ranking/{workspaceId}/set/{userId}
Change a user's rank to the specified rank
# Using the Roblox Module
Source: https://docs.hyra.io/api-reference/ranking/using-the-module
A guide on how to use the Roblox Module.
Hyra's Ranking API comes with a Roblox MainModule wrapper to allow you to easily interact with the API from Roblox Lua.
## Getting started
Make sure you have your API key and Workspace ID to hand.
You can find your Workspace ID in the URL of your workspace. For example, if your workspace URL is `https://app.hyra.io/123456`, your Workspace ID is `123456`.
Your API key can be found in the Workspace Settings under Developer API.
## Require the Module
At the top of the Server Script where you want to use Ranking, you must require the module.
```lua
local ranking = require(14743387756)
local workspaceId = "abc123" -- Your Workspace ID
```
## Ranking a user
In your event or function, you can rank a user by calling the `SetRank` function.
```lua
local callback = ranking.SetRank(token, workspaceId, userId, groupId, rank)
if callback.success then
-- Ranked successfully
else
-- Handle failure
print(callback.message)
end
```
The API is callback based, so you can react to success or errors by checking the `success` boolean in the callback.
# Search Workspace Staff
Source: https://docs.hyra.io/api-reference/search/get-search-people
get /search/{workspaceId}/people
Search for people in a workspace.
# Delete Logbook Entry
Source: https://docs.hyra.io/api-reference/staff/delete-stafflogbook-
delete /staff/logbook/{workspaceId}/{staffId}/{logbookId}
# Stop active timeoff for user
Source: https://docs.hyra.io/api-reference/staff/delete-stafftimeoff-
delete /staff/timeoff/{workspaceId}/{staffId}
Stop active timeoff requests for a staff member
# Retrieve Assignments
Source: https://docs.hyra.io/api-reference/staff/get-staffassignments-
get /staff/assignments/{workspaceId}/{staffId}
Retrieve assignment information for a staff member
# Retrieve Staff Dashboard
Source: https://docs.hyra.io/api-reference/staff/get-staffdashboard
get /staff/dashboard/{workspaceId}
Retrieve workspace staff dashboard.
# Retrieve Logbook
Source: https://docs.hyra.io/api-reference/staff/get-stafflogbook-
get /staff/logbook/{workspaceId}/{staffId}
Retrieve a staff member's logbook history.
Image links from this endpoint are only valid for 1 hour
# Retrieve Summary
Source: https://docs.hyra.io/api-reference/staff/get-stafftimeoff
get /staff/timeoff/{workspaceId}
Retrieve timeoff information for a workspace
# Retrieve staff information
Source: https://docs.hyra.io/api-reference/staff/get-stafftimeoff-
get /staff/timeoff/{workspaceId}/{staffId}
Retrieve timeoff information for a staff member
# List Requests
Source: https://docs.hyra.io/api-reference/staff/get-stafftimeoff-requests
get /staff/timeoff/{workspaceId}/requests
Retrieve timeoff requests for a workspace
# Update status
Source: https://docs.hyra.io/api-reference/staff/patch-stafftimeoff-
patch /staff/timeoff/{workspaceId}/{staffId}/{timeoffId}
Update the status of a timeoff request
# Post Staff Logbook
Source: https://docs.hyra.io/api-reference/staff/post-stafflogbook-
post /staff/logbook/{workspaceId}/{staffId}
There is a more advanced version of this endpoint that allows for uploading
files and videos.
However, this API uses multipart encoding instead of JSON,
so it has been omitted from this documentation and the Swagger reference.
# Create Request
Source: https://docs.hyra.io/api-reference/staff/post-stafftimeoff-
post /staff/timeoff/{workspaceId}/{staffId}
Create a timeoff request
# Retrieve User
Source: https://docs.hyra.io/api-reference/users/get-users
get /users/{userId}
Get a user by their ID
# Retrieve Current User
Source: https://docs.hyra.io/api-reference/users/get-users@me
get /users/@me
# Get user by Roblox username
Source: https://docs.hyra.io/api-reference/users/get-usersroblox
get /users/roblox
Get a user by their Roblox username
# Set User Settings
Source: https://docs.hyra.io/api-reference/users/patch-users@mesettings
patch /users/@me/settings
Update the current user's settings
# Create a Logbook Template
Source: https://docs.hyra.io/api-reference/workspace/create-a-new-logbook-template
post /workspace/logbook/templates/{workspaceId}
Create a new logbook template
# Delete a Logbook Template
Source: https://docs.hyra.io/api-reference/workspace/delete-a-logbook-template
delete /workspace/logbook/templates/{workspaceId}/{templateId}
Delete a logbook template
# Delete a Game
Source: https://docs.hyra.io/api-reference/workspace/delete-workspace-games
delete /workspace/{workspaceId}/games/{gameId}
Remove a game from the Home layout
# Delete a Role
Source: https://docs.hyra.io/api-reference/workspace/delete-workspace-roles
delete /workspace/{workspaceId}/roles/{roleId}
Delete a role
# Delete GApps Config
Source: https://docs.hyra.io/api-reference/workspace/delete-workspacegoogle
delete /workspace/google/{workspaceId}
Delete Google Workspace Configuration
# Delete Trello Config
Source: https://docs.hyra.io/api-reference/workspace/delete-workspacetrello
delete /workspace/trello/{workspaceId}
Disconnect Trello from a workspace
# Delete Trello Action
Source: https://docs.hyra.io/api-reference/workspace/delete-workspacetrello-actions
delete /workspace/trello/{workspaceId}/actions/{actionId}
Delete an action
# Disconnect Trello board
Source: https://docs.hyra.io/api-reference/workspace/delete-workspacetrello-boards
delete /workspace/trello/{workspaceId}/boards
Disconnect Trello board from a workspace
# Retrieve Logbook Template
Source: https://docs.hyra.io/api-reference/workspace/get-a-logbook-template
get /workspace/logbook/templates/{workspaceId}/{templateId}
Get a logbook template
# List logbook templates
Source: https://docs.hyra.io/api-reference/workspace/get-all-logbook-templates-for-a-workspace
get /workspace/logbook/templates/{workspaceId}
Get all logbook templates for a workspace
# Retrieve a Workspace
Source: https://docs.hyra.io/api-reference/workspace/get-workspace
get /workspace/{workspaceId}
Get general settings
# List Games
Source: https://docs.hyra.io/api-reference/workspace/get-workspace-games
get /workspace/{workspaceId}/games
Get all games in the Home layout
# List Roles
Source: https://docs.hyra.io/api-reference/workspace/get-workspace-roles
get /workspace/{workspaceId}/roles
Get all roles in a workspace
# Retrieve Schedules
Source: https://docs.hyra.io/api-reference/workspace/get-workspace-sessions
get /workspace/sessions/{workspaceId}
# Retrieve GApps Config
Source: https://docs.hyra.io/api-reference/workspace/get-workspacegoogle
get /workspace/google/{workspaceId}
Retrieve Google Workspace Configuration
# Get Trello Config
Source: https://docs.hyra.io/api-reference/workspace/get-workspacetrello
get /workspace/trello/{workspaceId}
Get workspace Trello information
# Retrieve Trello Actions
Source: https://docs.hyra.io/api-reference/workspace/get-workspacetrello-actions
get /workspace/trello/{workspaceId}/actions
Get all actions
# Get Trello boards
Source: https://docs.hyra.io/api-reference/workspace/get-workspacetrello-boards
get /workspace/trello/{workspaceId}/boards
Get Trello boards for a workspace
# Update a Schedule
Source: https://docs.hyra.io/api-reference/workspace/patch-workspace-sessions
post /workspace/sessions/{workspaceId}/{scheduleId}
# Update GApps Config
Source: https://docs.hyra.io/api-reference/workspace/patch-workspacegoogle
patch /workspace/google/{workspaceId}
Update Google Workspace Configuration
# Update Trello Action
Source: https://docs.hyra.io/api-reference/workspace/patch-workspacetrello-actions
patch /workspace/trello/{workspaceId}/actions/{actionId}
Update an action
# Update a Workspace
Source: https://docs.hyra.io/api-reference/workspace/post-workspace
post /workspace/{workspaceId}
Update general settings
# Create Game
Source: https://docs.hyra.io/api-reference/workspace/post-workspace-games
post /workspace/{workspaceId}/games
Add a new game to the Home layout
# Create a Role
Source: https://docs.hyra.io/api-reference/workspace/post-workspace-roles
post /workspace/{workspaceId}/roles
Create a role
# Create a Schedule
Source: https://docs.hyra.io/api-reference/workspace/post-workspace-sessions
post /workspace/sessions/{workspaceId}
# Set GApps Service Account
Source: https://docs.hyra.io/api-reference/workspace/post-workspacegoogle
post /workspace/google/{workspaceId}
Store Google Service account for a workspace
# Create Trello Action
Source: https://docs.hyra.io/api-reference/workspace/post-workspacetrello-actions
post /workspace/trello/{workspaceId}/actions
Create a new action
# Set Trello board
Source: https://docs.hyra.io/api-reference/workspace/post-workspacetrello-boards
post /workspace/trello/{workspaceId}/boards
Set Trello board for a workspace
# Set Trello format
Source: https://docs.hyra.io/api-reference/workspace/post-workspacetrello-format
post /workspace/trello/{workspaceId}/format
Set Trello board format for a workspace
# Update Role
Source: https://docs.hyra.io/api-reference/workspace/put-workspace-roles
put /workspace/{workspaceId}/roles/{roleId}
Update a role
# Update a Logbook Template
Source: https://docs.hyra.io/api-reference/workspace/update-a-logbook-template
patch /workspace/logbook/templates/{workspaceId}/{templateId}
Update a logbook template
# Cancellation Policy
Source: https://docs.hyra.io/good-to-know/billing/cancellation-policy
Everything you need to know about canceling your Hyra account.
We want our customers to have full control over their subscription, which is why we allow you to manage and cancel your account directly in our website - no phone calls or email chains required.
## How to cancel your product
You can manage your Hyra Premium subscription from within your Workspace settings. To cancel your subscription, follow these steps:
Go to your Workspace, and then click the Settings cog in the bottom left corner.
If you're on a mobile device, you'll need to click 'More' and then click 'Settings'.
Select the 'Billing' option. Depending on who you bought your subscription from, you may be redirected to another page.
If you're billed by Paddle, you'll be shown the option to pause your subscription with the click of a button.
If you're billed by Hyra directly (through Stripe) you'll need to pick the correct subscription if you have more than one. Then, click the 'Cancel plan' button.
If you're not sure which subscription is for your workspace, please contact Support who will be able to point you in the right direction.
At the moment, you'll need to reach out to us to cancel your Auto Ranking subscription. We're working on adding this functionality to our website, but for now, please contact Support who will be able to help you.
If you cancel your Hyra Premium subscription, your Auto Ranking will also be cancelled
Our legal responsibility is to account owners, which means we cannot cancel an account at the request of anyone else. If for whatever reason you no longer know who the account owner is, [contact us](mailto:team@hyra.io). We will gladly reach out to any current account owners at the email addresses we have on file.
## What happens when you cancel
With the exception of Auto Ranking, when you cancel your subscription you'll retain full access to the product until the end of your billing period. After that, you'll lose access to the product until you resubscribe.
Workspaces are deleted if inactive for 365 days
## Hyra initiated cancellations
We also retain the right to suspend or terminate accounts for any reason at any time, as outlined in our [Terms of Service](https://policies.hyra.io/terms). In practice, this generally means we will cancel your account without notice if we have evidence that you are using our products to engage in abusive behavior.
# Refund Policy
Source: https://docs.hyra.io/good-to-know/billing/refund-policy
Bad refund policies are infuriating. We never want our customers to feel that way, so our refund policy is simple: If you're ever unhappy with our products for any reason, we'll take care of you.
## A fair refund policy
Bad refund policies are infuriating. You feel like the company is just trying to rip you off. We never want our customers to feel that way, so our refund policy is simple: If you're ever unhappy with our products for any reason, just contact [our support team](mailto:team@hyra.io) and we'll take care of you.
### Examples of full refunds we'd grant
* You accidentally purchased the same product twice.
* You accidentally purchased the wrong product.
* If you were just charged for your next month of service but you meant to cancel, we're happy to refund that extra charge.
* If you were unhappy with your purchase for any reason, we'll refund it in full.
### Examples of partial refunds or credits we'd grant
* If you purchased a product at full price and it goes on sale the next day, we'll refund you the difference in price.
* If you upgraded your account a few months ago to a higher plan and kept using it in general but you didn't end up using the extra features, projects, or storage space, we'd consider applying a prorated credit towards future months.
## Get in touch
At the end of the day, nearly everything on the edges comes down to a case-by-case basis. [Send us a note](mailto:team@hyra.io), tell us what's up, and we'll work with you to make sure you're happy
# Why does Hyra cost money?
Source: https://docs.hyra.io/good-to-know/billing/why-does-hyra-cost-money
Navigating the vast ecosystem of Roblox can be daunting for any developer or creator. From design to moderation, every aspect requires meticulous attention. That's where tools like Hyra, the Roblox human resources manager, come into play. By offering specialised solutions for HR tasks within Roblox, Hyra has become a go-to tool for many. But why is Hyra a paid product? Let’s delve into the reasons:
One of the primary reasons lies in the motivation for developers. In the
absence of a revenue model, developers often find little reason to innovate
and enhance the software. An income stream not only ensures the sustenance
of the platform but also inspires developers to continually improve and
optimise.
As the user base of a product grows, so does the complexity of catering to the
diverse needs of its users. With a larger user base, customer satisfaction
scores (CSAT) often dip. Charging for the product helps limit its user base to
those who genuinely need it, ensuring better service and maintaining high CSAT
scores.
Developing and maintaining a software product requires capital. Without
adequate funds, it becomes challenging to hire skilled professionals, invest
in research and development, or even keep the software up-to-date with the
latest tech standards.
For any product or service, having a predictable cash flow is vital. It
ensures that the team behind the product can plan long-term, secure resources,
and make informed decisions. Without a stable revenue stream, it's challenging
to make future predictions or commitments, hampering innovation.
When a platform is available for free, it often becomes a breeding ground for
misuse. With a rise in the number of users exploiting or abusing the system,
the costs for moderation and devops monitoring also shoot up. Charging users
helps deter misuse and ensures that those who are on the platform have a
genuine need and intent.
Free products often get overwhelmed with a vast number of users, making it
tough to maintain the quality of service. By charging for Hyra, the team can
ensure that only serious users access the service, maintaining the platform's
integrity.
With a paid model, the Hyra team can guarantee regular software updates, bug fixes, and round-the-clock support, something not feasible with a free model.
Roblox developers value the confidentiality and safety of their data. A paid model allows Hyra to invest in robust security measures, ensuring that user data remains protected.
With additional resources from a paid model, the Hyra team can work on custom features, catering to the specific needs of different developers and communities.
Funds can be reinvested into building a community around Hyra, offering tutorials, webinars, and fostering collaboration among Roblox developers.
# Security
Source: https://docs.hyra.io/good-to-know/security
Discover how Hyra prioritises security. Learn about our security measures and how to report potential vulnerabilities.
For inquiries about Hyra's architecture, data handling practices, or any specific questions regarding our data processing methods, please contact us at [team@hyra.io](mailto:team@hyra.io).
We are always available to address your queries.
## Maintaining Data Security
* Our infrastructure is hosted on Railway, which is powered by Google Cloud.
* Our database is hosted on Hetzner.
* Our marketing website is hosted on Vercel.
* We utilise Cloudflare for DDoS attack protection.
* Data storage and compute locations are exclusively within the European Union or United Kingdom.
* All data is encrypted both at rest and during transmission.
* Daily encrypted backups of data are performed, retained for 30 days, and stored across three different locations.
## Reporting Vulnerabilities
At Hyra, we hold security as a fundamental principle and appreciate contributions from external security experts who assist us in safeguarding the privacy and security of our users and systems.
Please report any security vulnerabilities or suspicions to the contact details provided below.
### Guidelines for External Security Researchers
We expect all security researchers to:
* Conduct their research responsibly, ensuring no privacy breaches, service degradation, production system disruptions, or data destruction (including denial of service).
* Provide clear, concise reports, and include a proof-of-concept if possible.
* Limit interactions to personal or designated test accounts. Do not access or alter our or our users' data without our express permission.
* Maintain confidentiality of any discovered vulnerabilities until we have had a 30-day period to address the issue.
In response to your adherence to these guidelines, we pledge to:
* Refrain from legal action related to your research.
* Collaborate with you for a swift resolution (including acknowledging your report within 72 hours).
While we don’t have a formal bug bounty or security program, we may choose to reward researchers who adhere to our policy and uncover a confirmed high-severity vulnerability, on a case-by-case basis.
### Contact Information for Security Concerns
To report a security vulnerability, please email [sam@hyra.io](mailto:sam@hyra.io).
Sam will address security-related inquiries within 48 hours.
# Quickstart
Source: https://docs.hyra.io/introduction
Everything you need to start using Hyra
 Hyra is the all-in-one tool for managing your staff. Everything you need to track, monitor, discipline, reward and manage your staff is here.
The quickstart guide walks you through the basics of Hyra, and how to get started.
A quick guide on how to install our Activity Tracking into your game
Set up instructions for creating sessions
Information on how to use Views - the customisable way to view your staff
How to use logbook to manage disciplinary actions and promotions
# Activity Tracking
Source: https://docs.hyra.io/using-hyra/activity-tracking
Hyra's automatic activity tracking feature allows you to track activity from your staff.
 ## View your Activity
You can view your Activity by going to [https://app.hyra.io](https://app.hyra.io) and navigating to your Workspace. From there, click the Activity clock icon in the side navigation.
## Setting up
Our activity tracking can be installed in a few simple steps. The system will automatically track when your team join and leave the game, as well as some handy metrics.
Before you continue, make sure you have [enabled the
HttpService](https://create.roblox.com/docs/en-us/reference/engine/classes/HttpService#:~:text=Enabling%20HTTP%20Requests,with%20at%20runtime.)
in your game's security settings.
To acquire your unique activity tracking loader script, go to the Activity
Tracking settings page. This can be found in Settings > Activity Tracking.
You can either generate a loader script, or if it has already been
generated, download it. It will download as a Roblox Studio game.
Once the file has been downloaded, open it in Roblox studio.
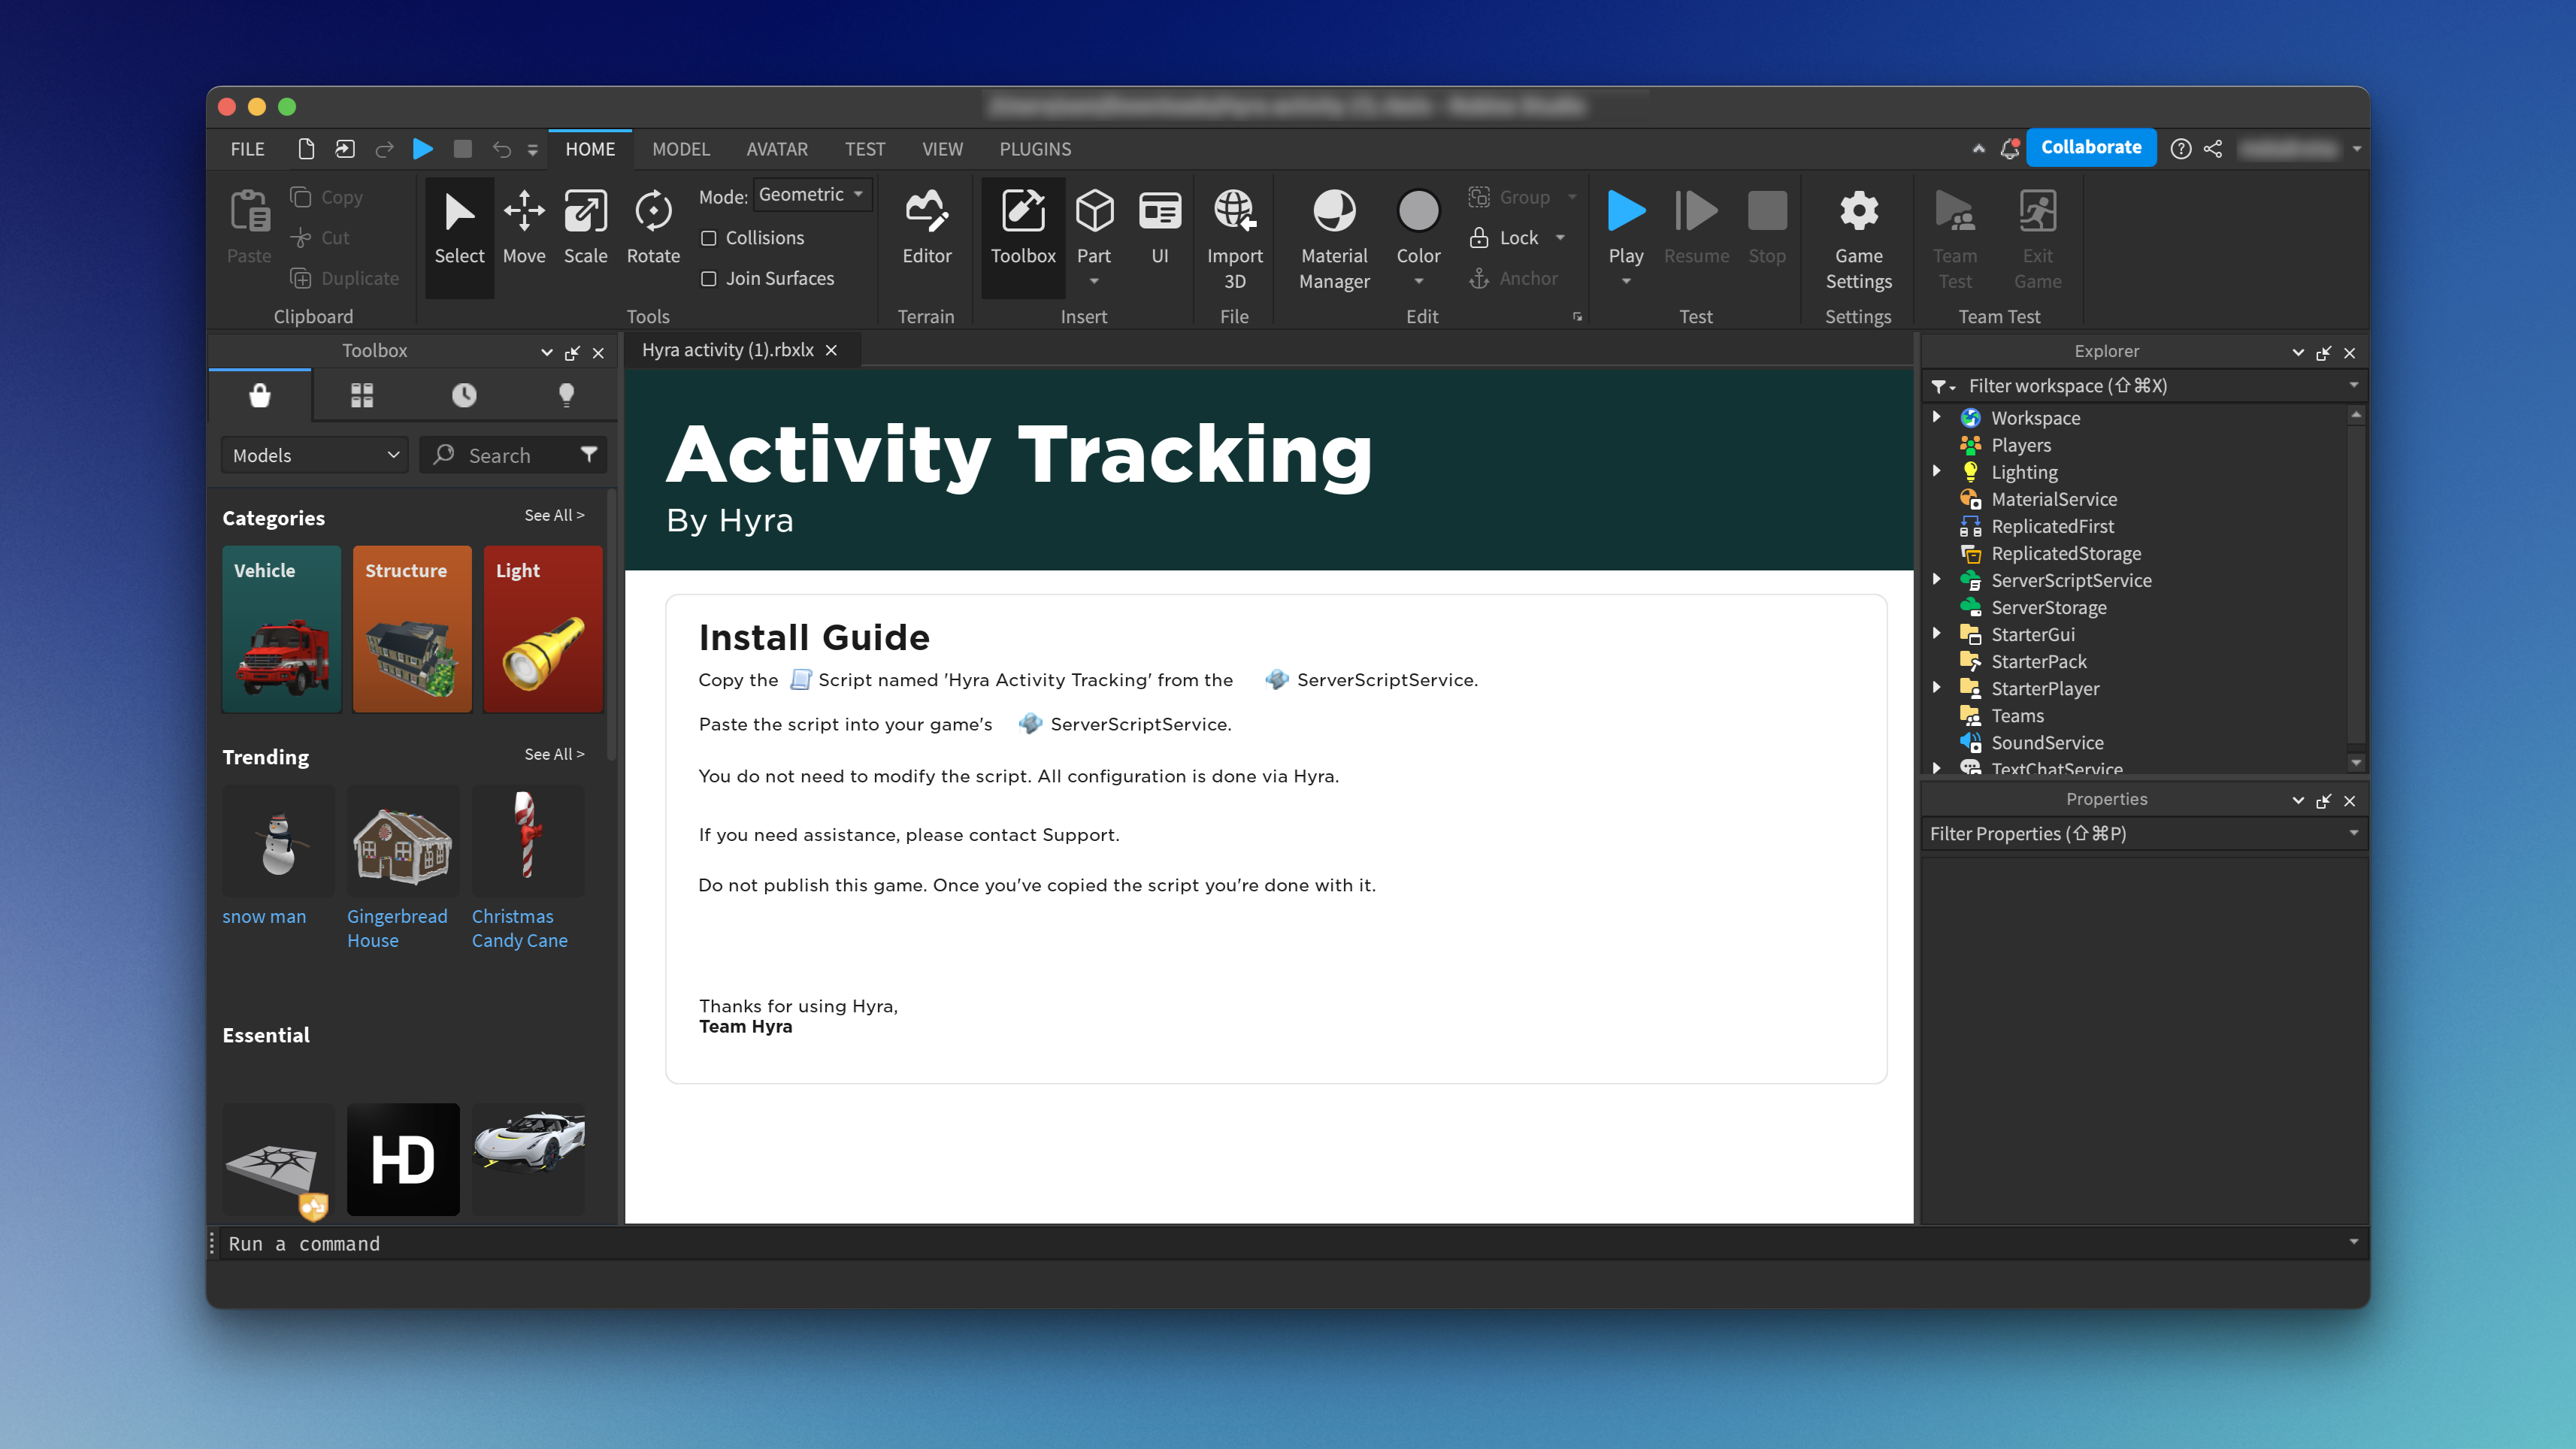 **Copy the script from the template file into your game**. You can do this by right clicking the script, clicking Copy.
Once you have copied it, **paste it into your game's ServerScriptService**.
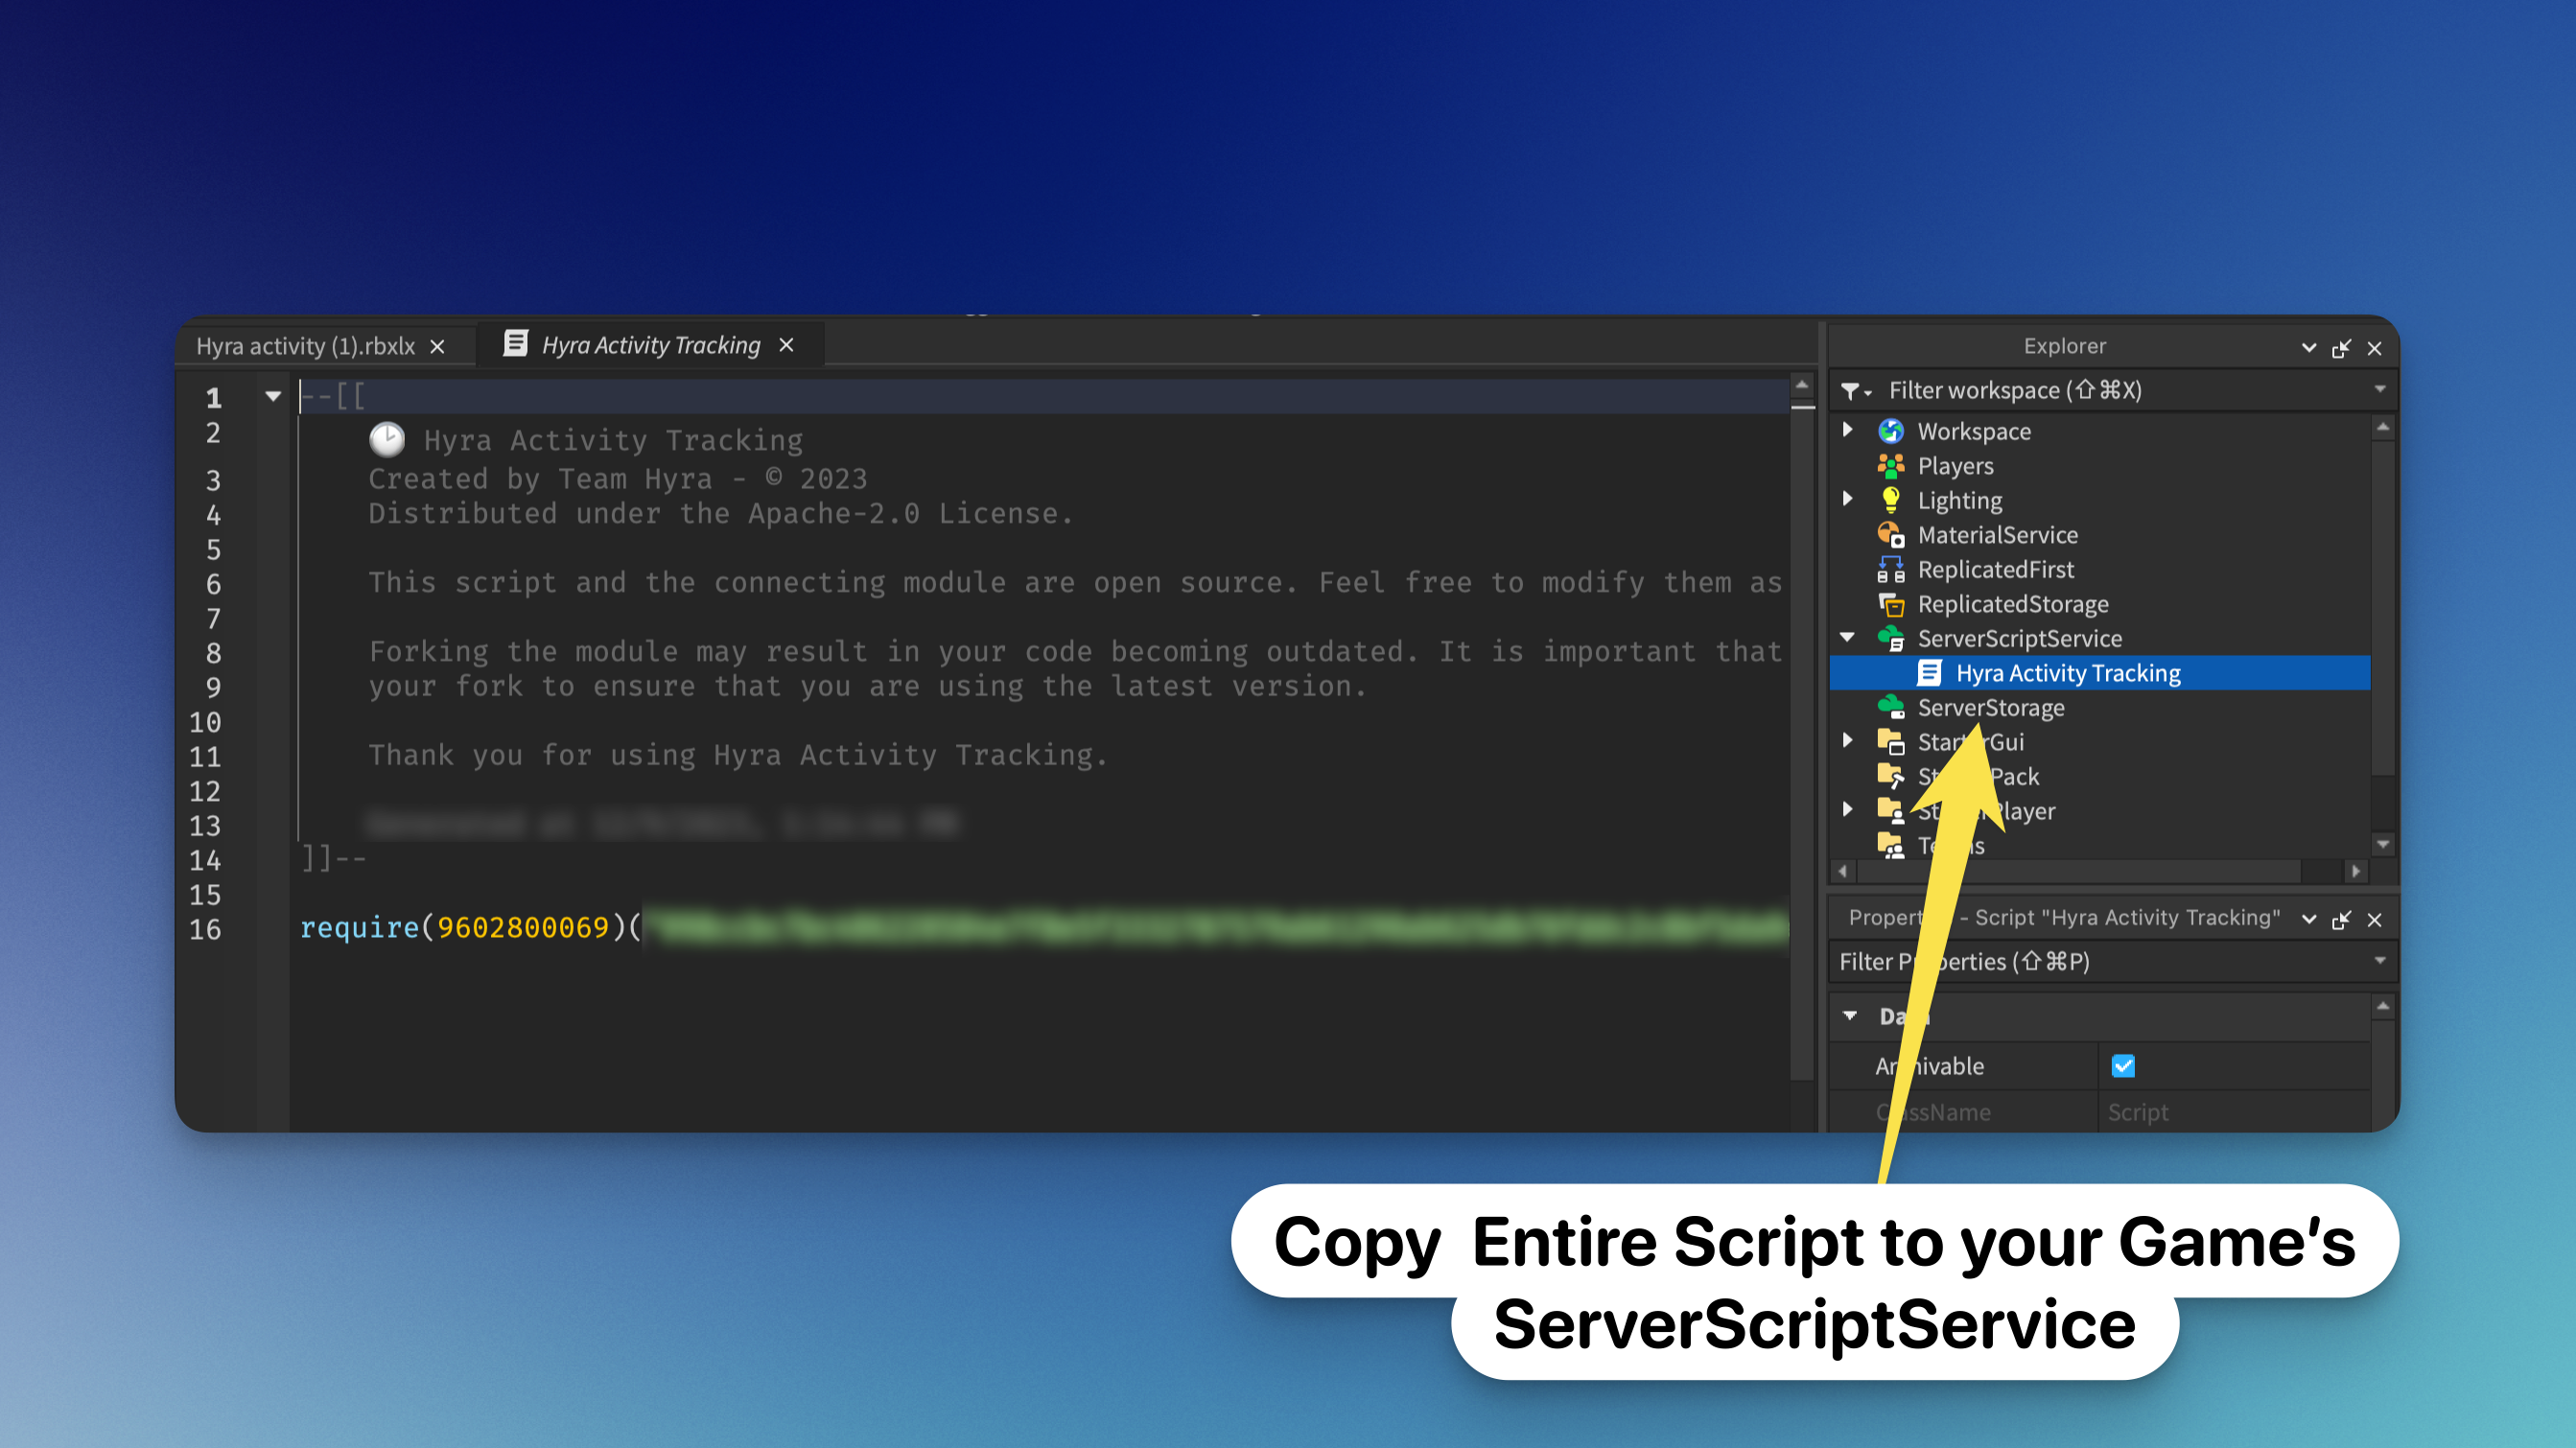 Once the script has been added to the ServerScriptService of your game, publish the game to Roblox.
Activity will begin tracking on your specified roles once the game has been published and servers have been restarted or created.
## Debugging issues
If you are having issues with the activity tracking, please check the following:
* Make sure you have enabled the HttpService in your game's security settings.
* Make sure you have copied the script into your game's ServerScriptService.
* Make sure you have published your game to Roblox.
* Make sure you have restarted or created a new server.
If you are still having issues, please contact us at [team@hyra.io](mailto:team@hyra.io)
# Home
Source: https://docs.hyra.io/using-hyra/home
The homepage is a hub for what's happening in your community.
 ## Cover Image
You can upload a cover image to your homepage instead of using the default gradient. The recommended size of the cover is 1920 x 300 pixels. The image is fixed at an aspect ratio of 32:5, constrained at a minimum height of 100 pixels.
### Guidelines
In order to get the best results for your banner, you should follow these guidelines:
1. Use a high resolution image. The minimum recommended size is 1920 x 300 pixels.
2. Keep the bottom left of your image free of busy content. This is where a greeting message will be displayed.
3. Avoid using an image with a logo or text on it.
4. Use darker images. The greeting message is white, so if your image is too bright, the message may be hard to read.
5. Repeating patterns or scapes work the best. Try to avoid designs that don't look good when cropped.
Once you've uploaded a cover image, it is not possible to go back to the default gradient.
## Birthdays
The upcoming birthdays section shows all the birthdays coming up in the next 7 days. If there are no birthdays coming up, this section will not be shown.
Your birthday can be set up when you first join. If you skipped this part or didn't put the correct date, you can request it to be changed by someone in your HR department.
The time for birthdays to begin showing is based on the timezone of the person's birthday itself.
For example, if someone's birthday is on the 1st of January, but they are in a timezone that is 12 hours ahead of yours, their birthday will begin showing at 12pm on the 31st of December. This is to make sure you're on time to wish them a happy birthday!
If you have permissions to update staff details, you can change birthdays in the Directory profile. You can find these either by searching the user in the 'Search anything...' box, or by going to Staff > Search (or you can find the user in a View).
Once you've found the user, click on their name to go to their profile. Click on the 'Edit' button next to 'Birthday'. You can then change the date and click 'Save'.
## New to the team
The new to the team section shows all the people who have joined your company in the last 7 days.
You won't show up in this section if you've previously been a member of the workspace. This is to avoid announcing a suspension.
# Discord
Source: https://docs.hyra.io/using-hyra/integrations/discord
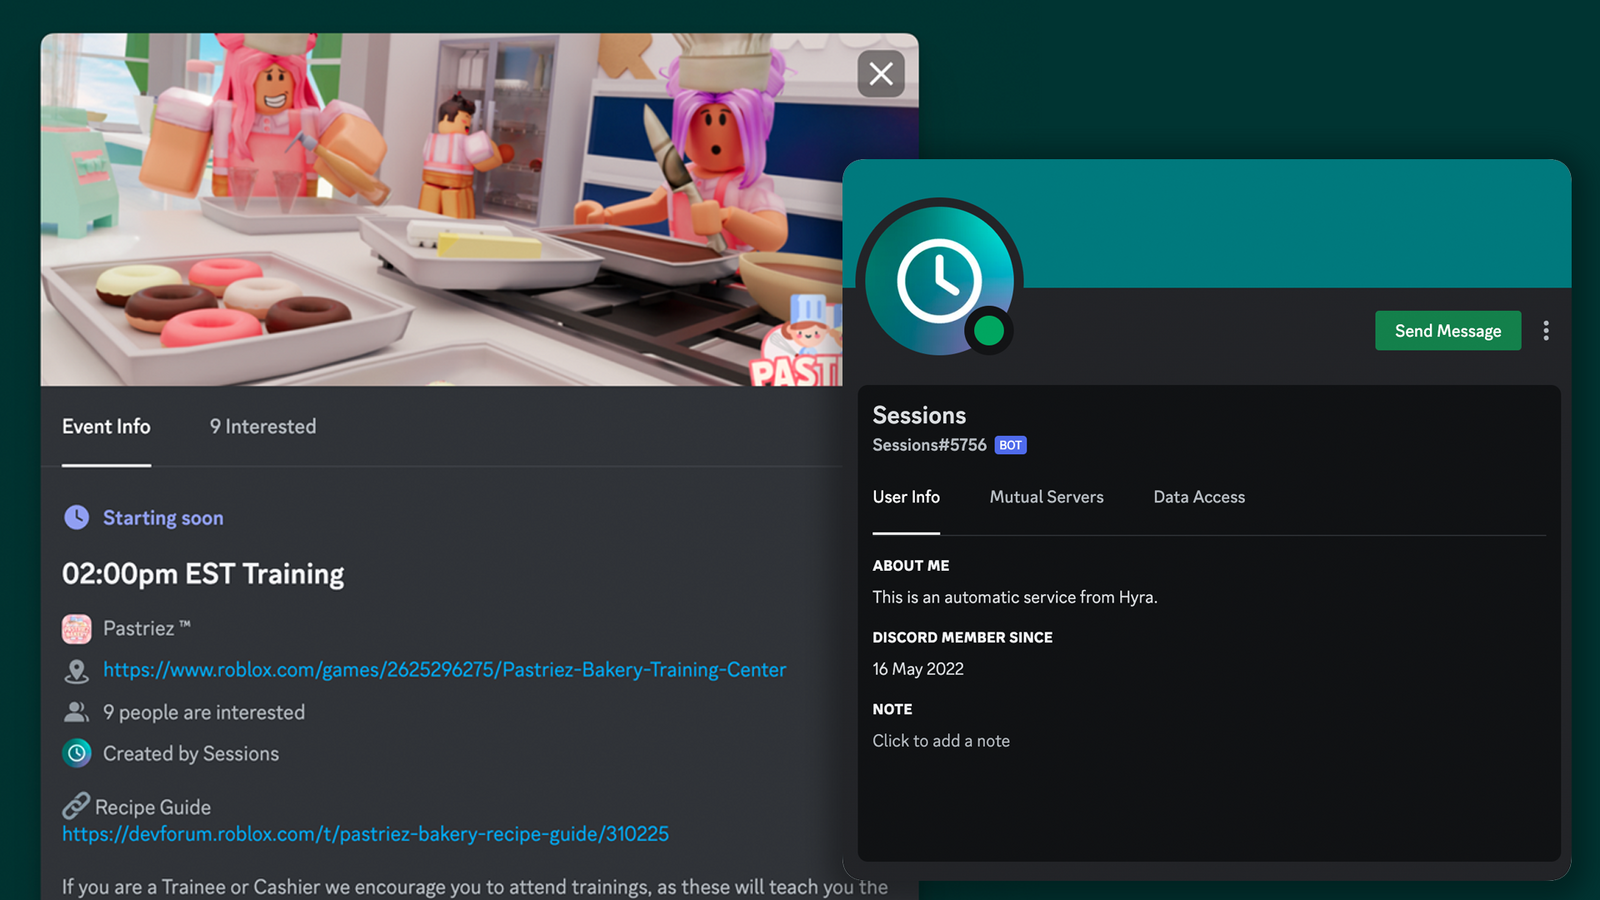 Hyra's Sessions feature allows you to automatically create events in your Discord server to let people know when your next session is.
## Setting up
Before you continue, make sure you have the Workspace Admin permission in your Hyra workspace and Manage Server permission in your Discord Server.
To go to the Discord integration settings page, go to Workspace Settings > Sessions > Discord Integration.
Click the button Connect to Discord and follow the instructions the same way.
Once the bot has been added to the server, go to Workspace Settings > Sessions and enable Create Discord Events located below the lock function.
## Troubleshooting
For Hyra to create events in your Discord server, each session must have a Roblox.com game link attached to it, and have Create Discord Events enabled. Hyra will only create events for sessions in the next 24 hours.
It can take up to 15 minutes for the events to appear in your Discord server. If they still haven't appeared after 15 minutes, make sure the bot has the correct permissions, the events have a Roblox.com game link attached to them, and that the Create Discord Events option is enabled. If you're still having issues, contact our support team.
# Trello
Source: https://docs.hyra.io/using-hyra/integrations/trello
 Using Hyra's Trello Integration, you can sync information from Trello card comments onto Hyra, such as warnings, suspensions, demotions, terminations and notes. The system works by matching your card comments onto Hyra using regular expression.
If you're fully Hyra for your logbook, you won't need this feature - it's only for those who have a hybrid setup.
Rules are applied going forward to new comments, and will not be applied retrospectively.
## Linking your Trello Board
To continue, you'll need the following permission: Workspace Admin
First, connect your Trello account to your workspace. Please do note that you'll only need one Trello account to link your whole workspace.
Once you've connected your Trello account, you'll then need to select the board to link it to your workspace.
Once the cards have been processed, the system will show if they've found a match. If they matched the same person, click the button below.
 For them to match, be sure to have their Username or User ID as the title of the card. You are free to add any prefixes like \[MR] or \[HR].
## Creating an Action
Once you've linked your Trello board to your Hyra workspace, it's now time to create an action. These will instruct the system on what to do once a comment has been made to a card.
To continue, you'll need the following permission: Workspace Admin
In the action editor, click Create an Action to create an action.
First confgure the action trigger. If a specific keyword has been sent, it will trigger the action. It uses regex to identify if the comment contains the specified word/sentence.
Here are some tips to help you set it correctly!
* Use [regex101.com](https://regex101.com/) to check if it correctly identifies the trigger.
* Be sure to have `^` and `$` on your trigger. Don't worry, you don't need to put ^ or \$ on your comments.
* If you have comments that is set to markdown (like Bold text), be sure to put a backslash on every syntax. Example: `\*\*Promotion\*\*`
Once you have a trigger, time to configure the action. To create one, select Add action and it should show on the right or bottom of the trigger.
Then, select what type of log will be created. For logging warnings, you have more choices to select!
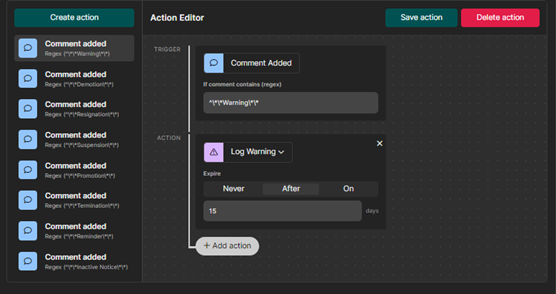 Once done, hit Save action to save your action.
### Stackable Actions
You can also stack actions too! You can mix and match on any of the actions based on your use-case!
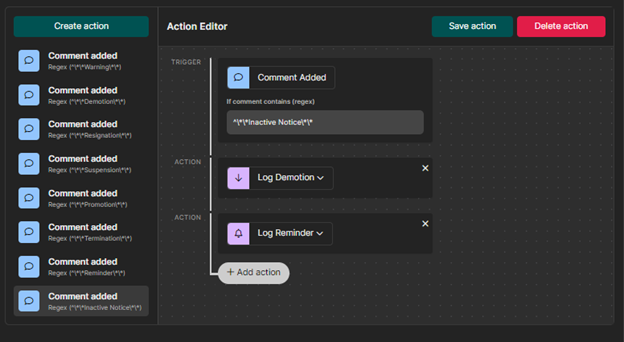 ## Triggering the Action
Once everything has been set up, it's time to test it out!
To continue, you'll need to be a member or admin of the Trello Board and have the permission View Logbook and Post to Logbook.
You can do this to any of your staff's card. Just post a comment with the specific trigger.
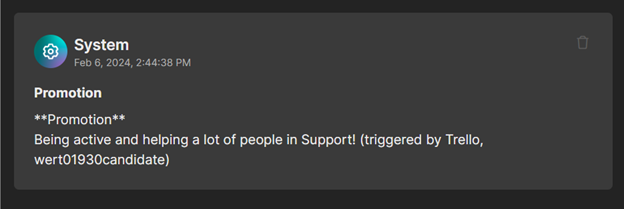
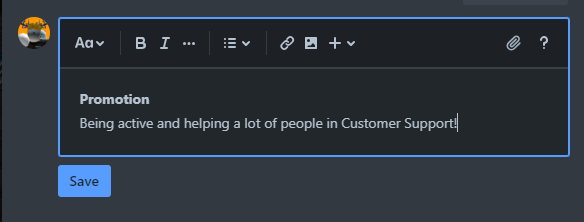 If the system detects the trigger word via Regex, it should create a logbook log.
 It will also show `(triggered by Trello, {Trello Username})` to signify that it was created via the Trello Integration.
 Once the triggers and actions has been correctly set up, time to clean the logbook! Be sure to delete the test cards (especially the warning entries) to clean your or an other's staff logbook!
## Unlinking a Board
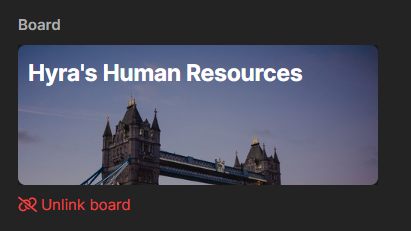
If you've accidentally chose the wrong board, don't worry. Just select if it allows you to, and click Unlink board below the board's photo and name.
 # Categories
Source: https://docs.hyra.io/using-hyra/knowledge/categories
 Categories allow you to categorize your content in your Knowledge Base. From locking content to only a handful of people, you can use it for confidential documents that you don't really want someone to have access to.
## Creating Categories
To create a category, follow the steps below:
In order to do this, you must have the following permissions: View Knowledge and Update Knowledge
Firstly, navigate to the Categories page by going to Knowledge > Categories
To create a Category, hit Create Category and a popout should appear.
Configure the category, from giving it a name, icon, color, and choosing the access.
If you've set up the access as Restricted, you'll need to select which roles will have access to the category on the next popout.
## Featuring Categories
You can feature categories that you want everyone to read and show them in the front page!
To do this, simply click the three dots and select Feature Category.
# Creating Content
Source: https://docs.hyra.io/using-hyra/knowledge/create
 ## Uploading and Linking Content
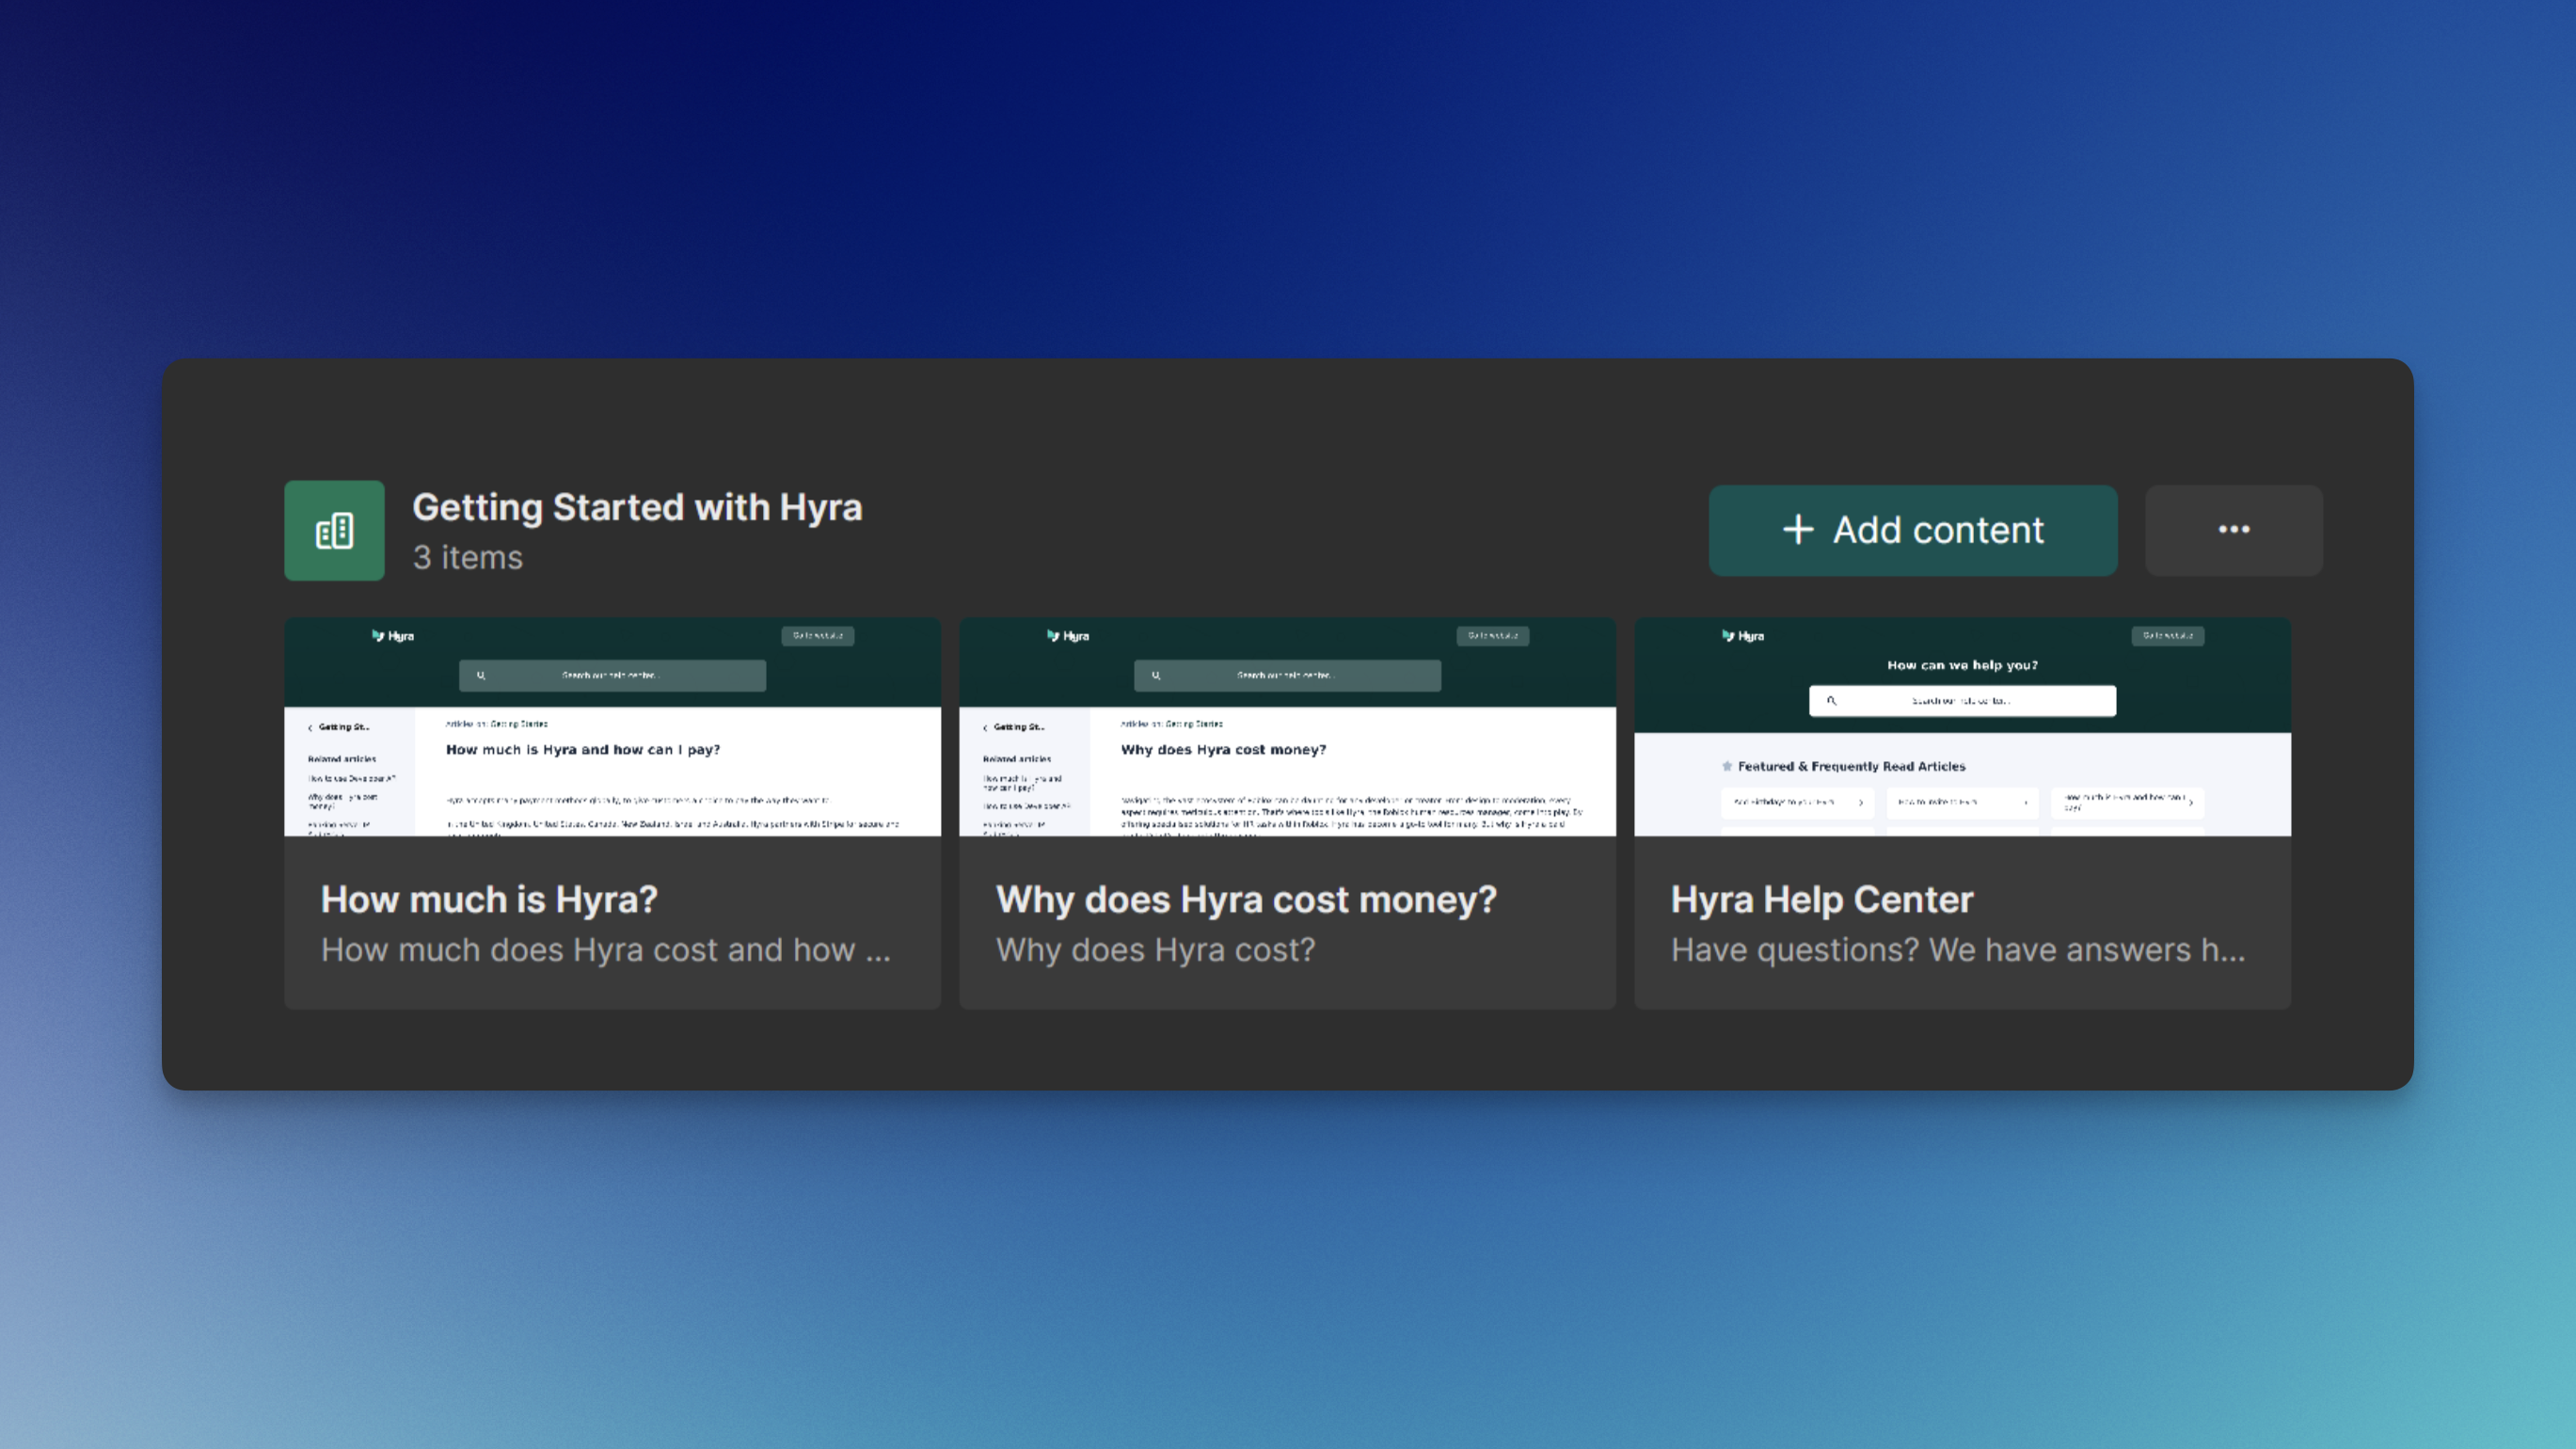
Uploading your files and content to Hyra couldn't be easier. To get started, you'll first need to create a category. A guide to creating categories can be found on the next article.
In order to do this, you must have the following permissions: View Knowledge and Update Knowledge
To add content to your Knowledge Base, go to Knowledge.
Select the category that you want to add content and click "Add Content". This will open up a menu where you can select if you want to upload or link a file.
## Uploaded Files vs. Linked Files
An uploaded file is stored on Hyra's file servers, whereas a linked file is external, such as a Google Doc or YouTube video.
# Permanent Bans
Source: https://docs.hyra.io/using-hyra/players/bans
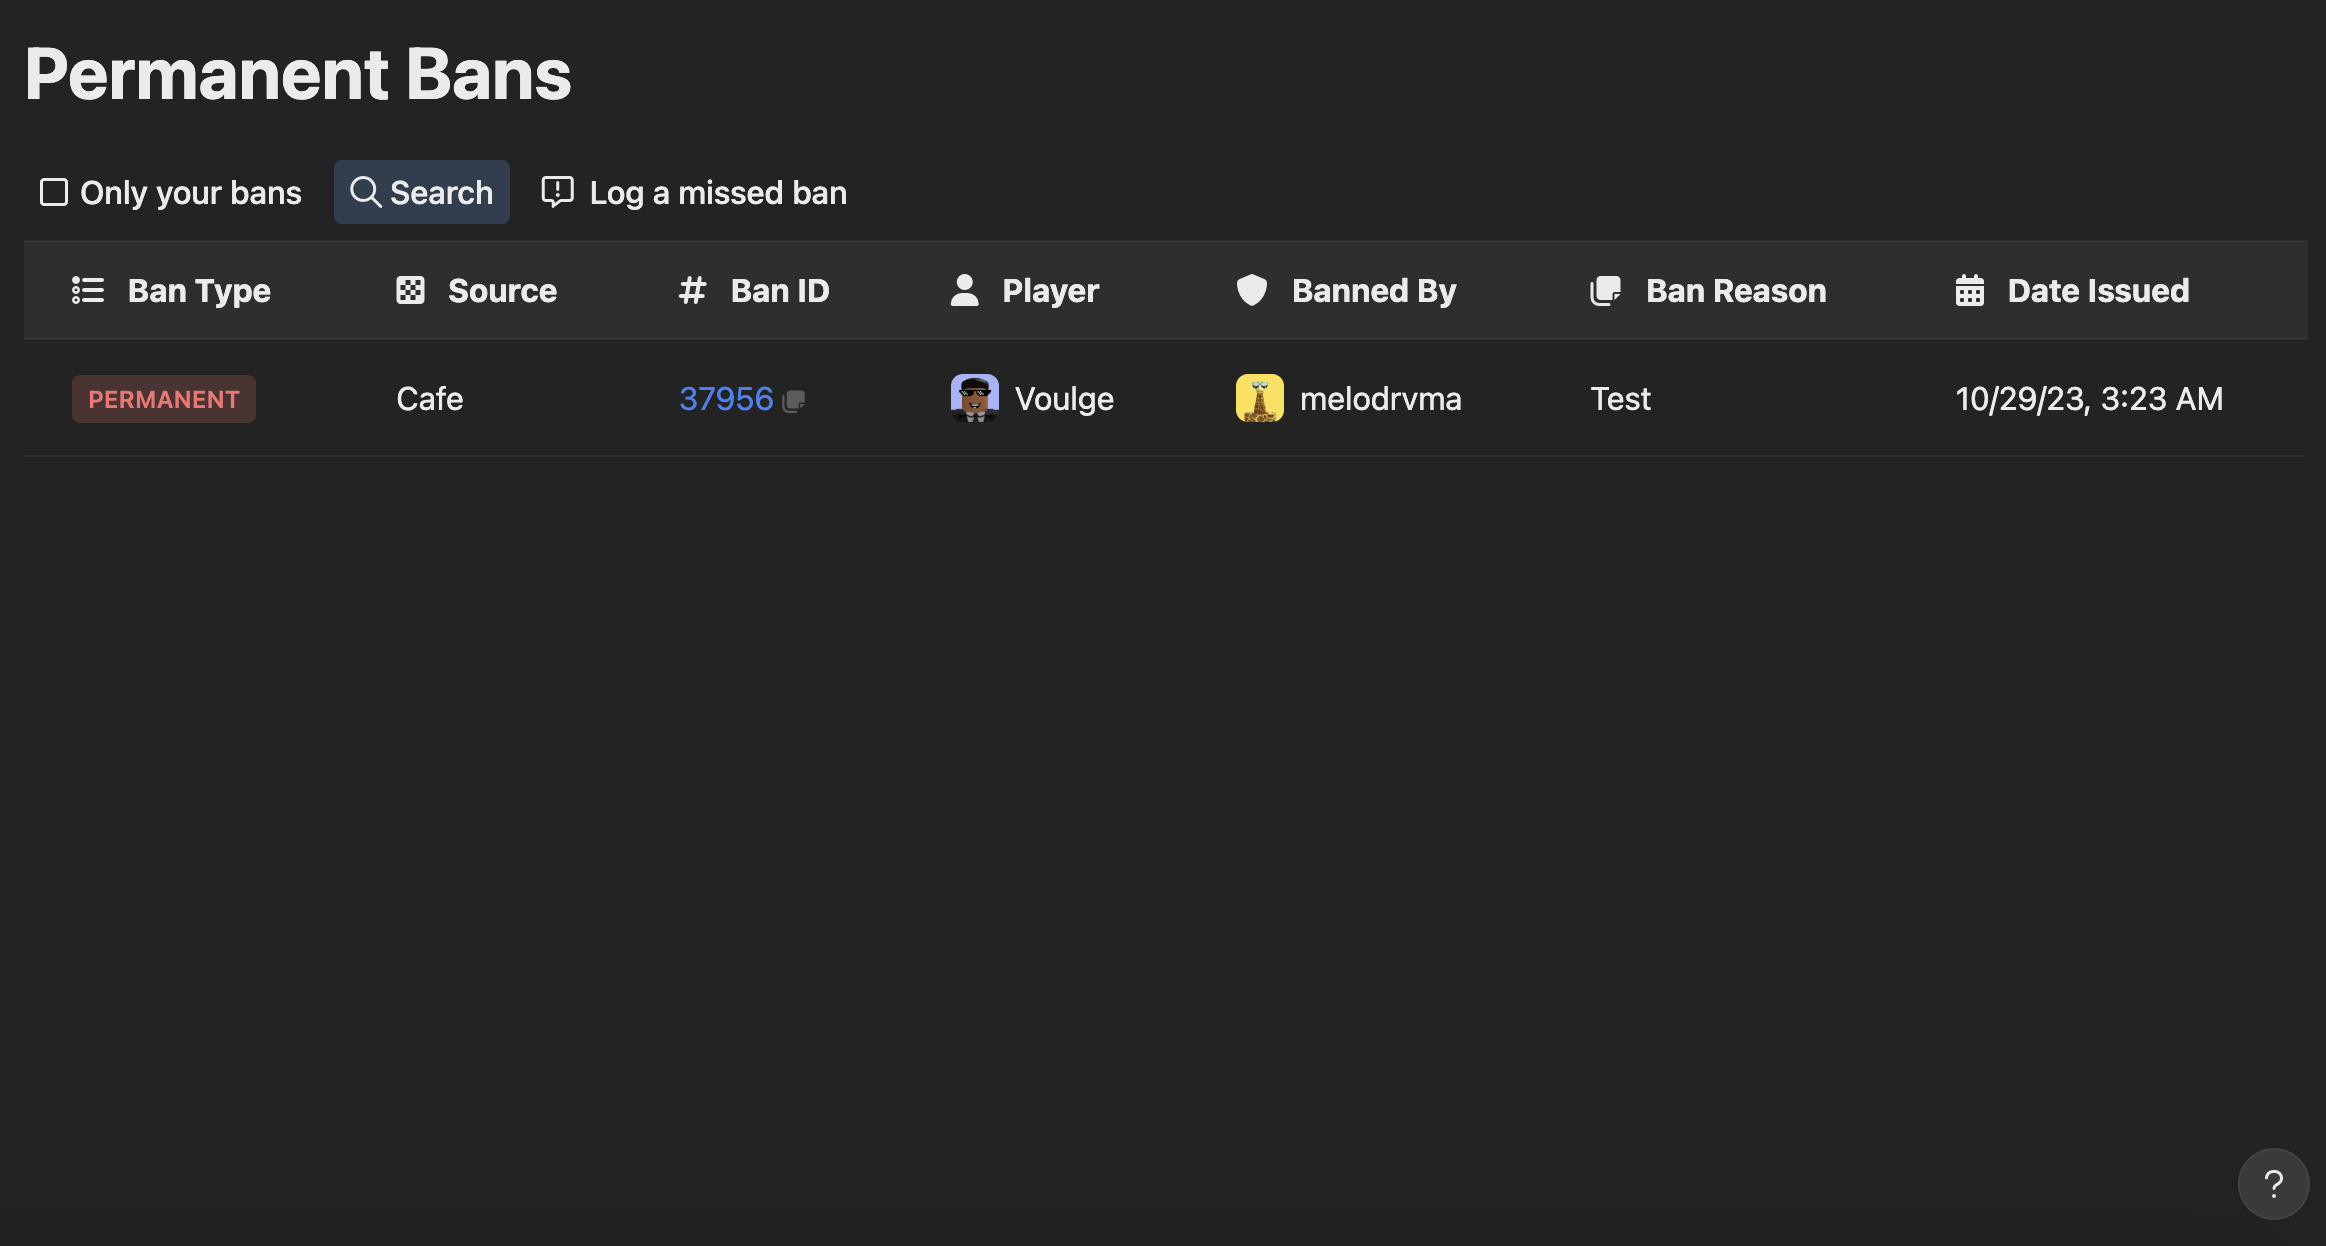 Hyra's Player Bans allow you to log your permanent bans from your game to your Hyra workspace! It also allows your staff to insert evidence using Hyra's fast CDN!
This article will show how to use the Permanent Bans Dashboard. For it's API Documentation, click
[here](https://docs.hyra.io/api-reference/introduction).
## Setting Up
To set it up, you'll need to integrate Hyra's Ban API to your moderation suite. We suggest getting a scripter to integrate the two.
For more information on Hyra's Ban API, click [here.](https://docs.hyra.io/api-reference/players/get-playersbans)
## Permanent Bans Dashboard
The dashboard shows the following:
* Permanent Bans List allows you to see all of the bans in a list.
* Only your Bans allows you to filter the list to only show your bans. This is great for those who needs to insert
evidences in their bans.
* Search allows you search for a ban. You can search via a banned player or moderator.
* Log a missed ban allows you to create a missing ban.
### Ban Information
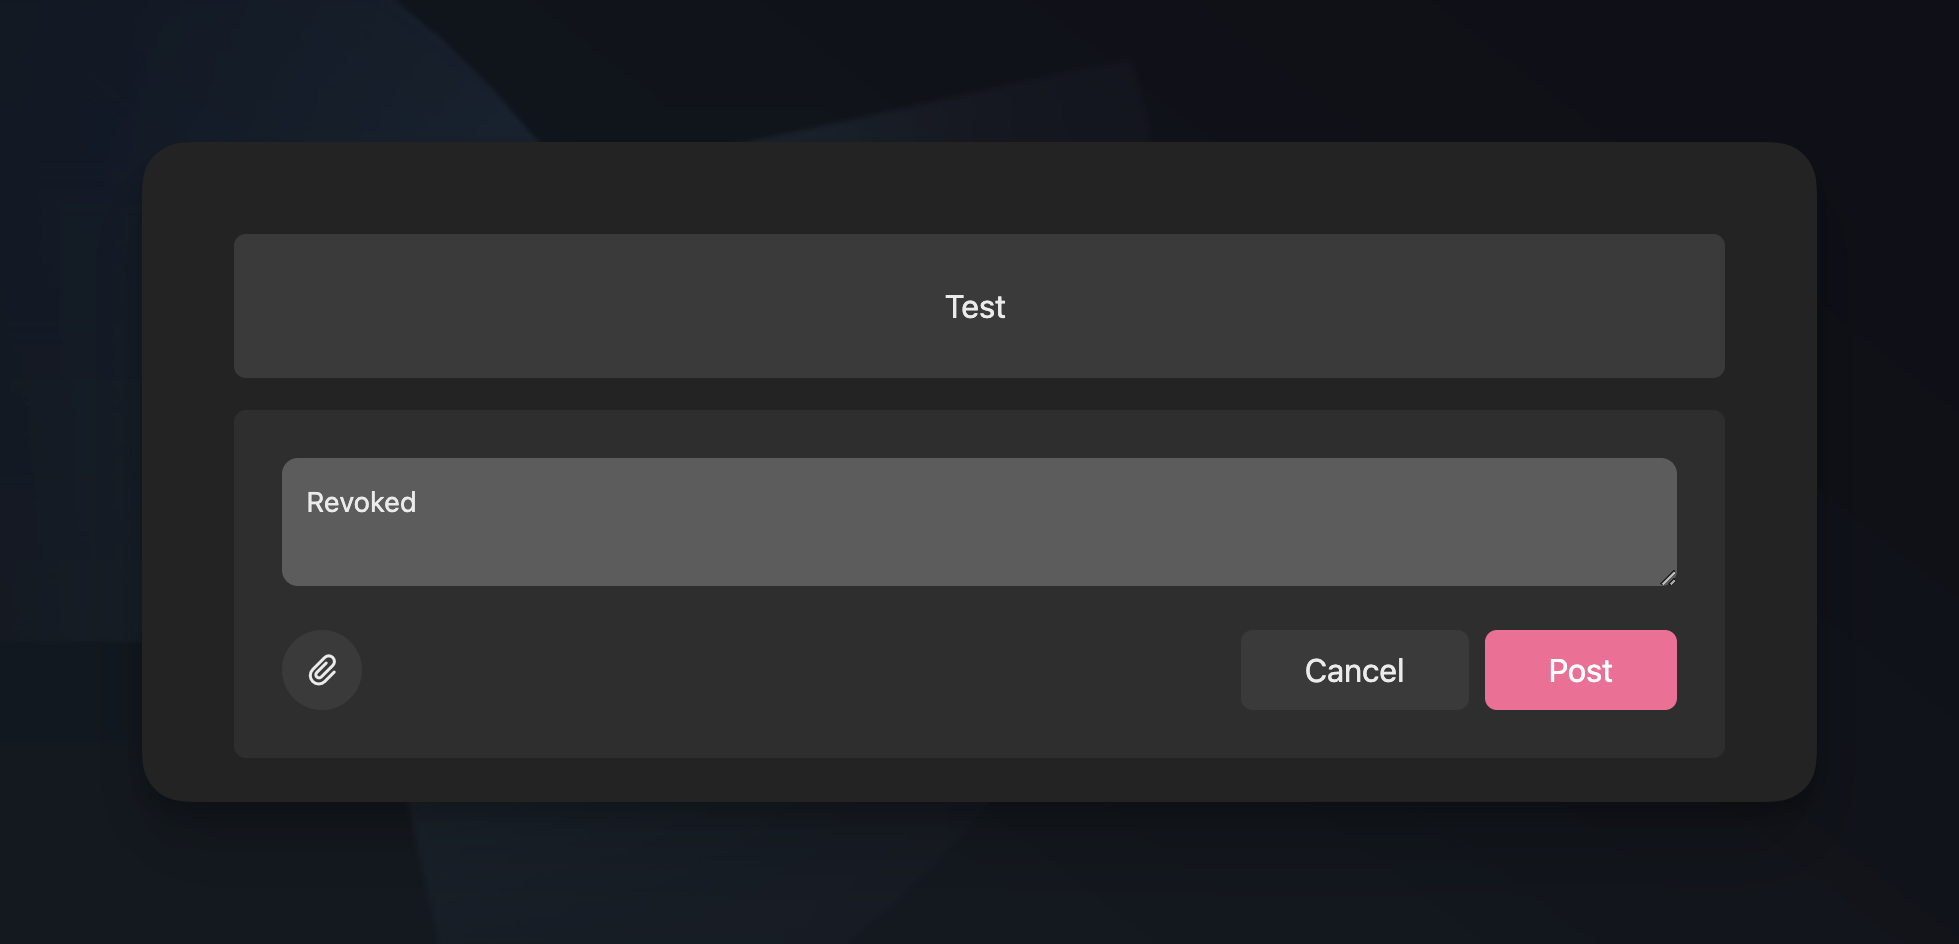
In the list, you can click the Ban ID to access more information about the ban. You can also add comments and attachments to show proof of the ban.
 ### Adding evidence
You can use the comments feature to attach evidence to your ban
### Logging a Missing Permanent Ban
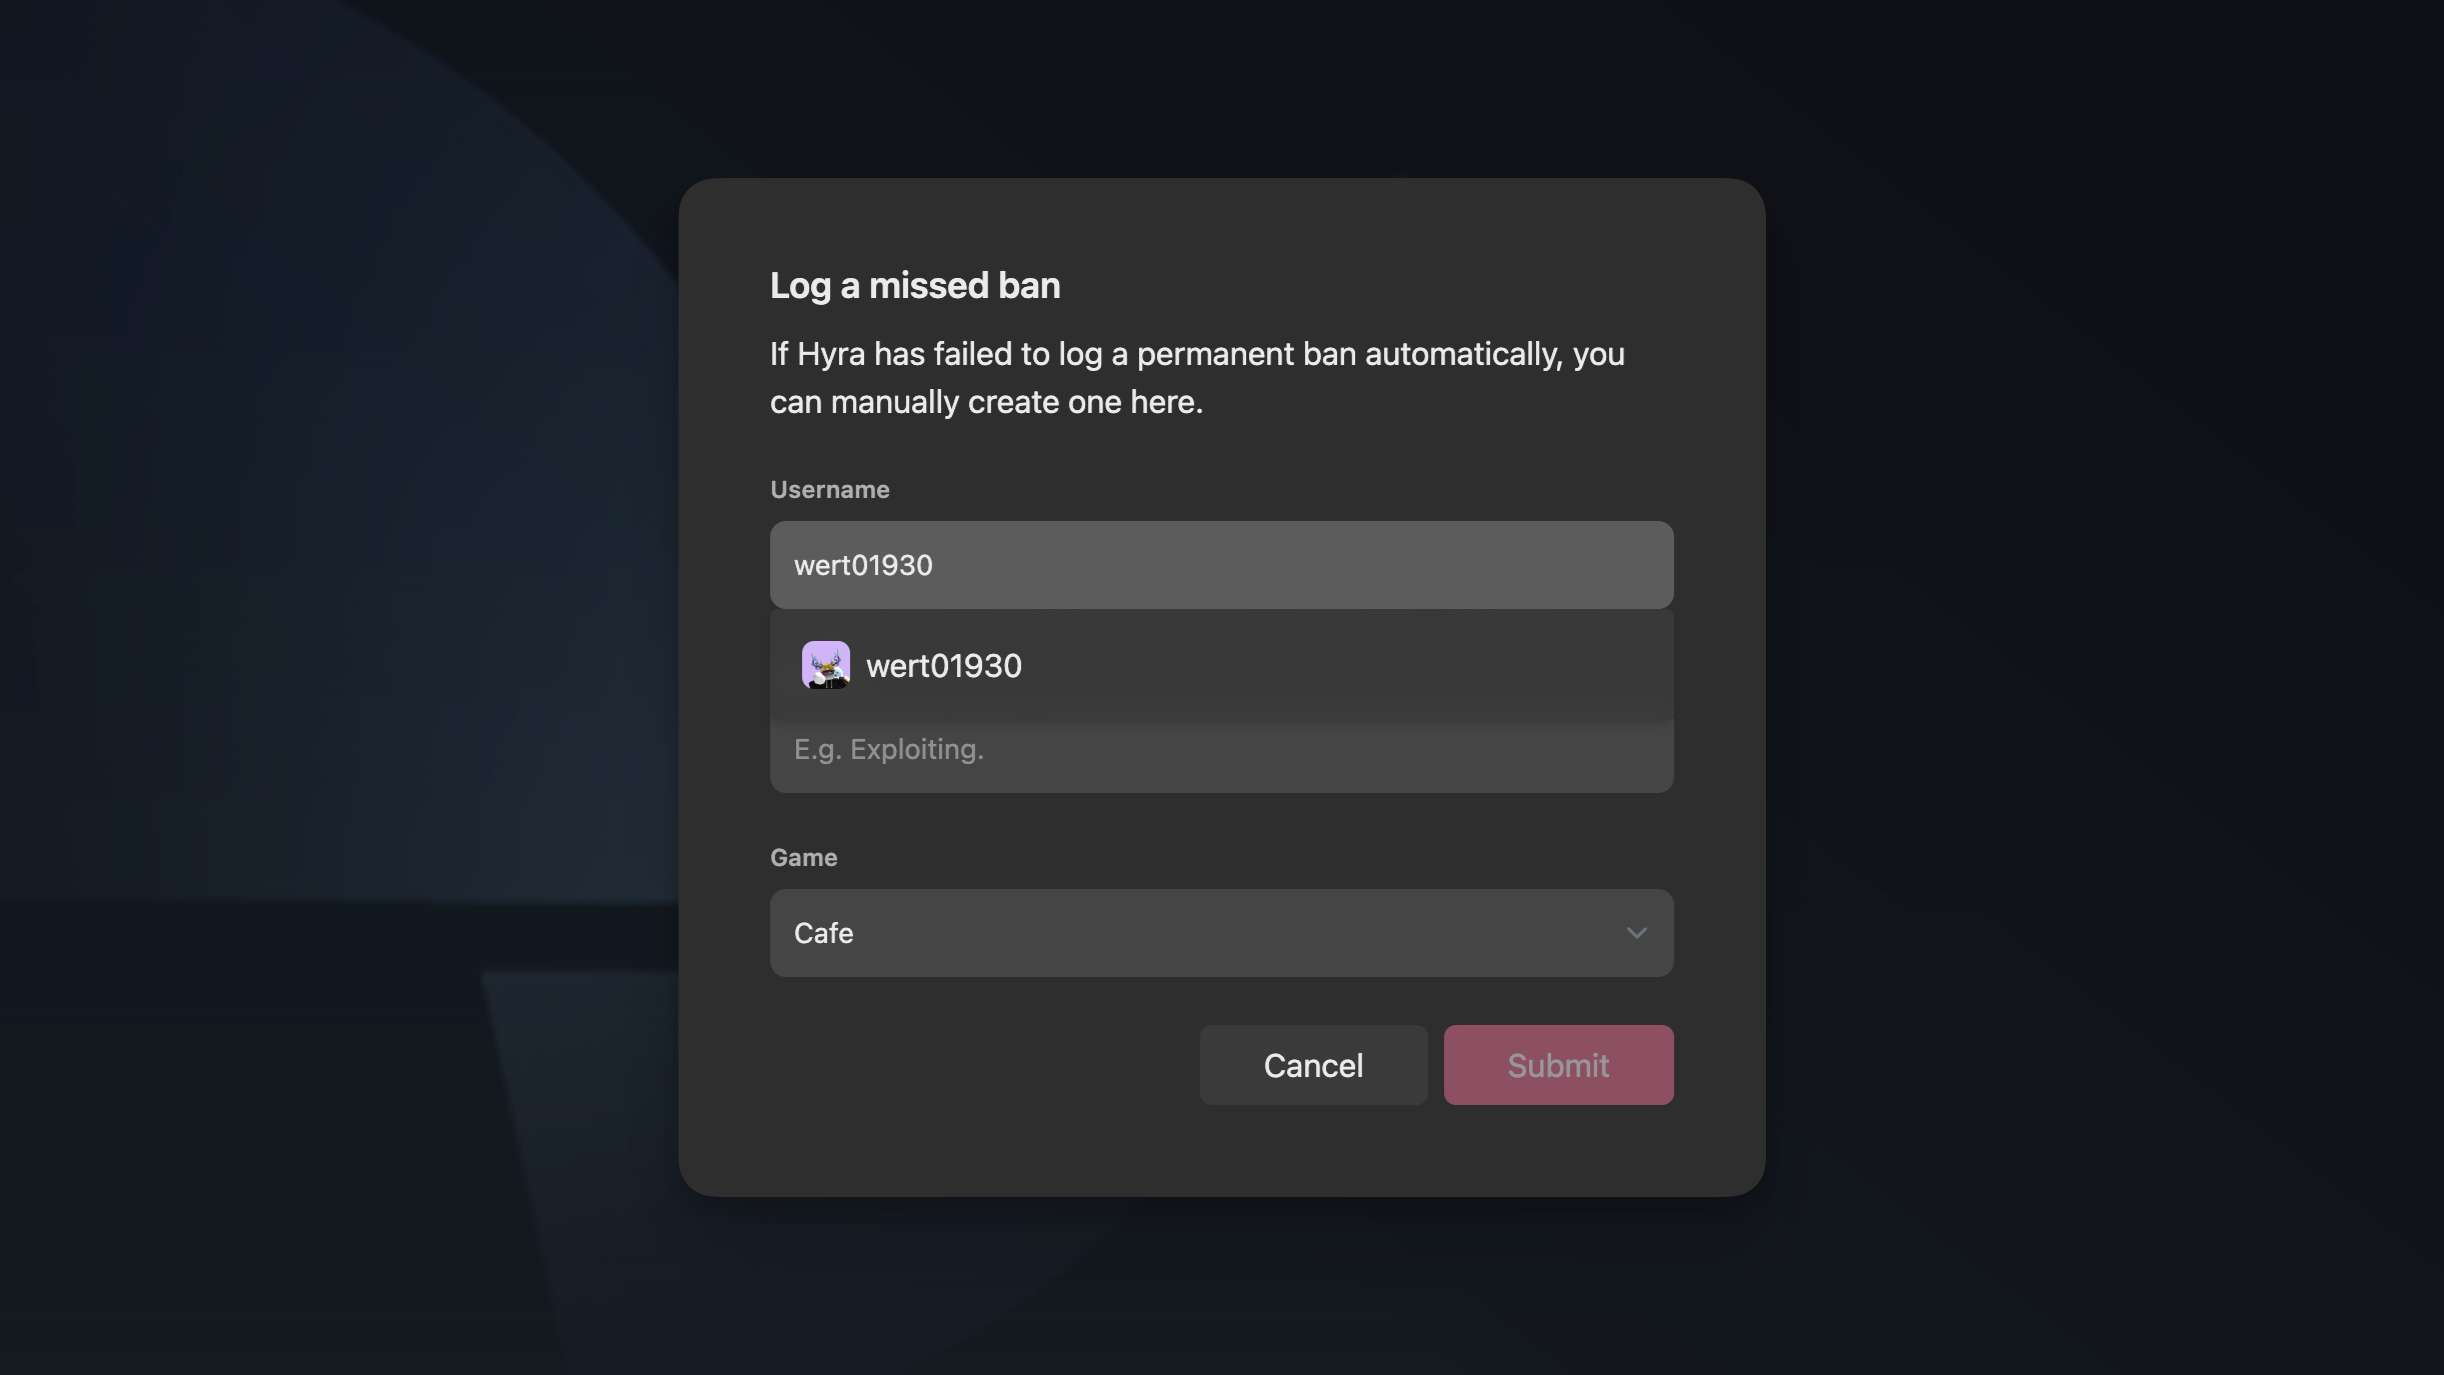
Sometimes, Hyra can fail to log a permanent ban automatically. You can manually log one by clicking Log a missed ban.
In the form, you'll need to type in the username, reason, and which game is it.
Once you've hit Submit, it will be permanently logged. You cannot delete the ban.
 ## Revoking a Ban
You cannot revoke a ban in the Ban Dashboard. You'll need to use an API to revoke a ban. This is for data integrity and security reasons.
For more information on the API, click [here.](https://docs.hyra.io/api-reference/players/delete-playersbans)
# Order Logging
Source: https://docs.hyra.io/using-hyra/players/order
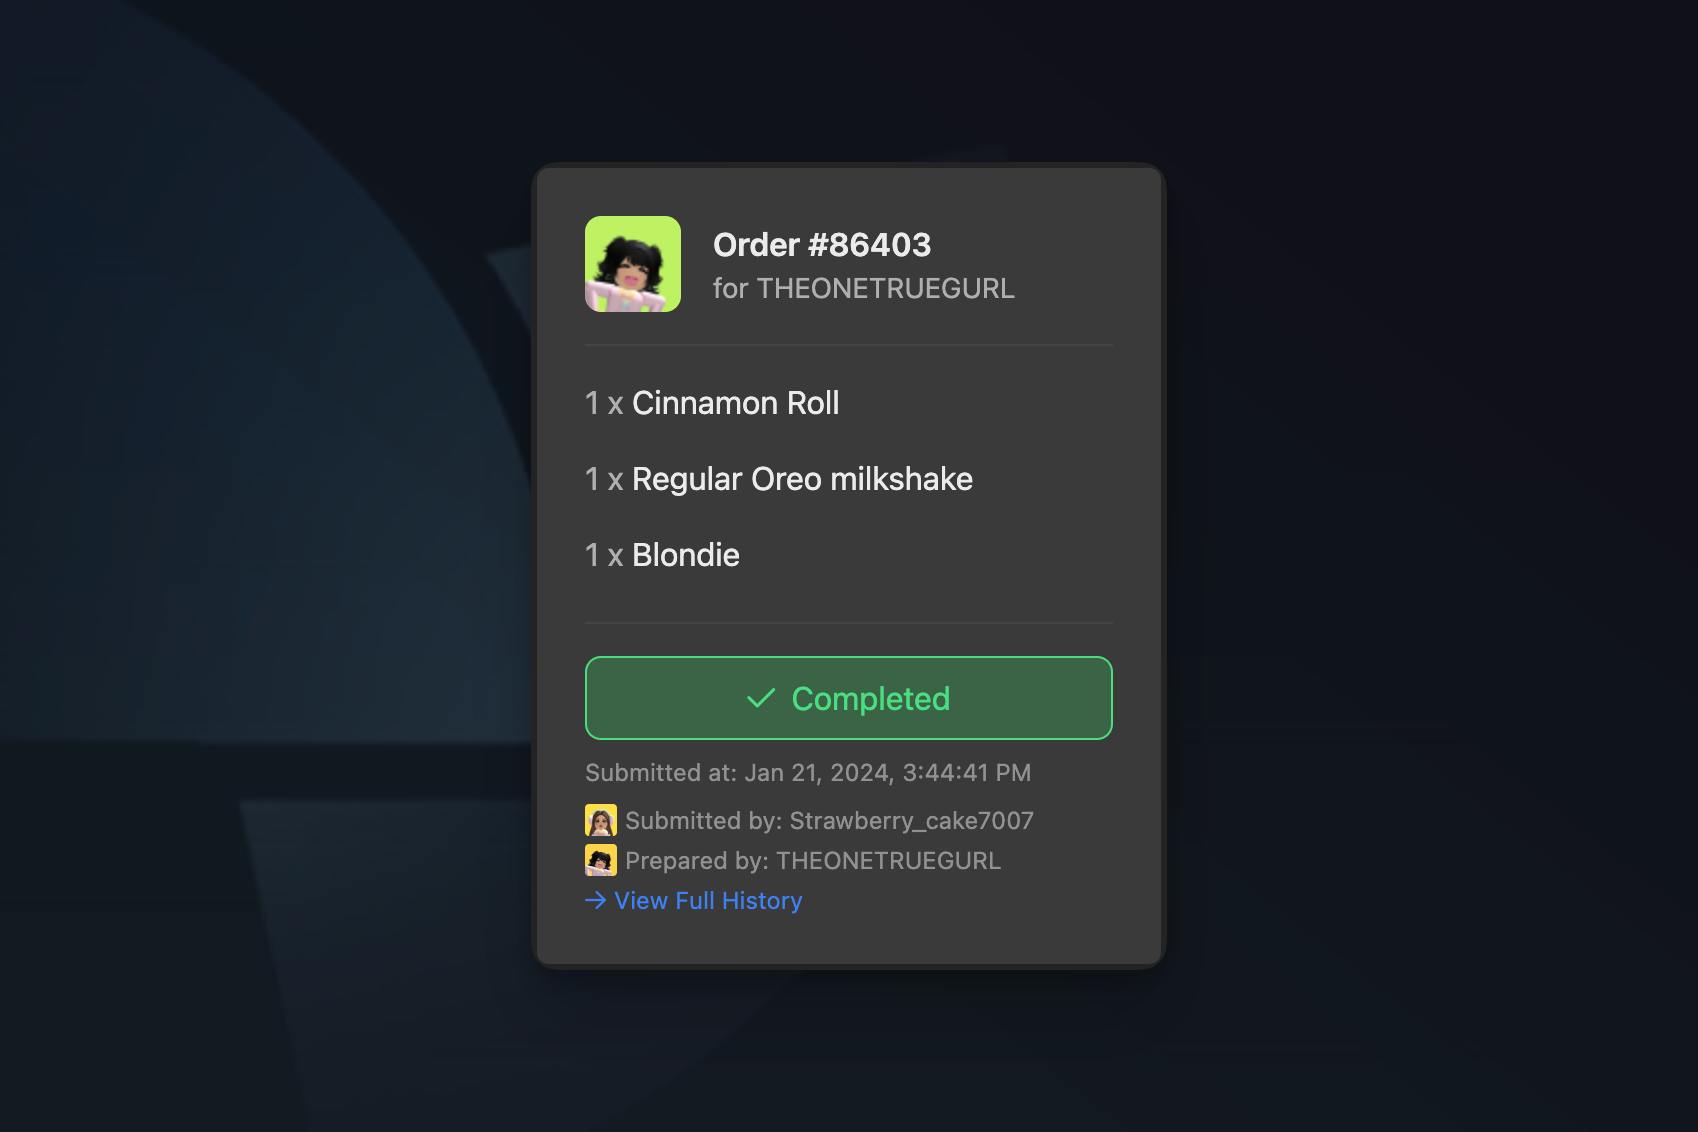 Hyra's Order Page allows you to show all of the Orders that has been sent to your game in Hyra. It can help you find staff that is spamming the order button to gain points.
This article will show the basic things found in the Order page. For it's API Documentation and implementation, click [here](https://docs.hyra.io/api-reference/players/module/using-the-module).
## Accessing the Order
In the Order Page, you can search for an order or see all of the order history as of now. It shows the contents for the order, status, when did it submitted, the cashier, and it's full history.
You can click View Full History to view the history of an order.
### Order Statuses
There are different statuses in an order. Please do note that some of these may not show based on how your game has implemented it.
These are the following:
* Handed to - The order has been handed to the customer
* Submitted - The order has been submitted by the cashier
* Waiting for preparation - The order is waiting for preparation by a chef or other staff member
* Finding new colleague - The order is waiting for a new colleague to take over preparation (for example, if the previous chef left the game)
* Preparing - The order is being prepared by a chef or other staff member
* Completed - The order has been completed
* Waiting for pickup - The order is waiting for pickup by the customer or a delivery person
* Cancelled - The order has been cancelled
# Promotion Recommendation
Source: https://docs.hyra.io/using-hyra/players/promotions
 Hyra's Promotion Recommendation feature allows you to recommend staff members that have gone above and beyond to make the community better to high-ranking staff for a chance to get a promotion.
Before you get started, you’ll need the following permission: View Promotions Recommendations
## Limitations
To keep the page fair for everyone, we've set some limitations to prevent the feature from getting abused.
1. Staff members can only recommend promotions to the members in their Community and up to their current rank.
2. Staff members cannot see the promotion recommendations about themselves.
3. Staff members cannot remove their upvote on a promotion recommendation.
## Creating a Promotion Recommendation
To create a promotion recommendation, you can create the following steps below:
To continue, you'll need the following permission: Create Promotion Recommendations
To get started, you'll need to go to the Players tab in the sidebar and then click Promotions to reach the Promotions page.
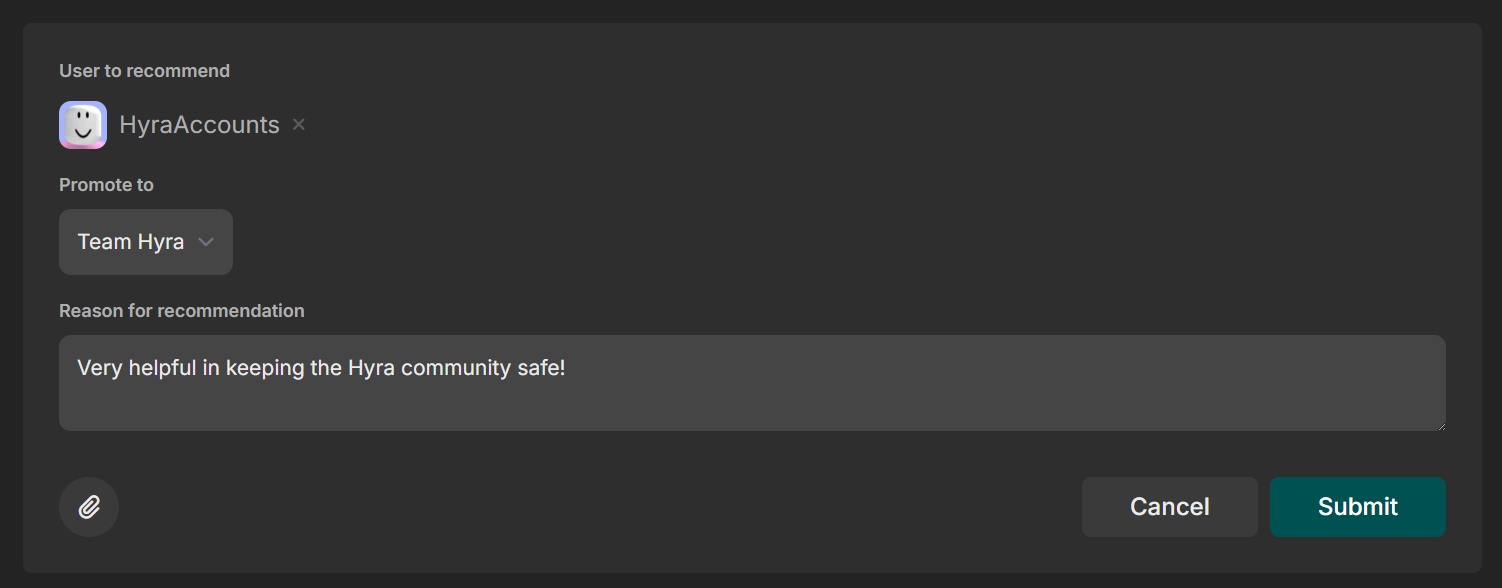
In the page, click Create promotion recommendation then select which staff member to recommend.
Below the staff member, select which rank you believe the staff member should be promoted to.
To ensure that your recommendation will have a chance to get approved, please select the role that is feasible for someone to get promoted to.
Once you've selected the staff member to promote and their recommended role, you'll need to explain why did you choose this user. You can also upload attachments to support your reason.
When creating a reason, try and explain what makes the staff member a candidate for a promotion. Be sure to support your claims with factual evidence.
## Upvoting a Promotion Recommendation
To upvote a promotion recommendation, you can follow the steps below:
To continue, you'll need the following permission: Upvote Promotion Recommendations
Click the Upvote button beside the username of a staff member.
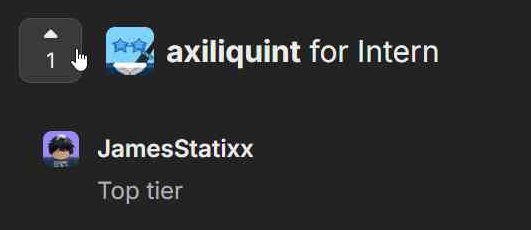 Once clicked, it will ask you to provide a justification on why should the staff member be promoted to a specific role.
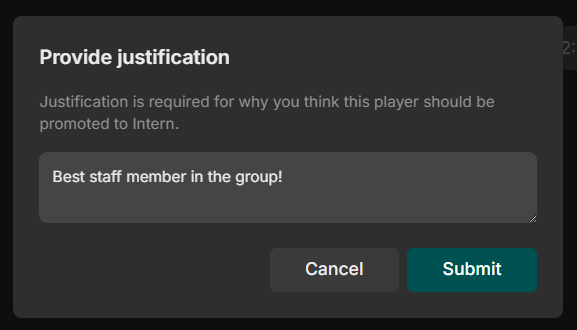 Once done, you should be able to see your justification below with all of the staff member who upvoted the recommendation.
 ## Deleting a Promotion Recommendation
To continue, you'll need the following permission: Delete Promotion Recommendations
To delete a promotion recommendation, you can click the Delete Recommendation button beside the username of the staff member.
 Once a promotion recommendation has been deleted, it cannot be recovered.
# Creating Sessions
Source: https://docs.hyra.io/using-hyra/sessions/create
 ## What are Sessions?
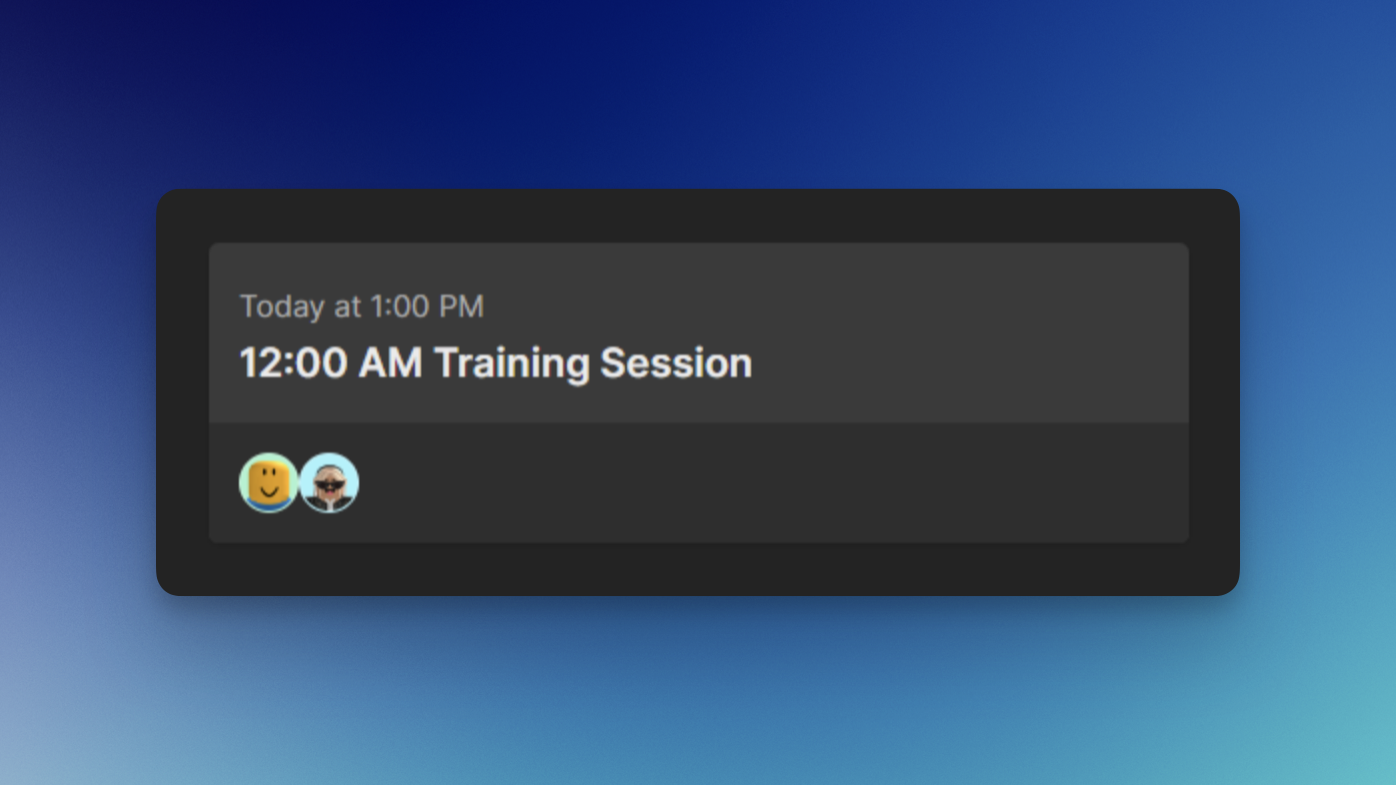
Sessions are one-time or repeating events that occur in your community. For example, you could create a session for all of your training sessions, interview sessions, and many more!
## Creating a Session
Before you continue, make sure you have the Workspace Admin permission in your Hyra workspace.
To create a session, first go to the Session Settings page by going to Workspace Settings > Sessions.
Click the button Add Session and wait for a popup to show.
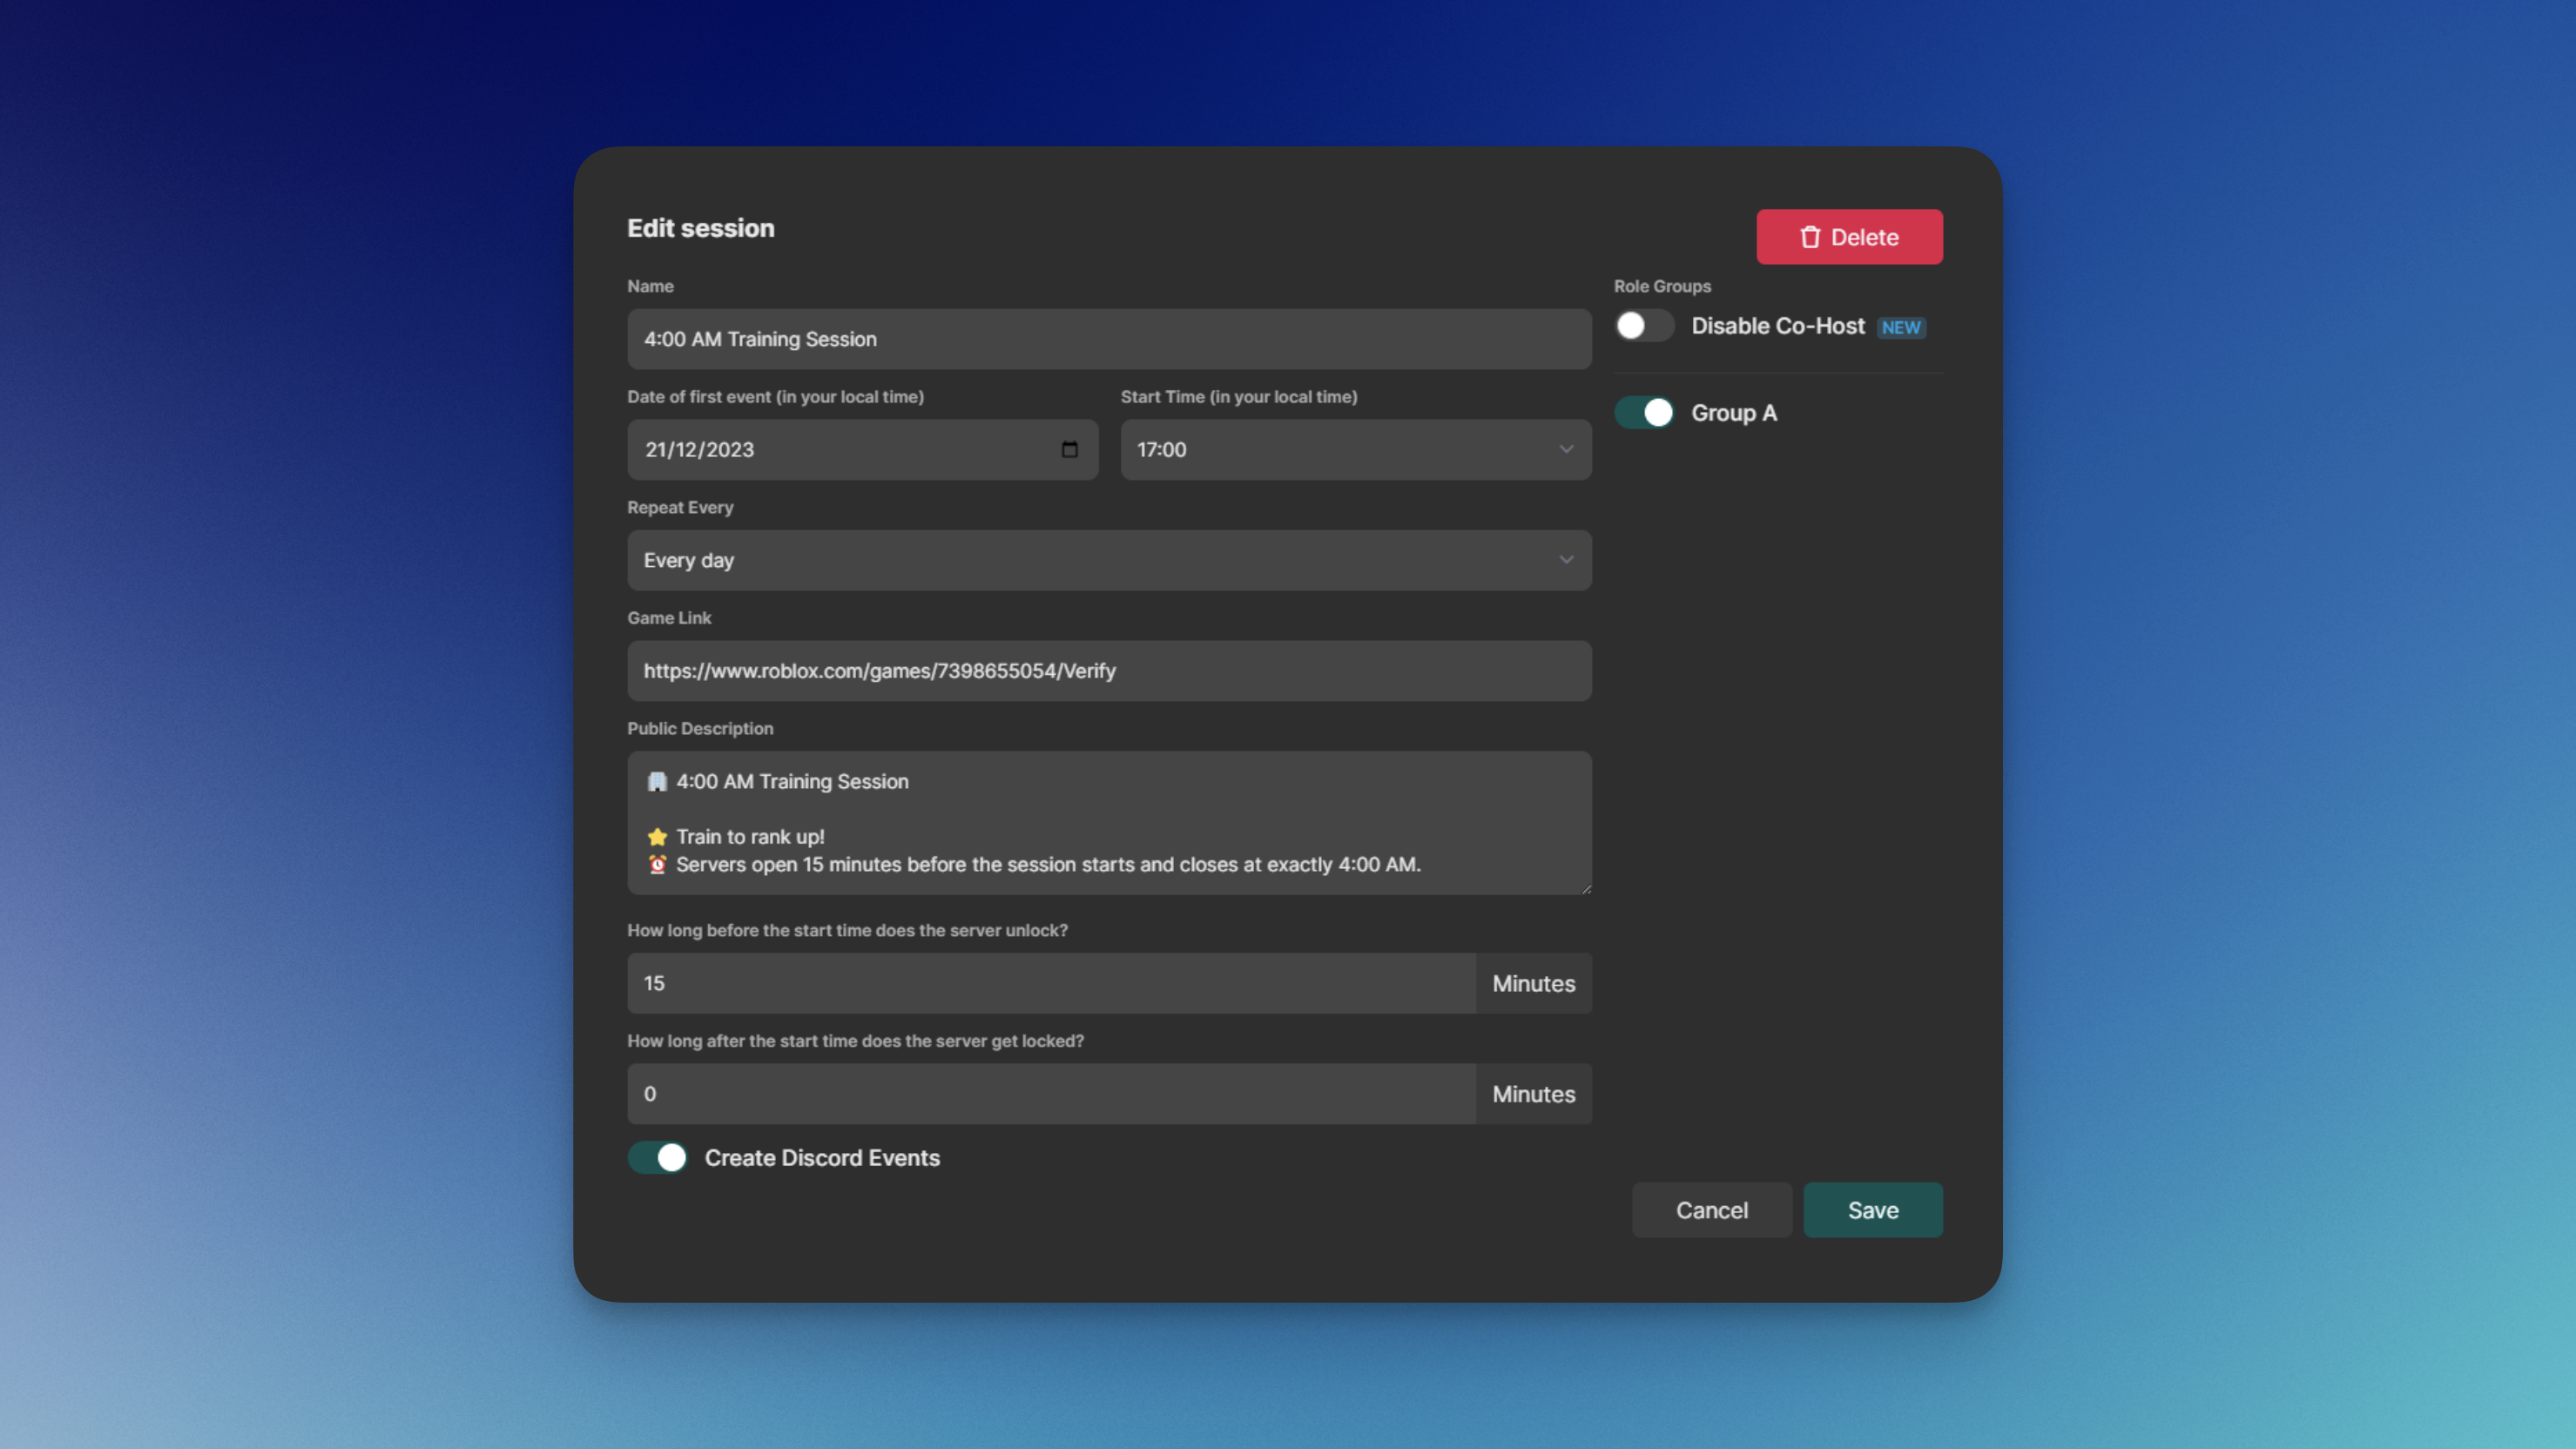
In the Session Configuration page, fill in all of the necessary fields and enable which role groups will be shown.
To disable co-host on your sessions, enable the Disable Co-Host toggle on the right side of the page.
 ## Ad Hoc Sessions
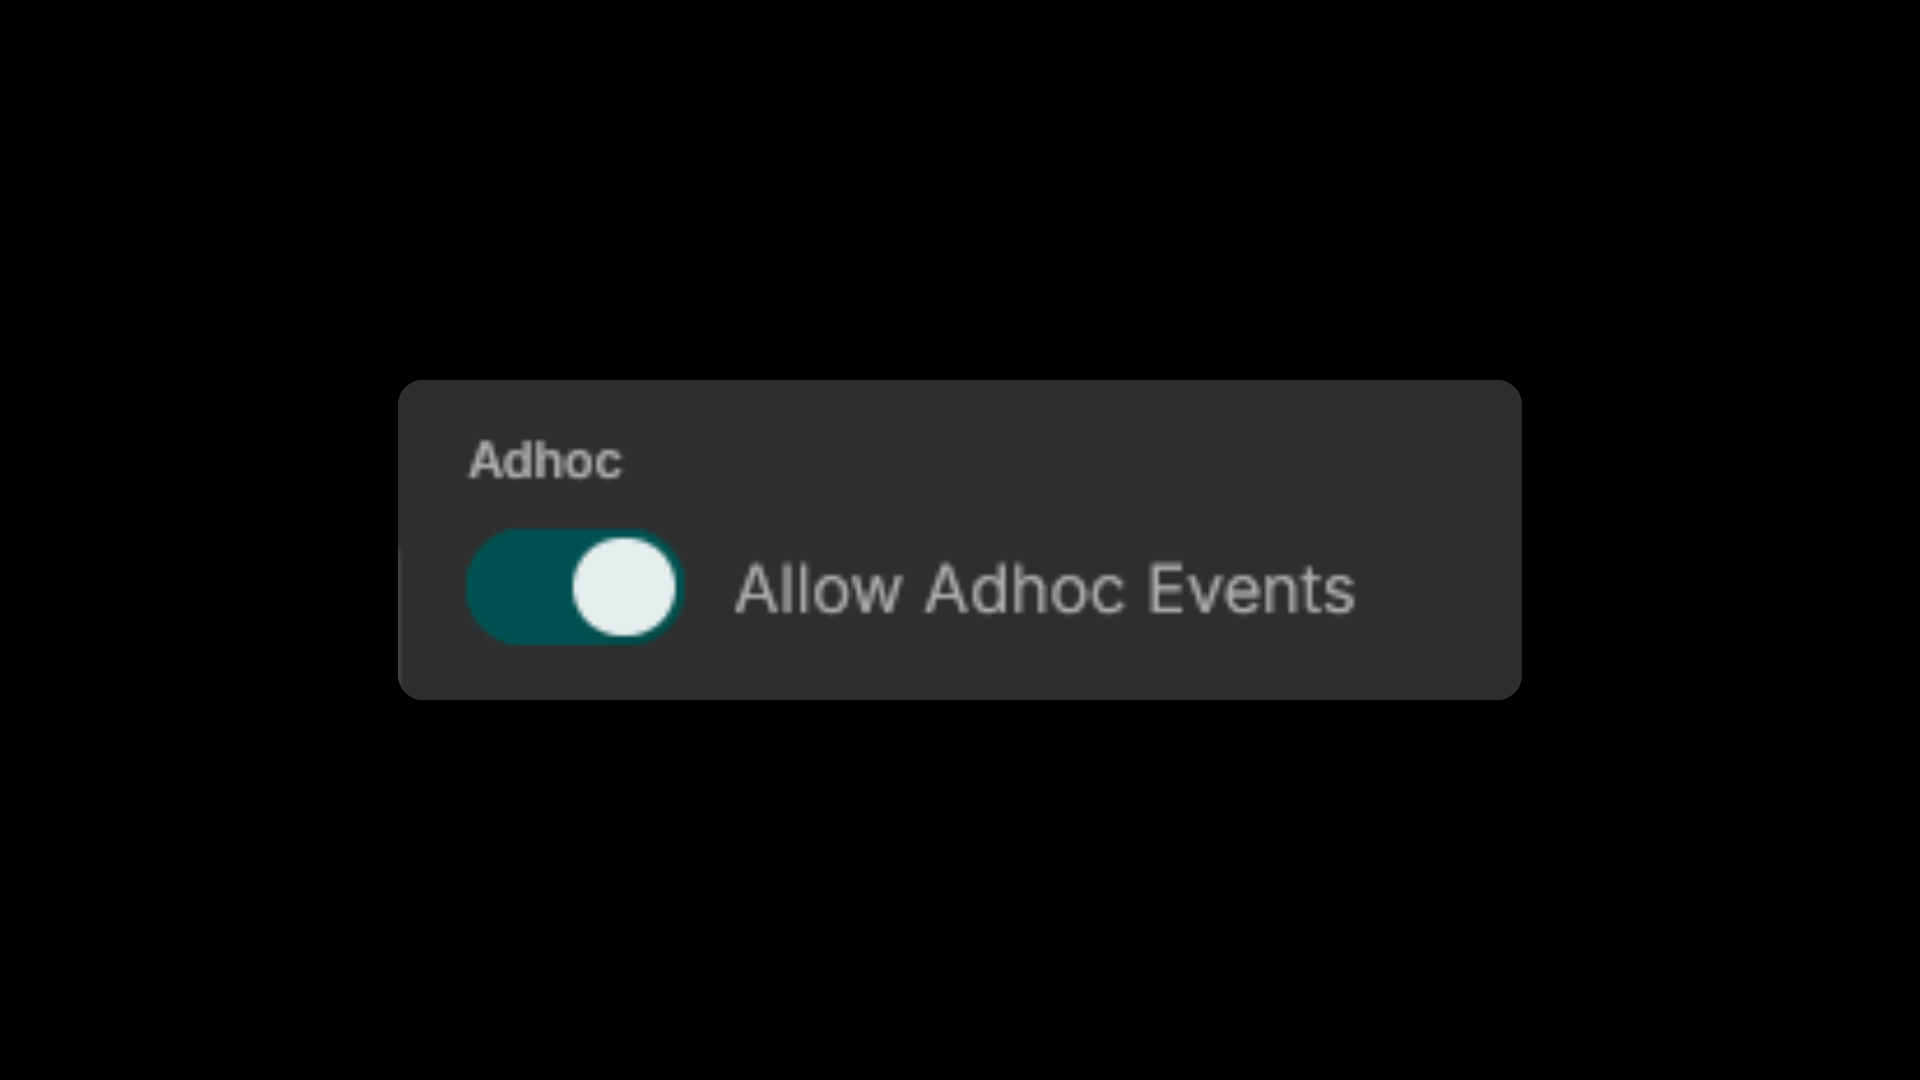
Ad Hoc Sessions are sessions that automatically start when a staff member created it.
To enable the feature, toggle Allow Adhoc Events on the right side of the popup below disable co-host.
Be sure that the Create Adhoc Sessions permission is enabled in your roles for your workspace members to create ad hoc sessions.
 # Joining Sessions
Source: https://docs.hyra.io/using-hyra/sessions/join
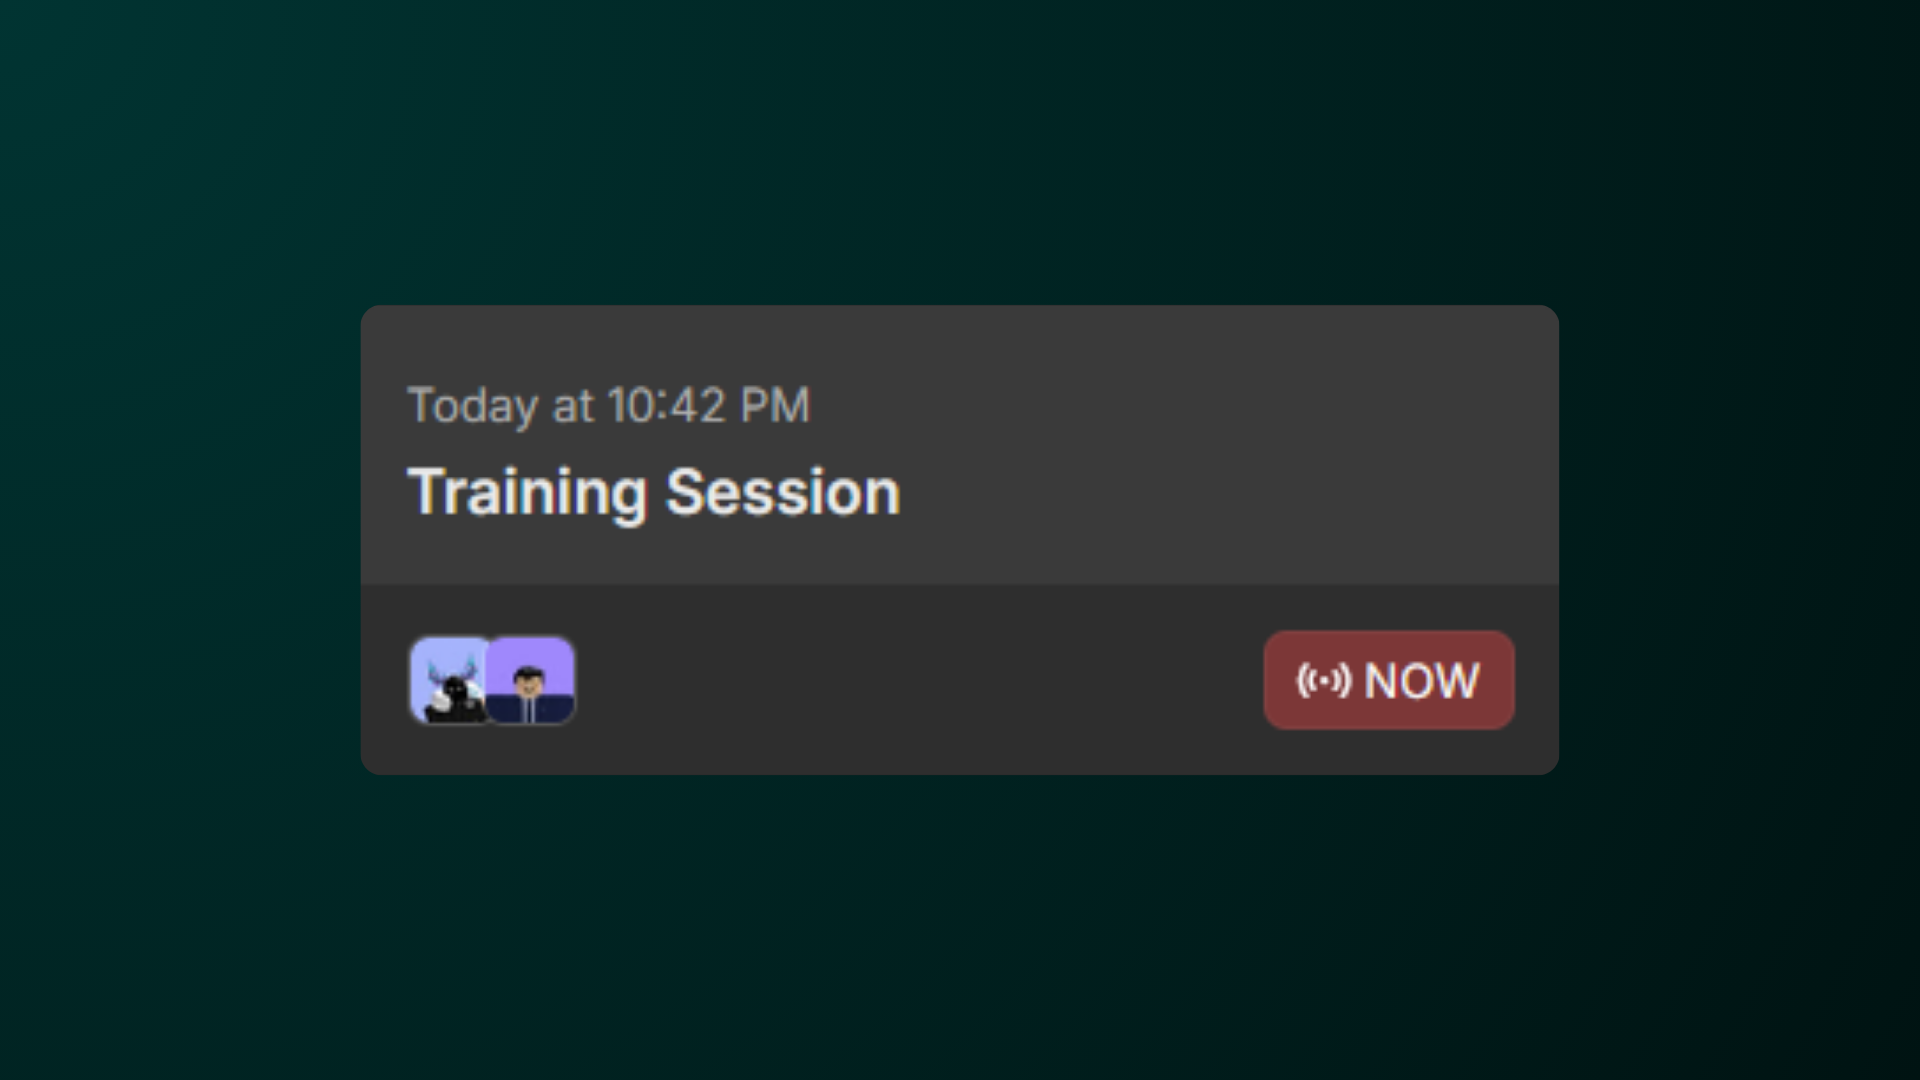 ## Joining Sessions
Joining Sessions allow you to reserve your spot on the session and automatically logs your session for your assignments!
For claiming Host and Co-Host role, be sure that you have the following permission: Assign Host to Self (for Hosts), Assign Co-Host to Self (for Co-Hosts).
To first join a session, first go to the session calendar by going to Activity > Sessions.
In the Session Calendar, select a session that you want to join.
Please note that you can also to switch the day that you want to view by clicking on the week above.
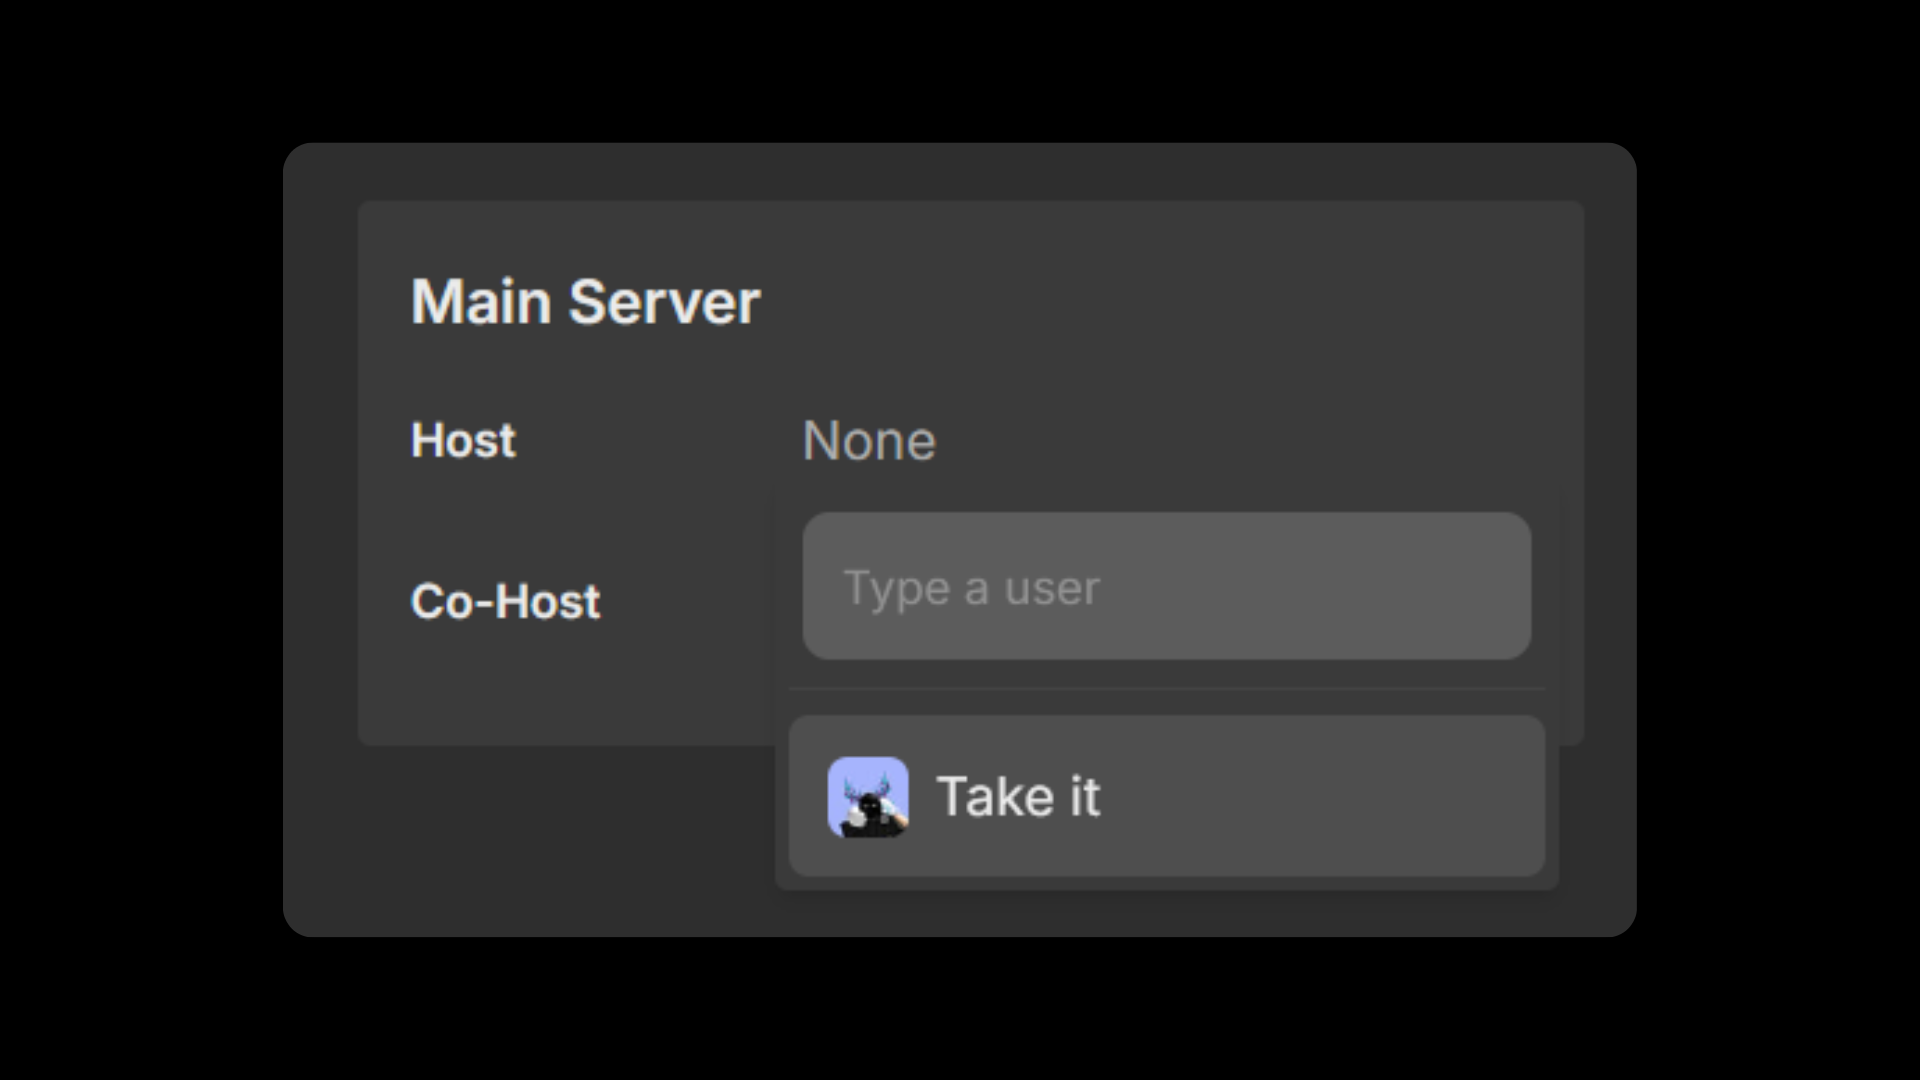
In the session, select a role that you want to join and hit "Take it" to take the role.
Can't see any servers? That may mean that this session doesn't have any servers as of now. Check back later if there's one available.
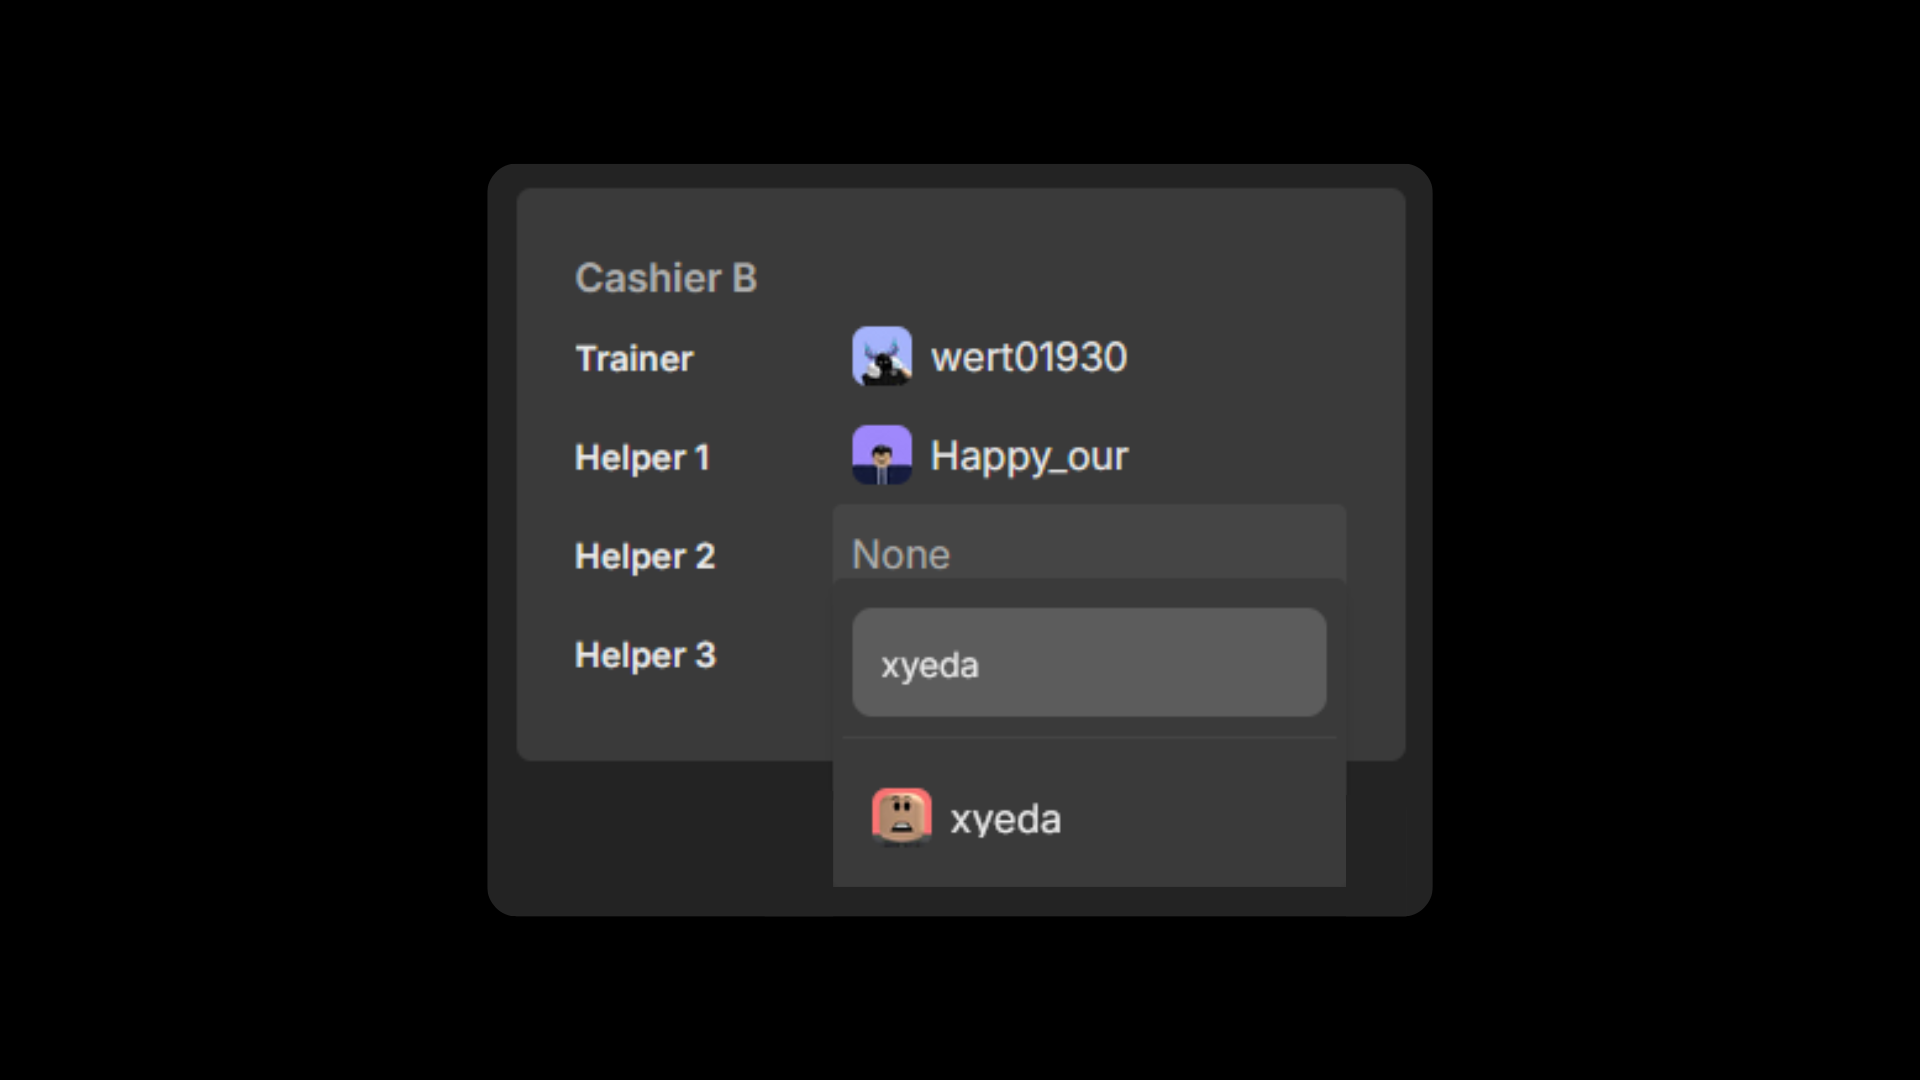
 ## Assigning Roles to Other People
If you need to manually log staff into your session, you can manually assign them to the session too!
Before you continue, you will need one of the following permissions:
* Assign Host to other people (for Hosts)
* Assign Co-Host to other people (for Co-Hosts)
* Assign Roles to other people (for all roles)
First go to the session calendar by going to Activity > Sessions.
In the Session Calendar, select a session that you want to assign to someone.
Please note that you can also to switch the day that you want to view by clicking on the week above.
In the session, type in the username of the staff that you want to assign the role and hit their username. This should add them to the session.
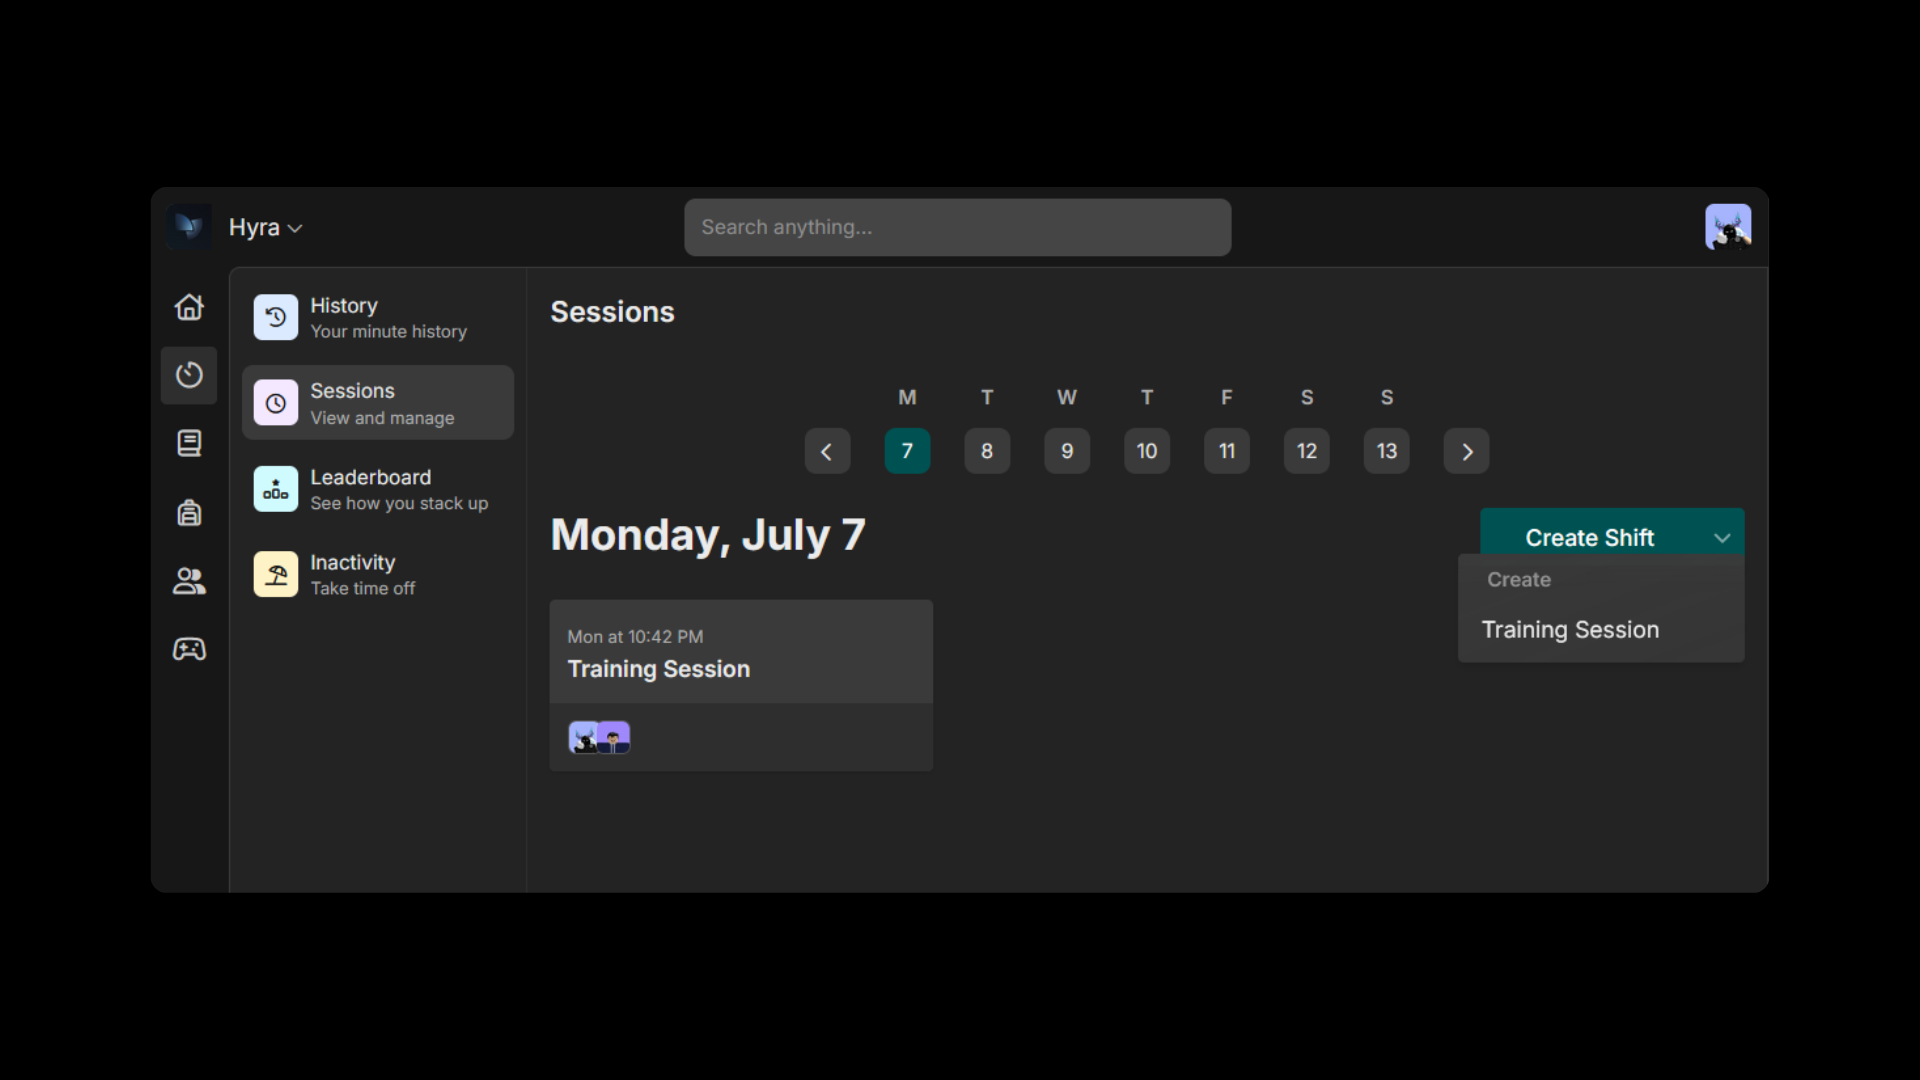
 ## Creating an Adhoc Session
To create an adhoc session, go to the session calendar and click Create \[session name]. To find more options, click on the dropdown button on the right.
Before you continue, you will need the permission: Create Adhoc Sessions
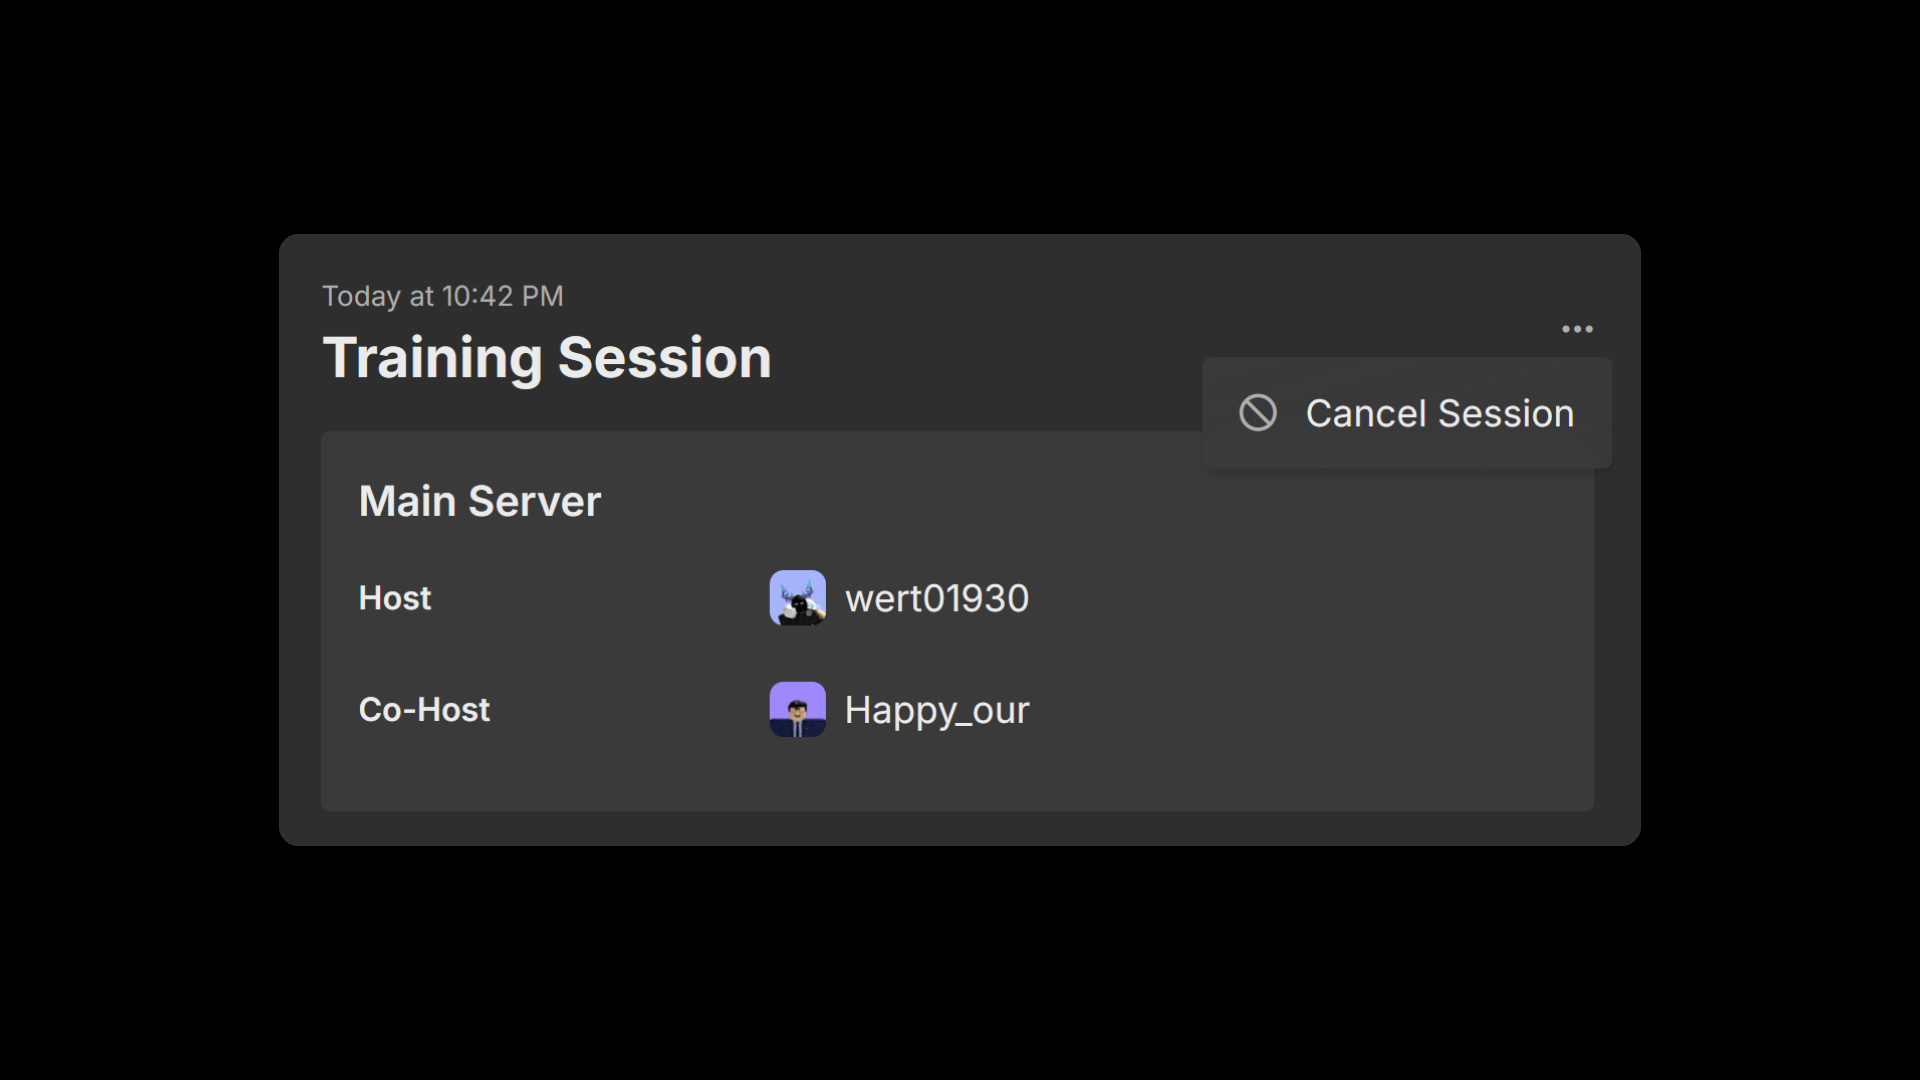
 ## Cancelling a Session
To cancel the session, simply click the three dots and select Cancel Session.
Before you continue, you will need the permission: Cancel Sessions
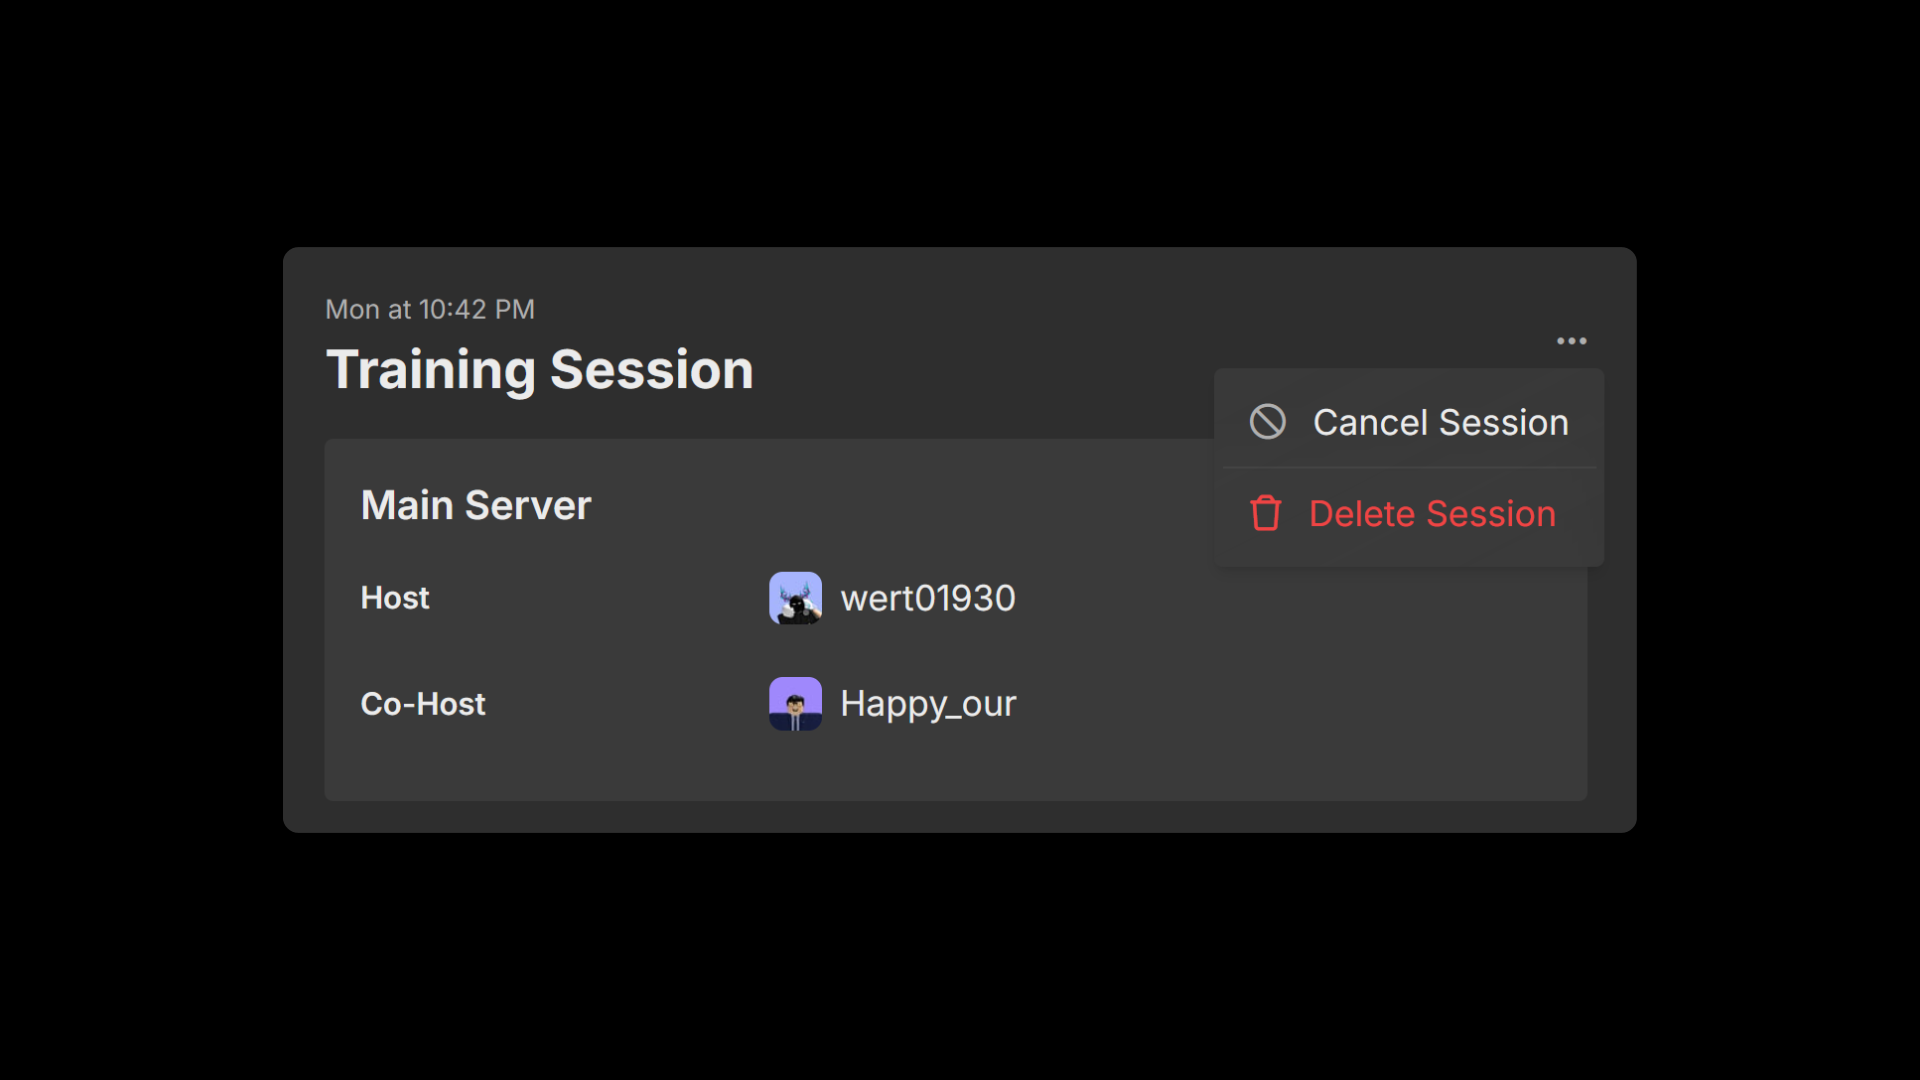
 ## Deleting a Session
The same goes to deleting a session, simply click the three dots and select Delete Session.
Before you continue, you will need the permission: Delete Sessions.
For Adhoc Sessions, you will need the permission: Delete Adhoc Sessions.
 # Session Roles
Source: https://docs.hyra.io/using-hyra/sessions/session-roles
How to configure Session Roles in Hyra.
 ## What are Session Roles?
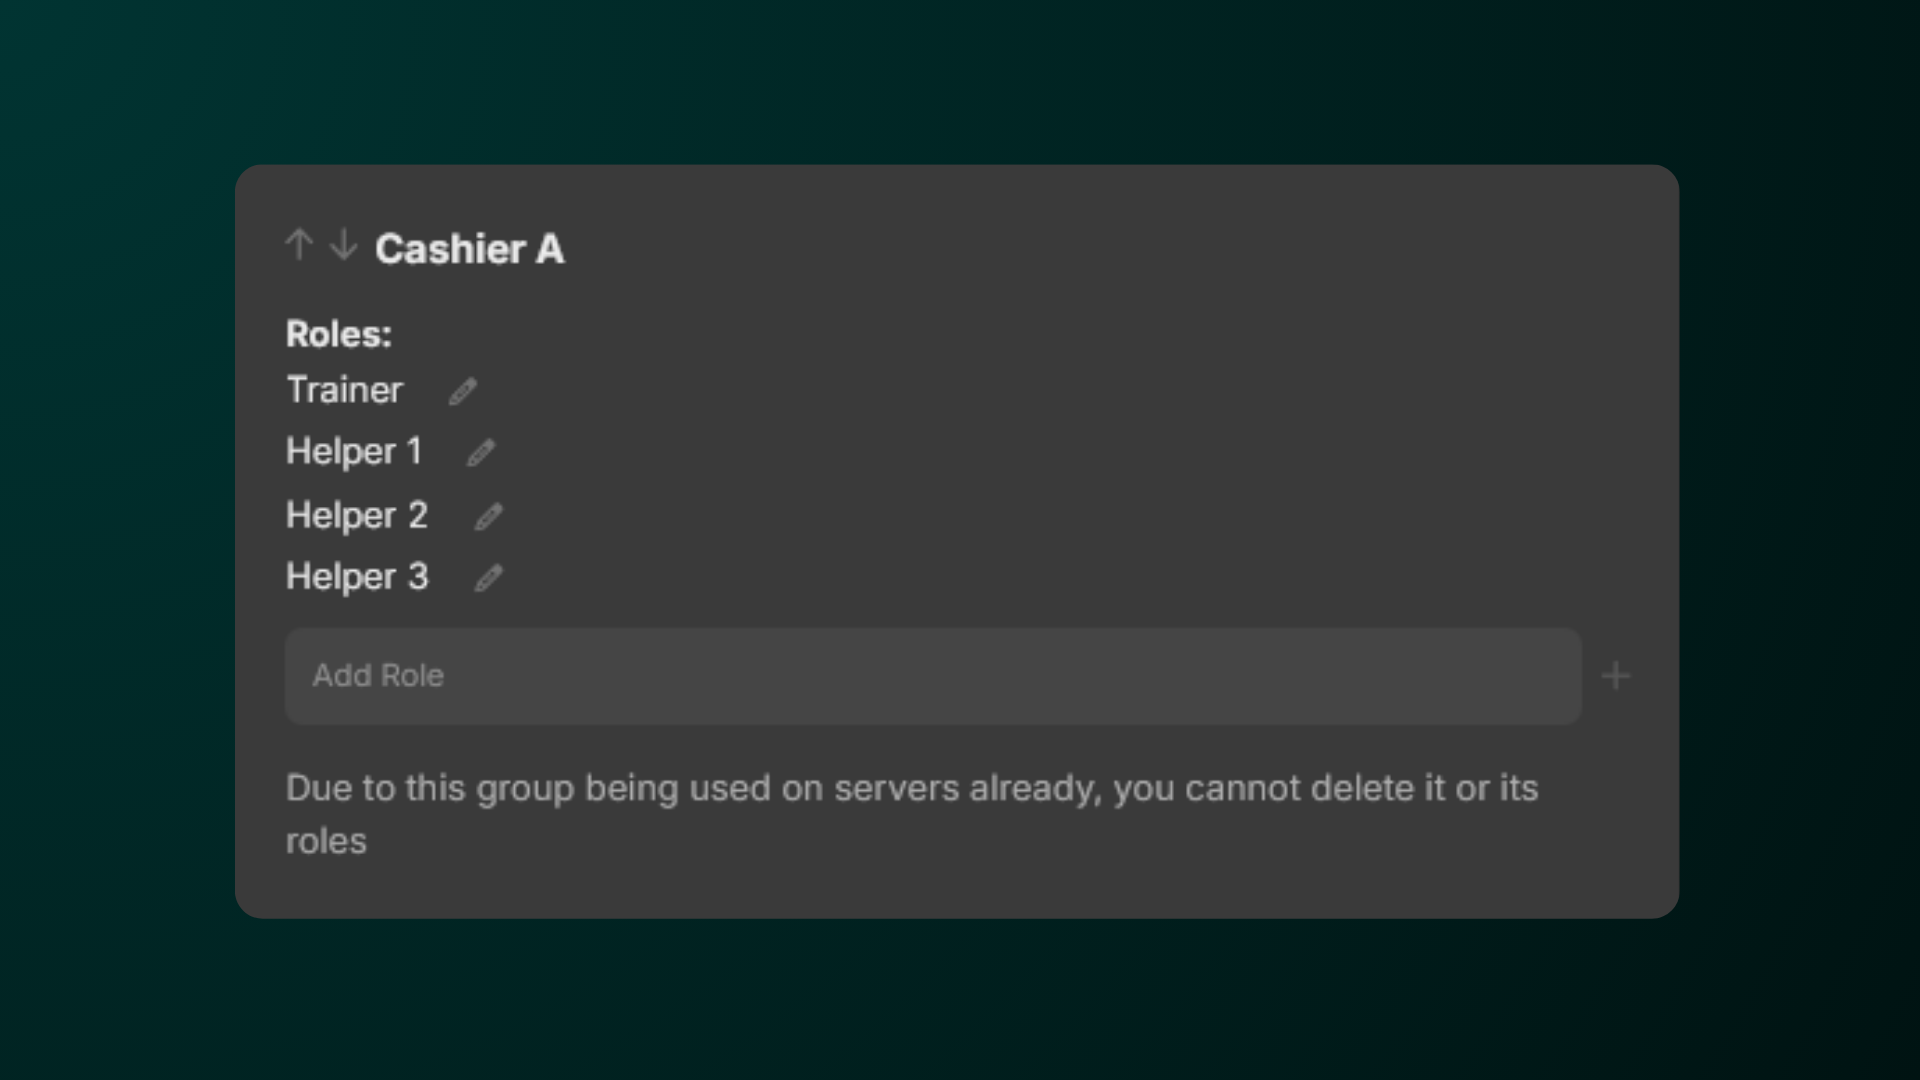
Roles are the foundation of attendance at sessions. They are available to be given to one staff member and are arranged into groups. For example, you might have a role group named 'Cashier A' with 1 trainer and 3 assistants beneath it.
## Configuring Session Roles
Before you continue, make sure you have the Workspace Admin permission in your Hyra workspace.
Please note that if a Role Group has been attached to a session, you cannot delete it or its roles
To create a role group, head over to Workspace Settings > Sessions > Role Groups.
Scroll to the bottom of the page and click Create a Group.
To create a role, click Add Role and type in the name of the role. We suggest adding numbers or letters to distinguish its roles in the session.
# Session Servers
Source: https://docs.hyra.io/using-hyra/sessions/session-server
 ## Creating a Server
To create a server, follow the steps below.
Before you continue, make sure you have the Create New Server permission in your Hyra workspace.
To first join a session, first go to the session calendar by going to Activity > Sessions.
In the Session Calendar, select a session that you want to join.
Please note that you can also to switch the day that you want to view by clicking on the week above.
Hit "Create Server", and you are good to go!
## Multi-Server Sessions
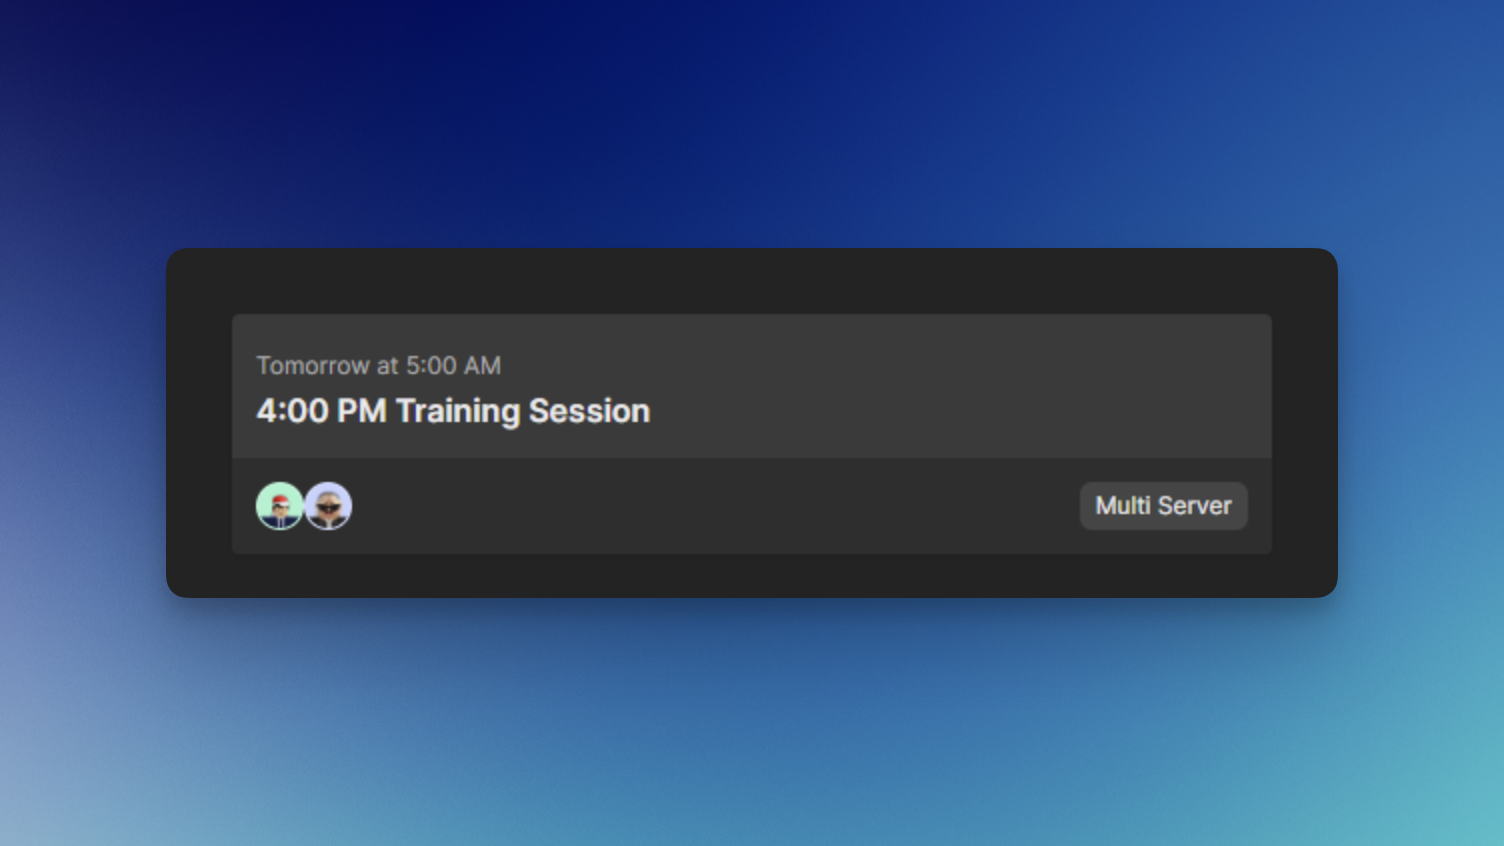
Mutli-Server Sessions are sessions that have multiple servers in one session. This is useful for sessions that has a lot of trainees that needs to be trained. The steps are the same as creating a server.
In this setup, there will be two Hosts and Co-Hosts (one for each server) and you can see which host/co-host in the server by going to the Hosting group in your server.
You can also distinguish a single-server and a multi-server session from the calendar by looking for the Multi Server label on the session.
# Assignments
Source: https://docs.hyra.io/using-hyra/staff/assignments
 Assignments in Hyra allows you to give out tasks to your staff. At the end of the week (either Saturday or Sunday depending on your Workspace Settings), it will be automatically checked and recorded.
## Creating an Assignment
To create an assignment, follow the steps below:
To continue, you'll need the following permission: Workspace Admin
To first create an assignment, you'll first need to go to the Assignment Settings page, just go to Settings > Assignments.
Once you are in the Assignment Settings page, click Create Assignment. It should create an assignment named "New Assignment"
Give it a name, description, assign which roles will recieve it, select it's type, and target if shown.
Be sure to save your changes!
### Assignment Types
You have different types of assignment that you can give out!
 This type of assignment will require your staff to play a specific amount of minutes in your game. You must have the Activity Tracker set up in order for your staff to start collecting minutes.
 This type of assignment will require your staff to attend a session and get logged as part of the session in the Session Calendar.
 This type of assignment will require your staff to be the Host of the session and get logged as the host of the session in the Session Calendar.
 This type of assignment will require your staff to manually press Mark as Complete in order for the assignment to be marked as passed.
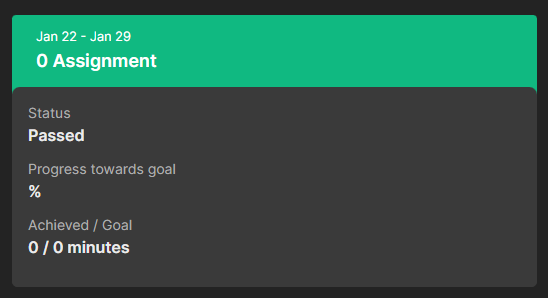 Assignments with a 0 target behave differently to other assignments - These will not display in the user's 'assigned' view, but will show everywhere else, including the user's history.
# Directory Profile
Source: https://docs.hyra.io/using-hyra/staff/directoryprofile
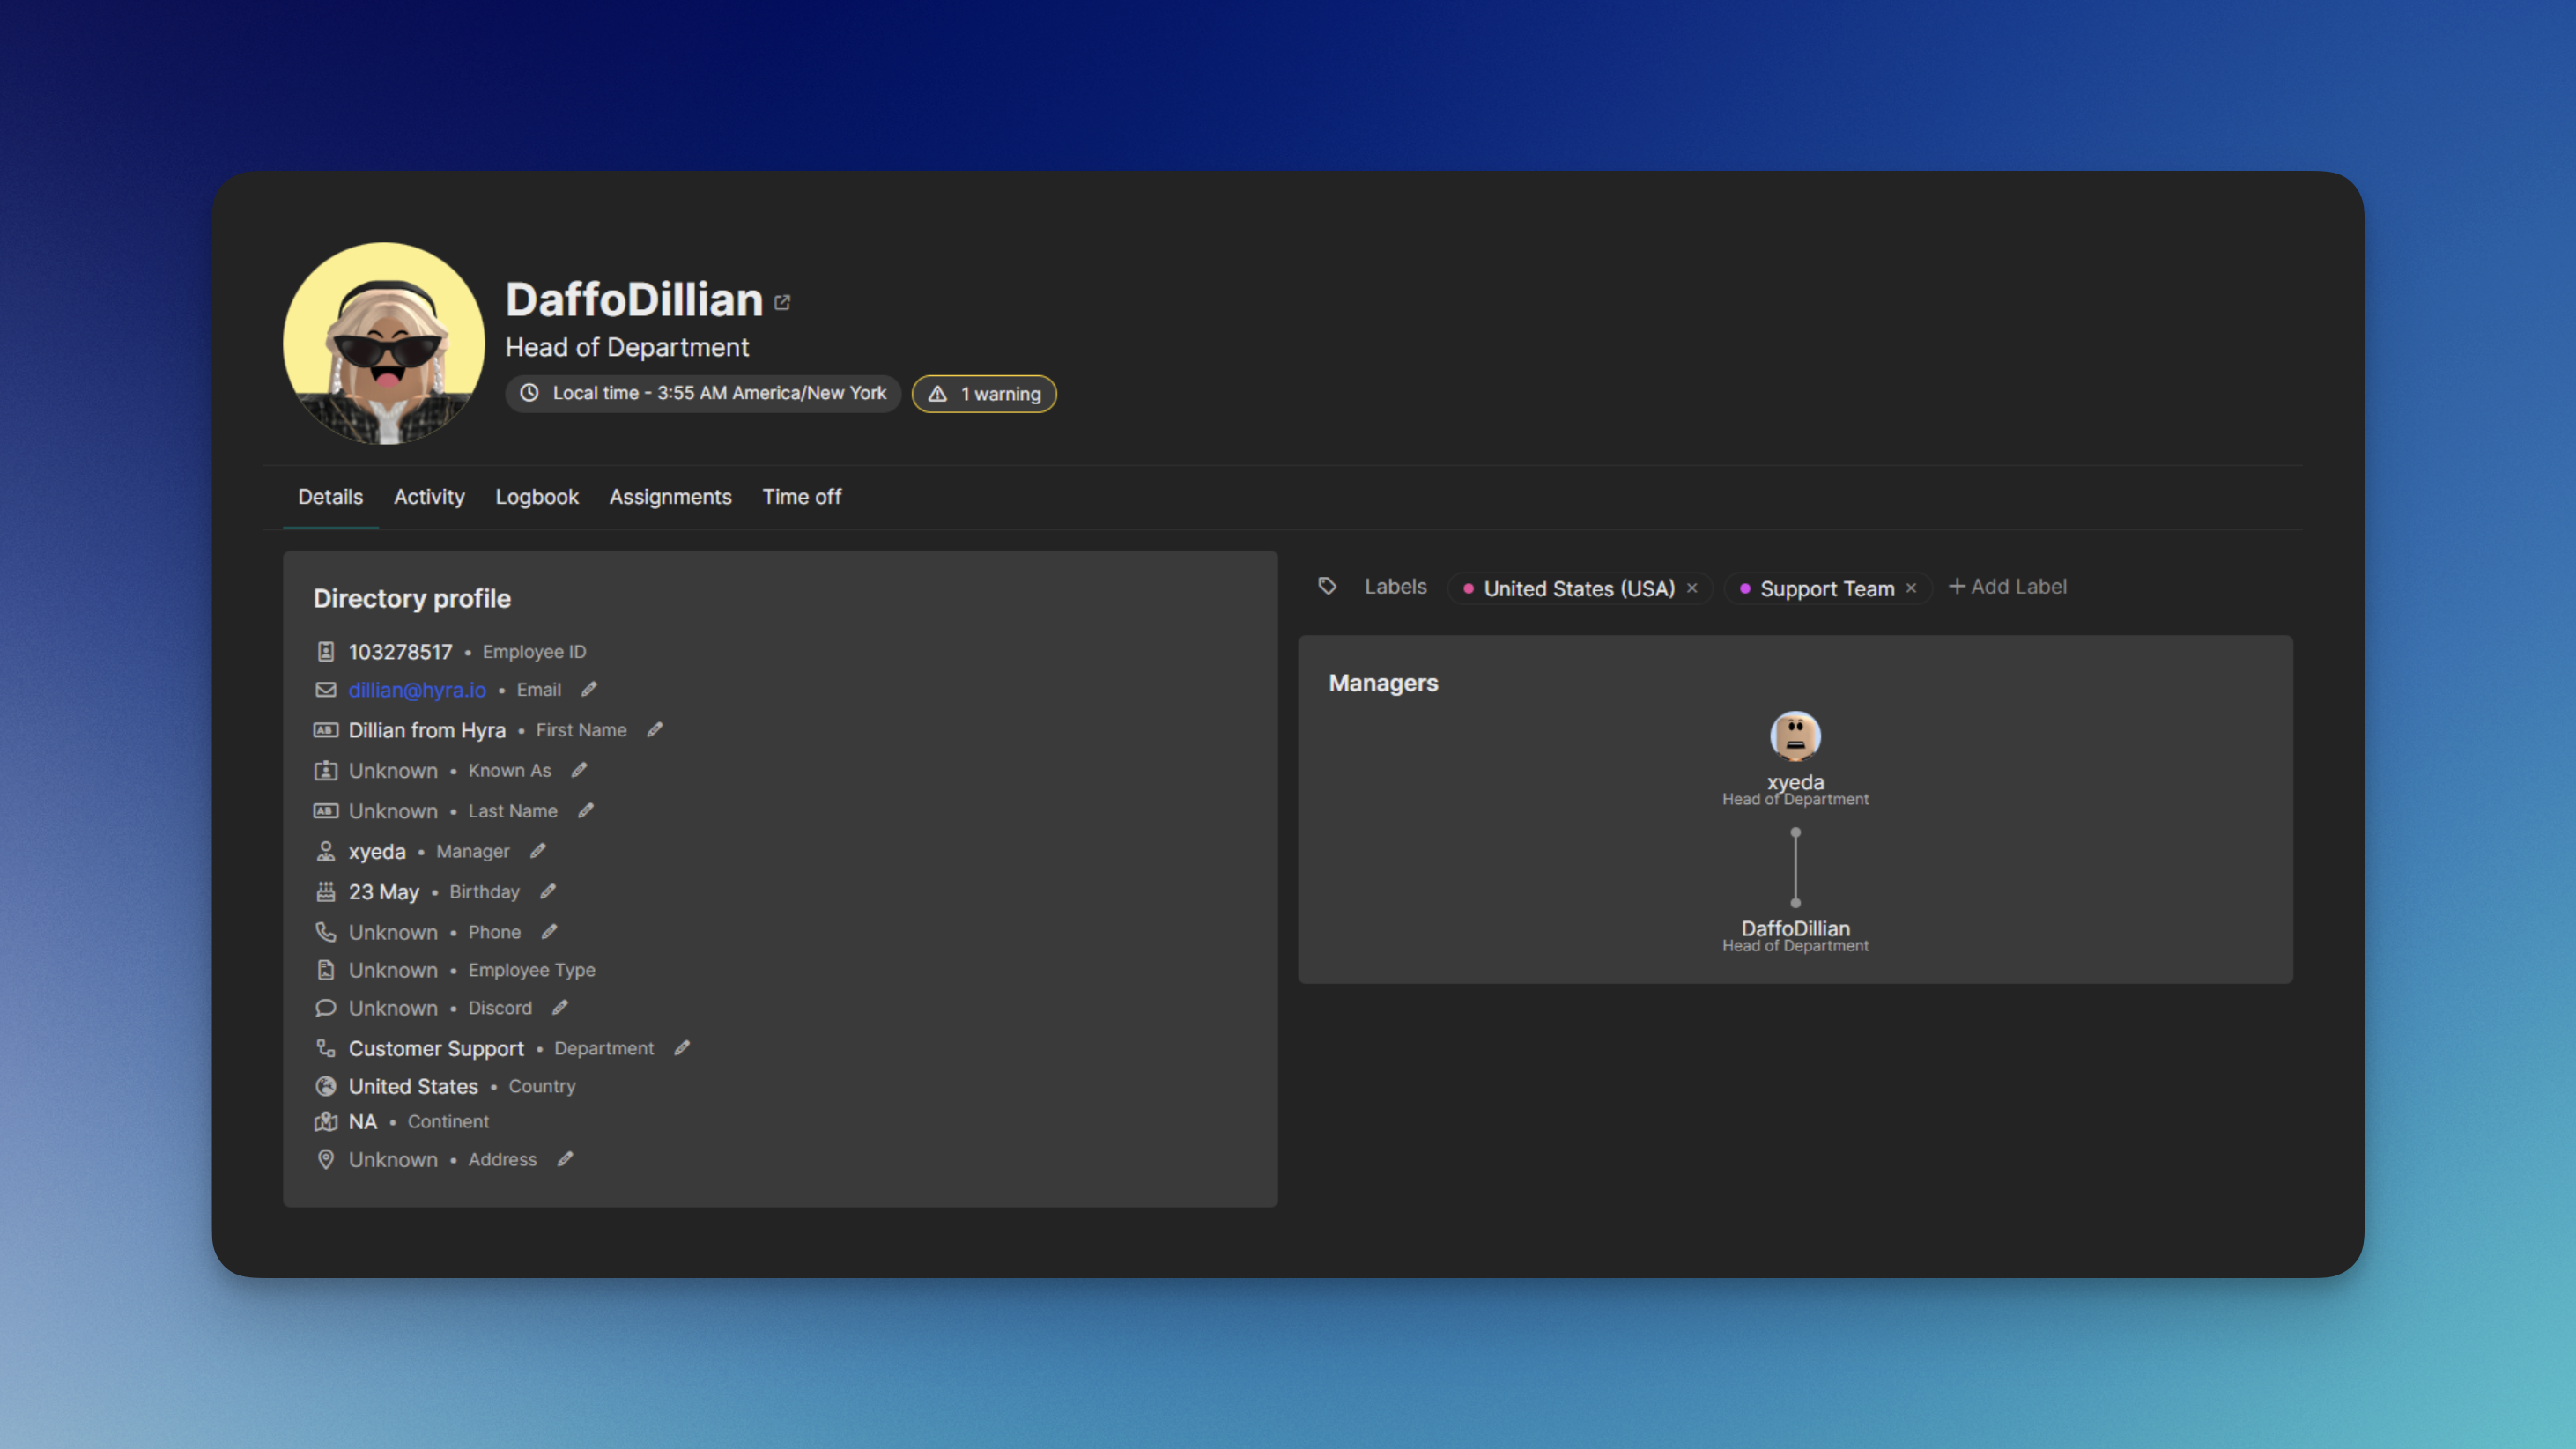 ## What are Directory Profile?
Directory Profile on Hyra are how workspace admins can view information about each of their employees. This includes their personal details, activity, logs, and current assignments.
Their purpose is to serve each community with the best possible staff management to quickly and effectively take charge.
In this article, we will only be tackling how to view and edit the Details tab. For other tabs, please head into their specific tabs.
## Viewing Directory Profile
To continue, you'll need the following permission: View Other Staff
To view the profile of someone, firstly, go to Activity. In Activity, you can search the staff for their Directory Profile.
There's two ways on searching the staff:
* You can search the user by clicking Ctrl + K (For Windows) or Cmd + K (for Mac) and typing their username in Search.
* You can also find them Views and hit the Open button.
## Editing Directory Profile
In order to do this, you must have the following permission: View Other Staff and Edit Staff Details
To edit a property in a staff's directory profile, go to the staff's directory profile and beside the property, you can hit the pencil icon to edit.
# Logbook
Source: https://docs.hyra.io/using-hyra/staff/logbook
 ## What is Logbook?
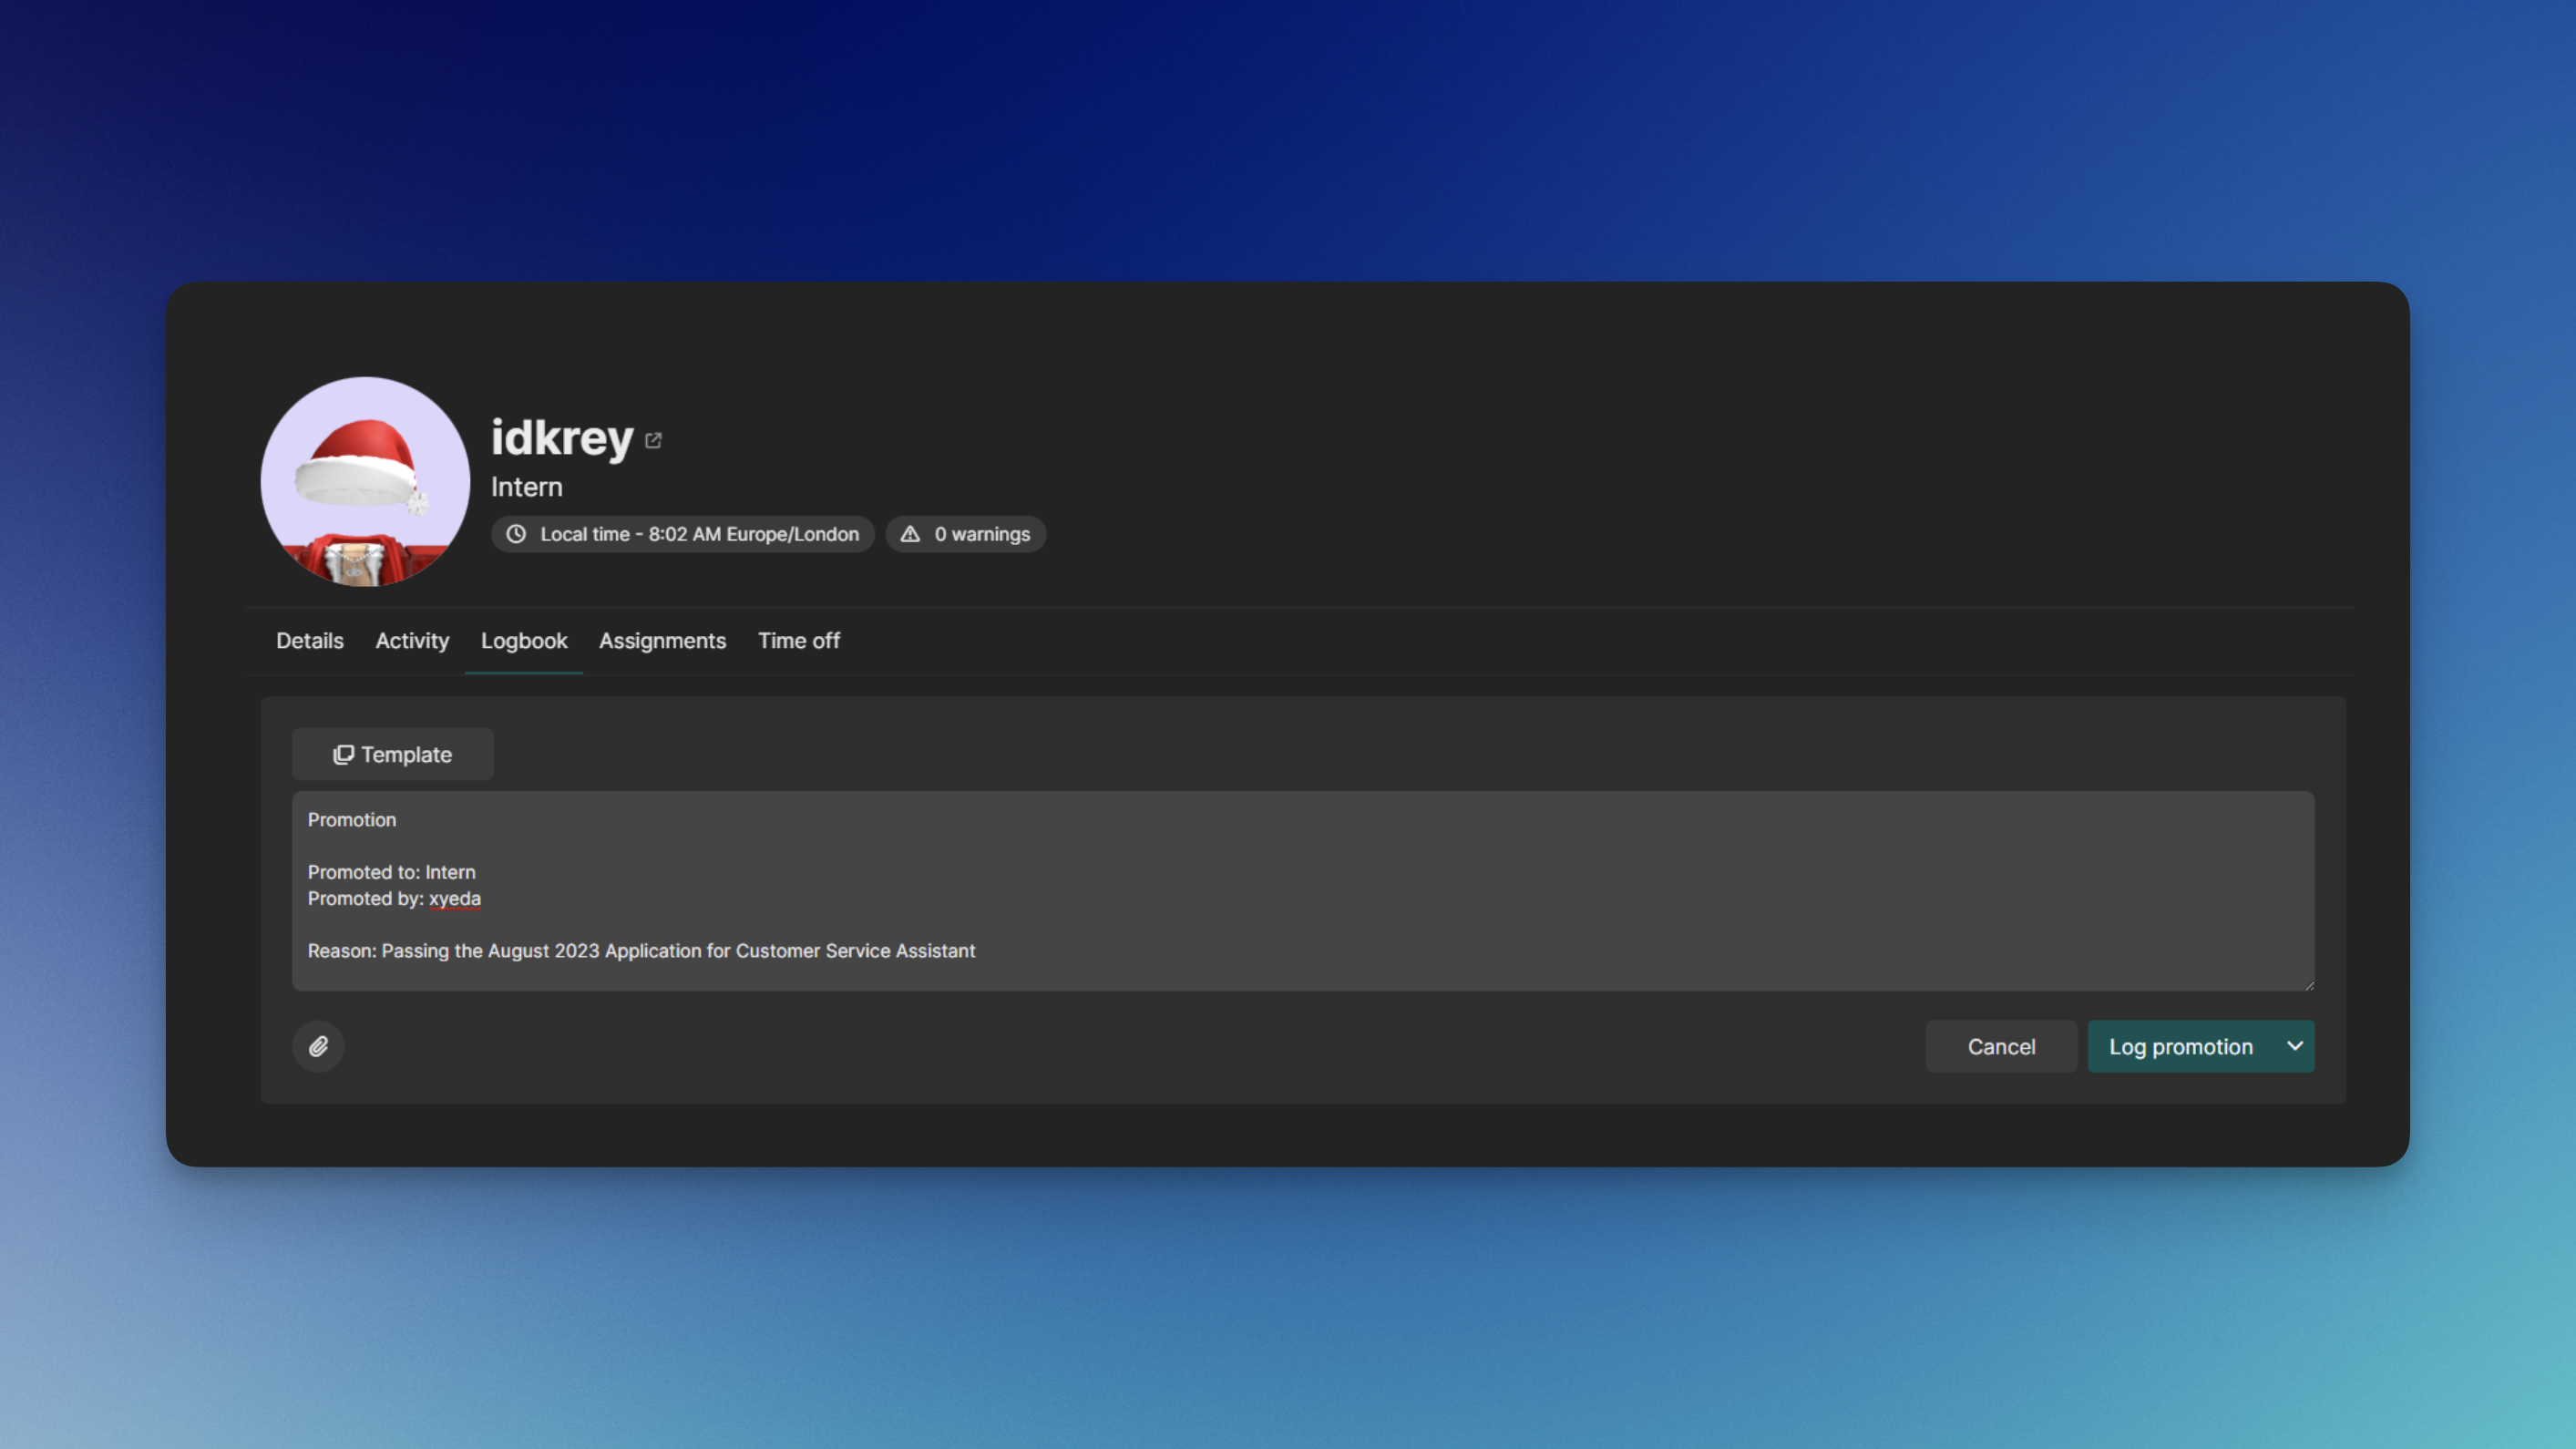
Logbook allows you to log all of the actions taken to the staff. From warnings, promotions, demotions, even username changes.
## Creating a Post
To create a post, follow the steps below:
To continue, you'll need the following permission: View Other Staff and Post to Logbook
Firstly, head over to the Staff's Directory Profile. In there, go to the Logbook tab.
To create a post, click Create Logbook Entry, then type in your comment. You can then upload attachments by clicking the paperclip button on the bottom-left.
Once done, hit Log Note. You can also find the different options by clicking the dropdown next to the button.
Extra Logbook Features
* For Warnings, you can set them to expire automatically after a certain amount of days.
* You can also copy from a template by clicking the Template button at the top-left.
To delete a post (if available), simply just click the trash icon on the top-right corner of the post.
## Cloning Logbook Posts
Cloning Logbook Posts allow you to transfer the logbook of one user's to another. Follow the steps below:
In order to do this, you must have the following permission: Workspace Admin
Firstly, head over to the Workspace Settings > Logbook > Copy from user.
Fill in all of the fields, from the source user and the user that will get the logbook, and hit Copy to user
## Creating Logbook Templates
Creating Templates allow you to convinently copy and paste a template to your logbook post.
In order to do this, you must have the following permission: Workspace Admin
Firstly, head over to the Workspace Settings > Logbook > Templates.
Click Create Template, give it a name and the content below.
# Roles
Source: https://docs.hyra.io/using-hyra/staff/roles
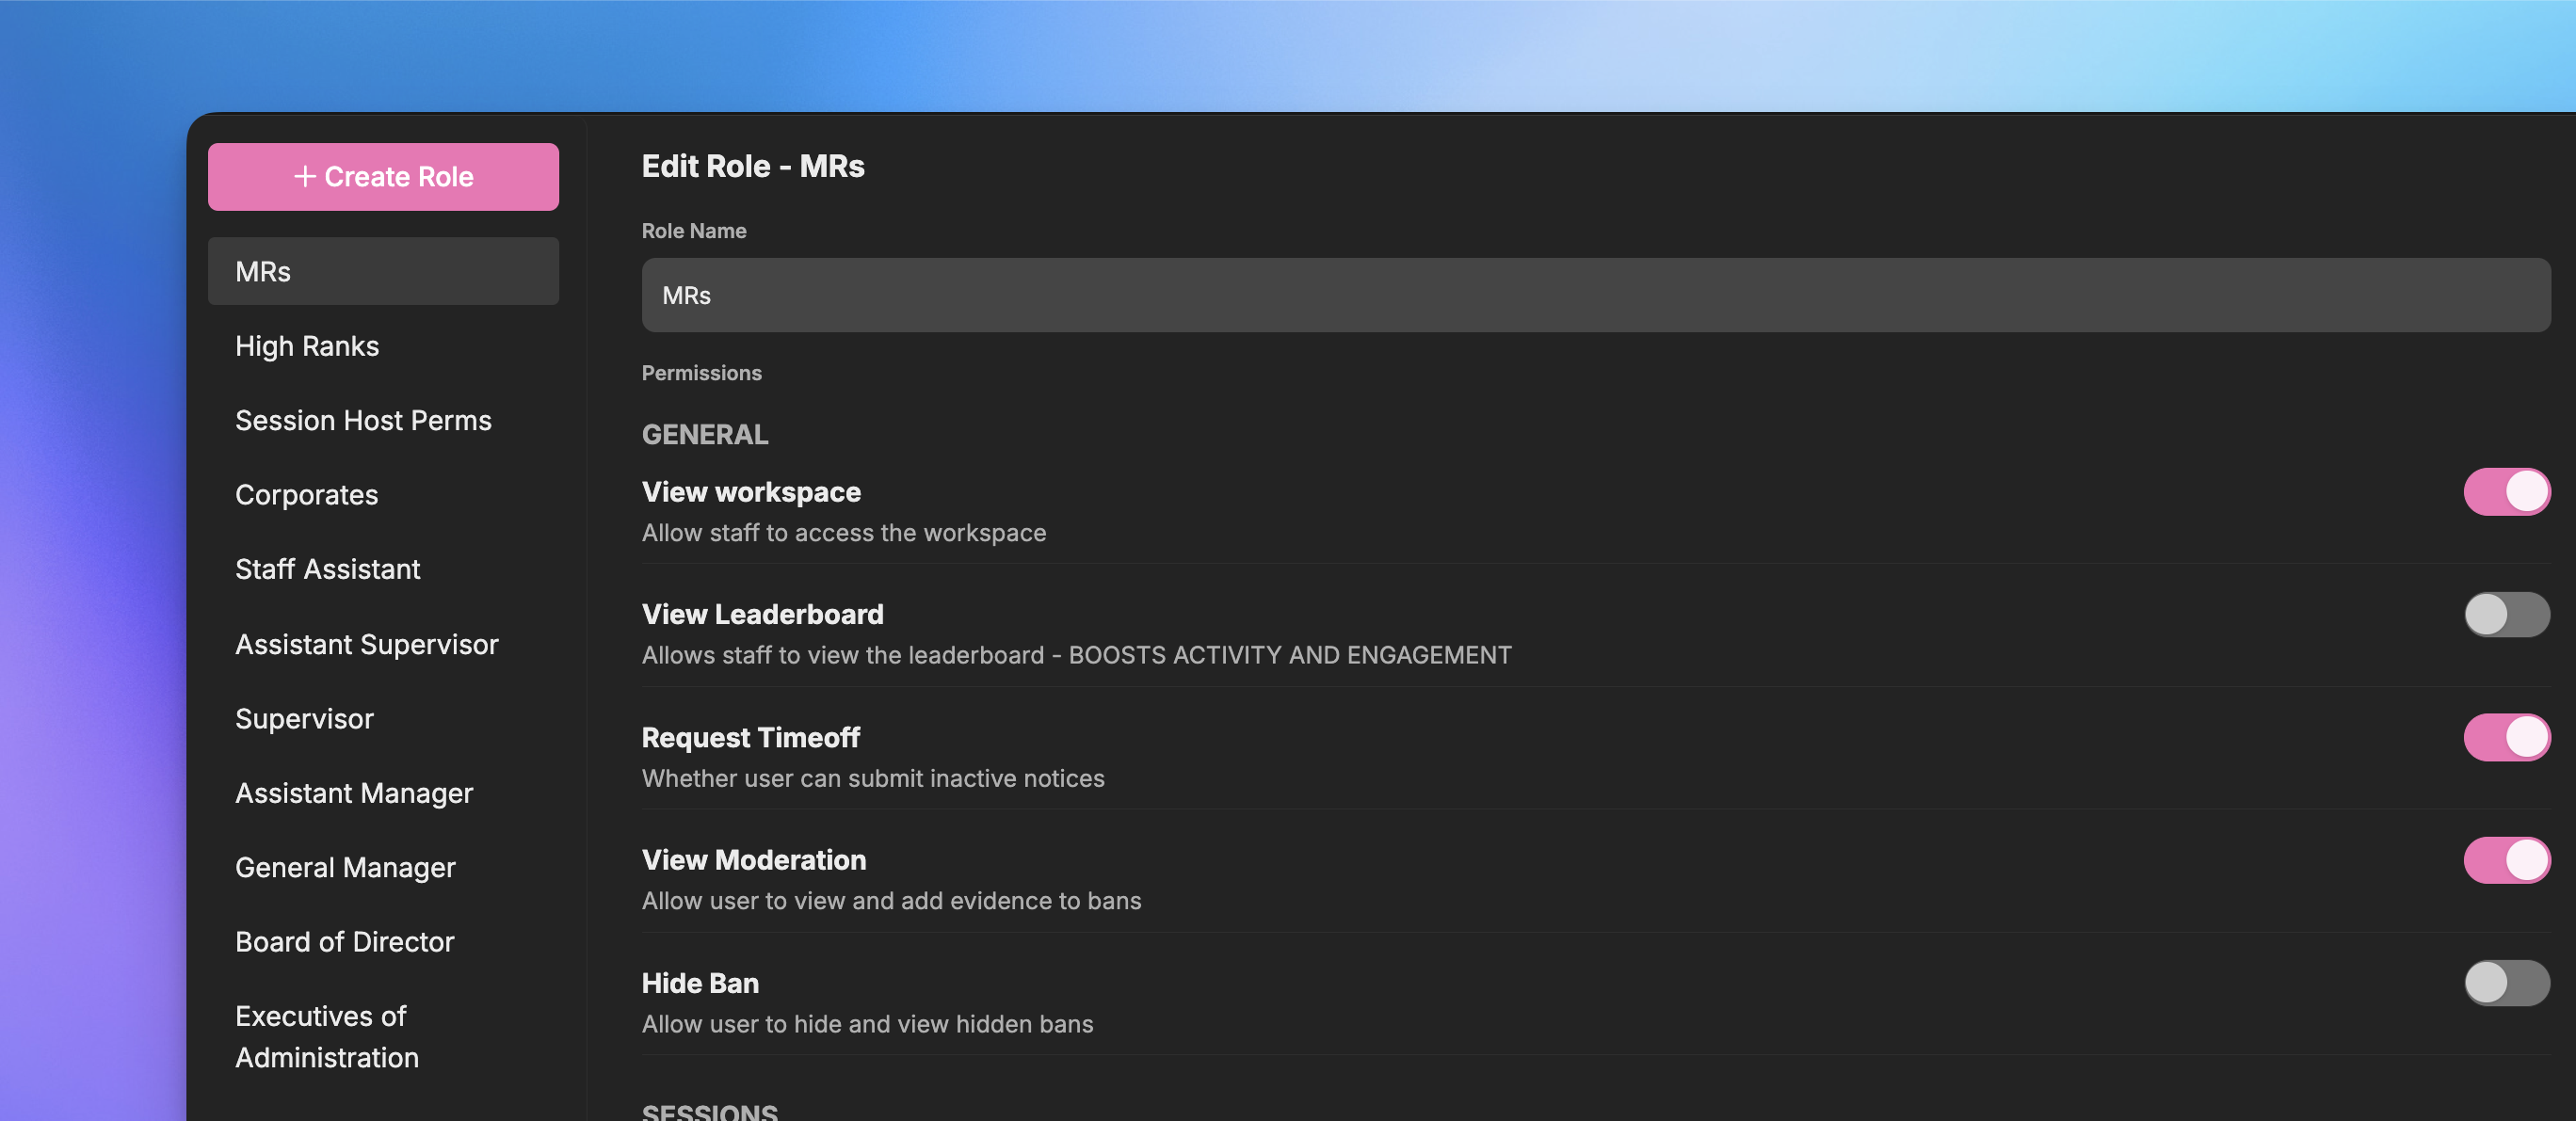 Roles allow you to give permissions to your team to access your workspace, create private categories in Knowledge Base, and many many more.
## Creating a Role
To create a role, follow the steps below:
To continue, you'll need the following permission: Workspace Admin
Firstly, go to the Roles Page by going to Settings > Roles.
Click Create Role in the top and it should create a role named "new role".
After creating a role, you'll need to give it permissions. To give it permissions, just toggle the switch located on the right side of the permission.
In order for a staff to access the workspace, they must have at least one permission.
Once the permissions have been selected, scroll down until you see Assigned Group Roles and Manual Members.
For Asisgned Group Roles, select which roles by switching the toggle on or off will recieve the role and its permissions. For Manual Members, you'll need to manually type their usernames and select from the dropdown.
Be sure to hit Save to save your role!
### Administrative Permissions
Some permissions can cause harm to your workspace if given to a bad actor. Here's the list of all levels of permissions:
The permissions below can be given to everyone without harming your workspace:
* View Workspace
* Request timeoff
* View Knowledge Library
* View Orders
* View Leaderboard
**For Promotion Recommendation:**
* View Promotions Recommendation
* Create Promotion Recommendations
* Upvote Promotion Recommendations
For Sessions:
* Assign Host to Self (for Hosts)
* Assign Co-Host to Self (for Co-Hosts)
* Create New Server (for Hosts and Co-Hosts)
* Change Week on Calendar
If you want the staff to access the workspace, enable View Workspace. This will also allow you to give more permissions to the staff.
The permissions below are usually reserved to your Human Resources Department or higher-ranking staff. We won't suggest giving these permissions to your staff.
* View Other Staff
* Manage timeoff Requests
* View Logbook History
* Post to Logbook
* View Orders and Players Tab
For Sessions:
* Assign host to other people
* Assign Co-Host to other people
* Assign Roles to other people
The permissions below are usually reserved to your Head of Human Resources and highest-ranking staff members. These permissions can cause harm to your workspace if given to a bad actor.
* Update Knowledge Library
* Edit Views
* Add/Remove Minutes on Staff
* Edit Staff Details
* Delete Promotion Recommendations
* Workspace Admin (dangerous permission)
Please do note that it's up to you to decide whether they will gonna need the permission. These are only our suggestions to help you on deciding if a permission should be given to everyone, or to only a handful of people.
### Dependent Permissions
Some permissions are hidden because they are dependent to a parent permission. This means in order for them to be given, they will need their parent to be enabled first.
Below is the list of all parent permissions:
* View Workspace
* View Knowledge Library
* View Other Staff
* View Orders and Players tab
* View Promotions Recommendations
# Time Off
Source: https://docs.hyra.io/using-hyra/staff/timeoff
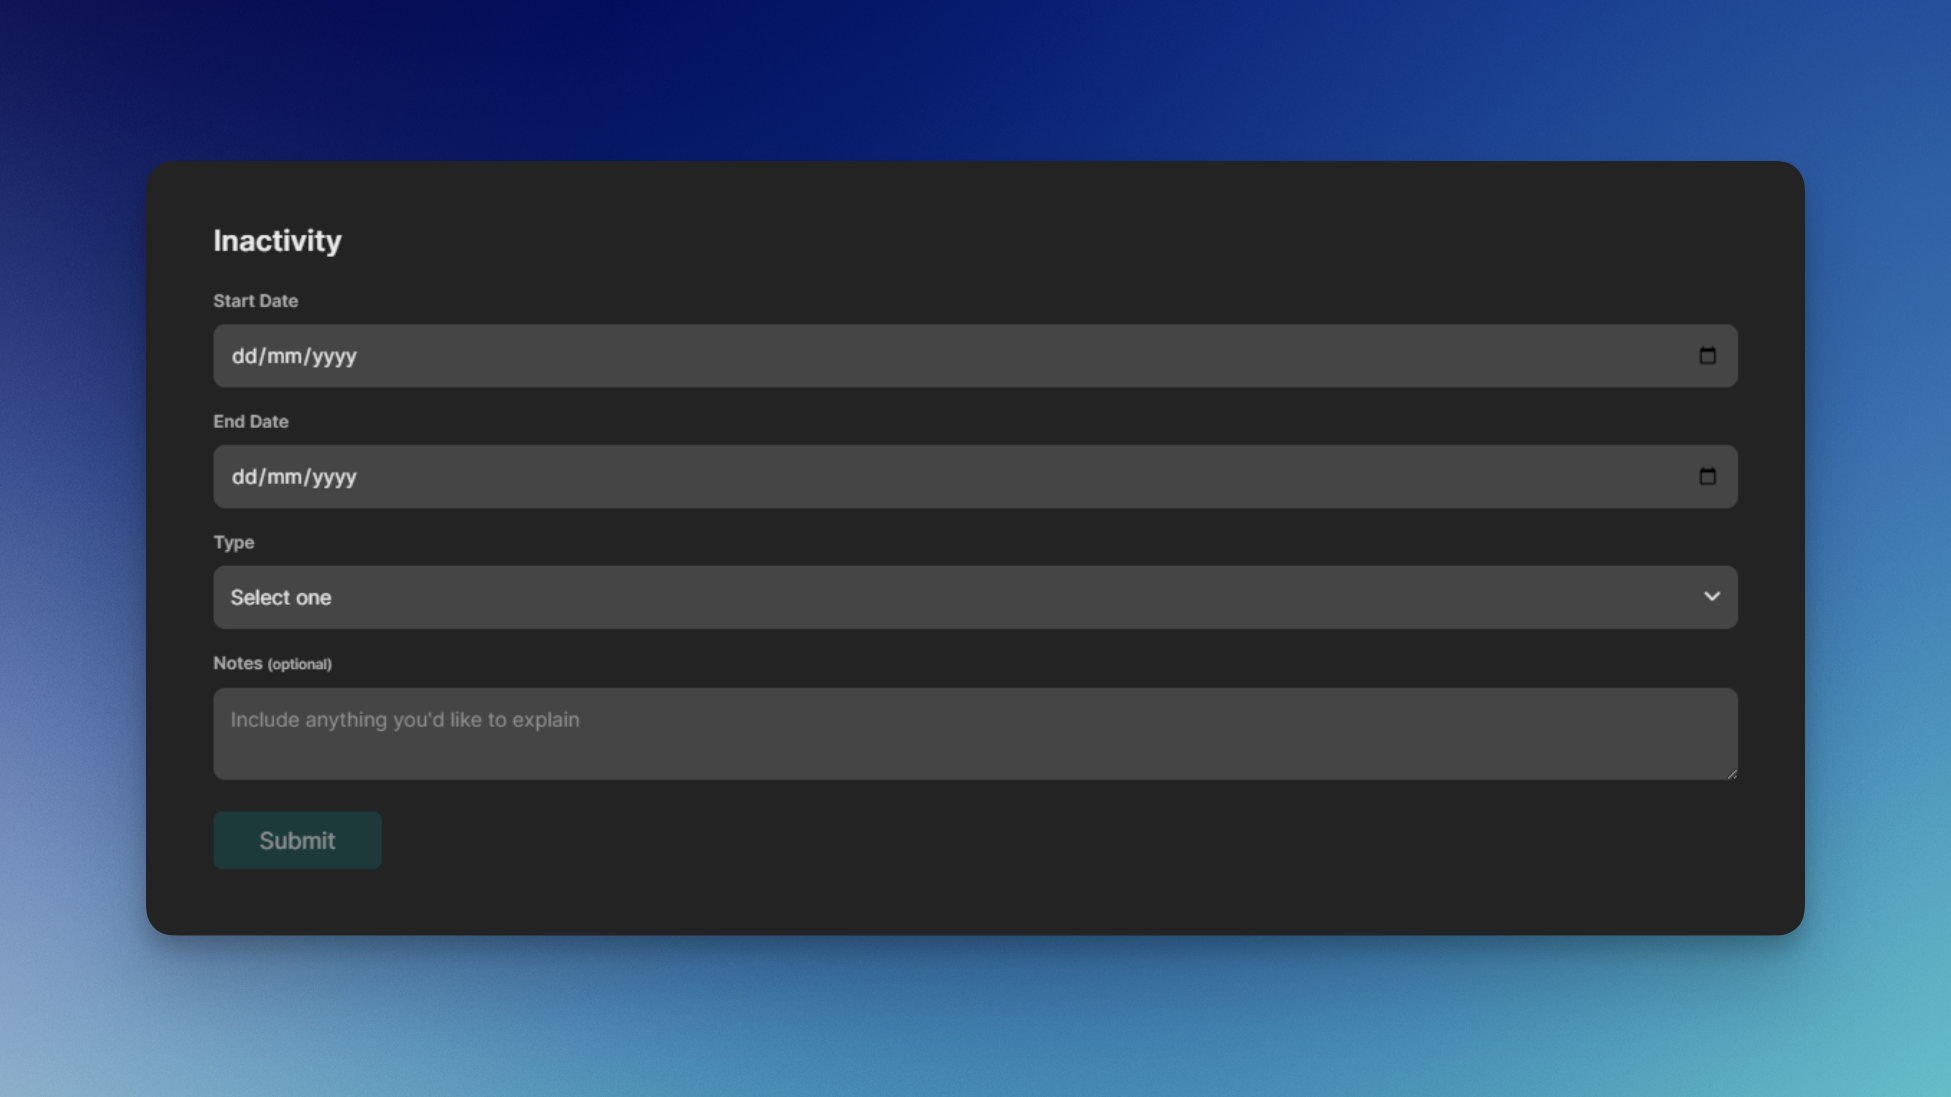 Hyra's Time Off feature allows your staff to file an Inactivity Notice that let your department know that they will be gone for some time.
## Creating an Inactive Notices
To create an Inactive Notice, follow the steps below:
To continue, you'll need the following permission: Request Timeoff
Firstly, go to the Inactivity Page by going to Activity > Inactivity.
Fill in all of the required fields, from when will it start and end, type of inactivity, and notes.
You can use the notes field as a space to add your reason or give extra info about your notice.
Once you've hit Submit, it will show up as Pending status. You can also cancel the notice by clicking Cancel.
If your notice got accepted, it will show up as Approved.
## Managing Inactive Notices
Keeping track of inactive notices is an important part of managing staff time off and absence requests. Follow the steps below to manage inactive notices:
To continue, you will need the following permission: View Other Staff and Manage timeoff requests
Firstly, go to the Timeoff Page by going to Staff > Timeoff.
Here you will see the staff that are out of office and all of the pending requests below it.
To accept a time off request, click Accept. To deny a request, select Deny.
## Viewing Staff
You can also see if the staff is out of office by looking at the icon next to their username in Views.
# Views
Source: https://docs.hyra.io/using-hyra/staff/views
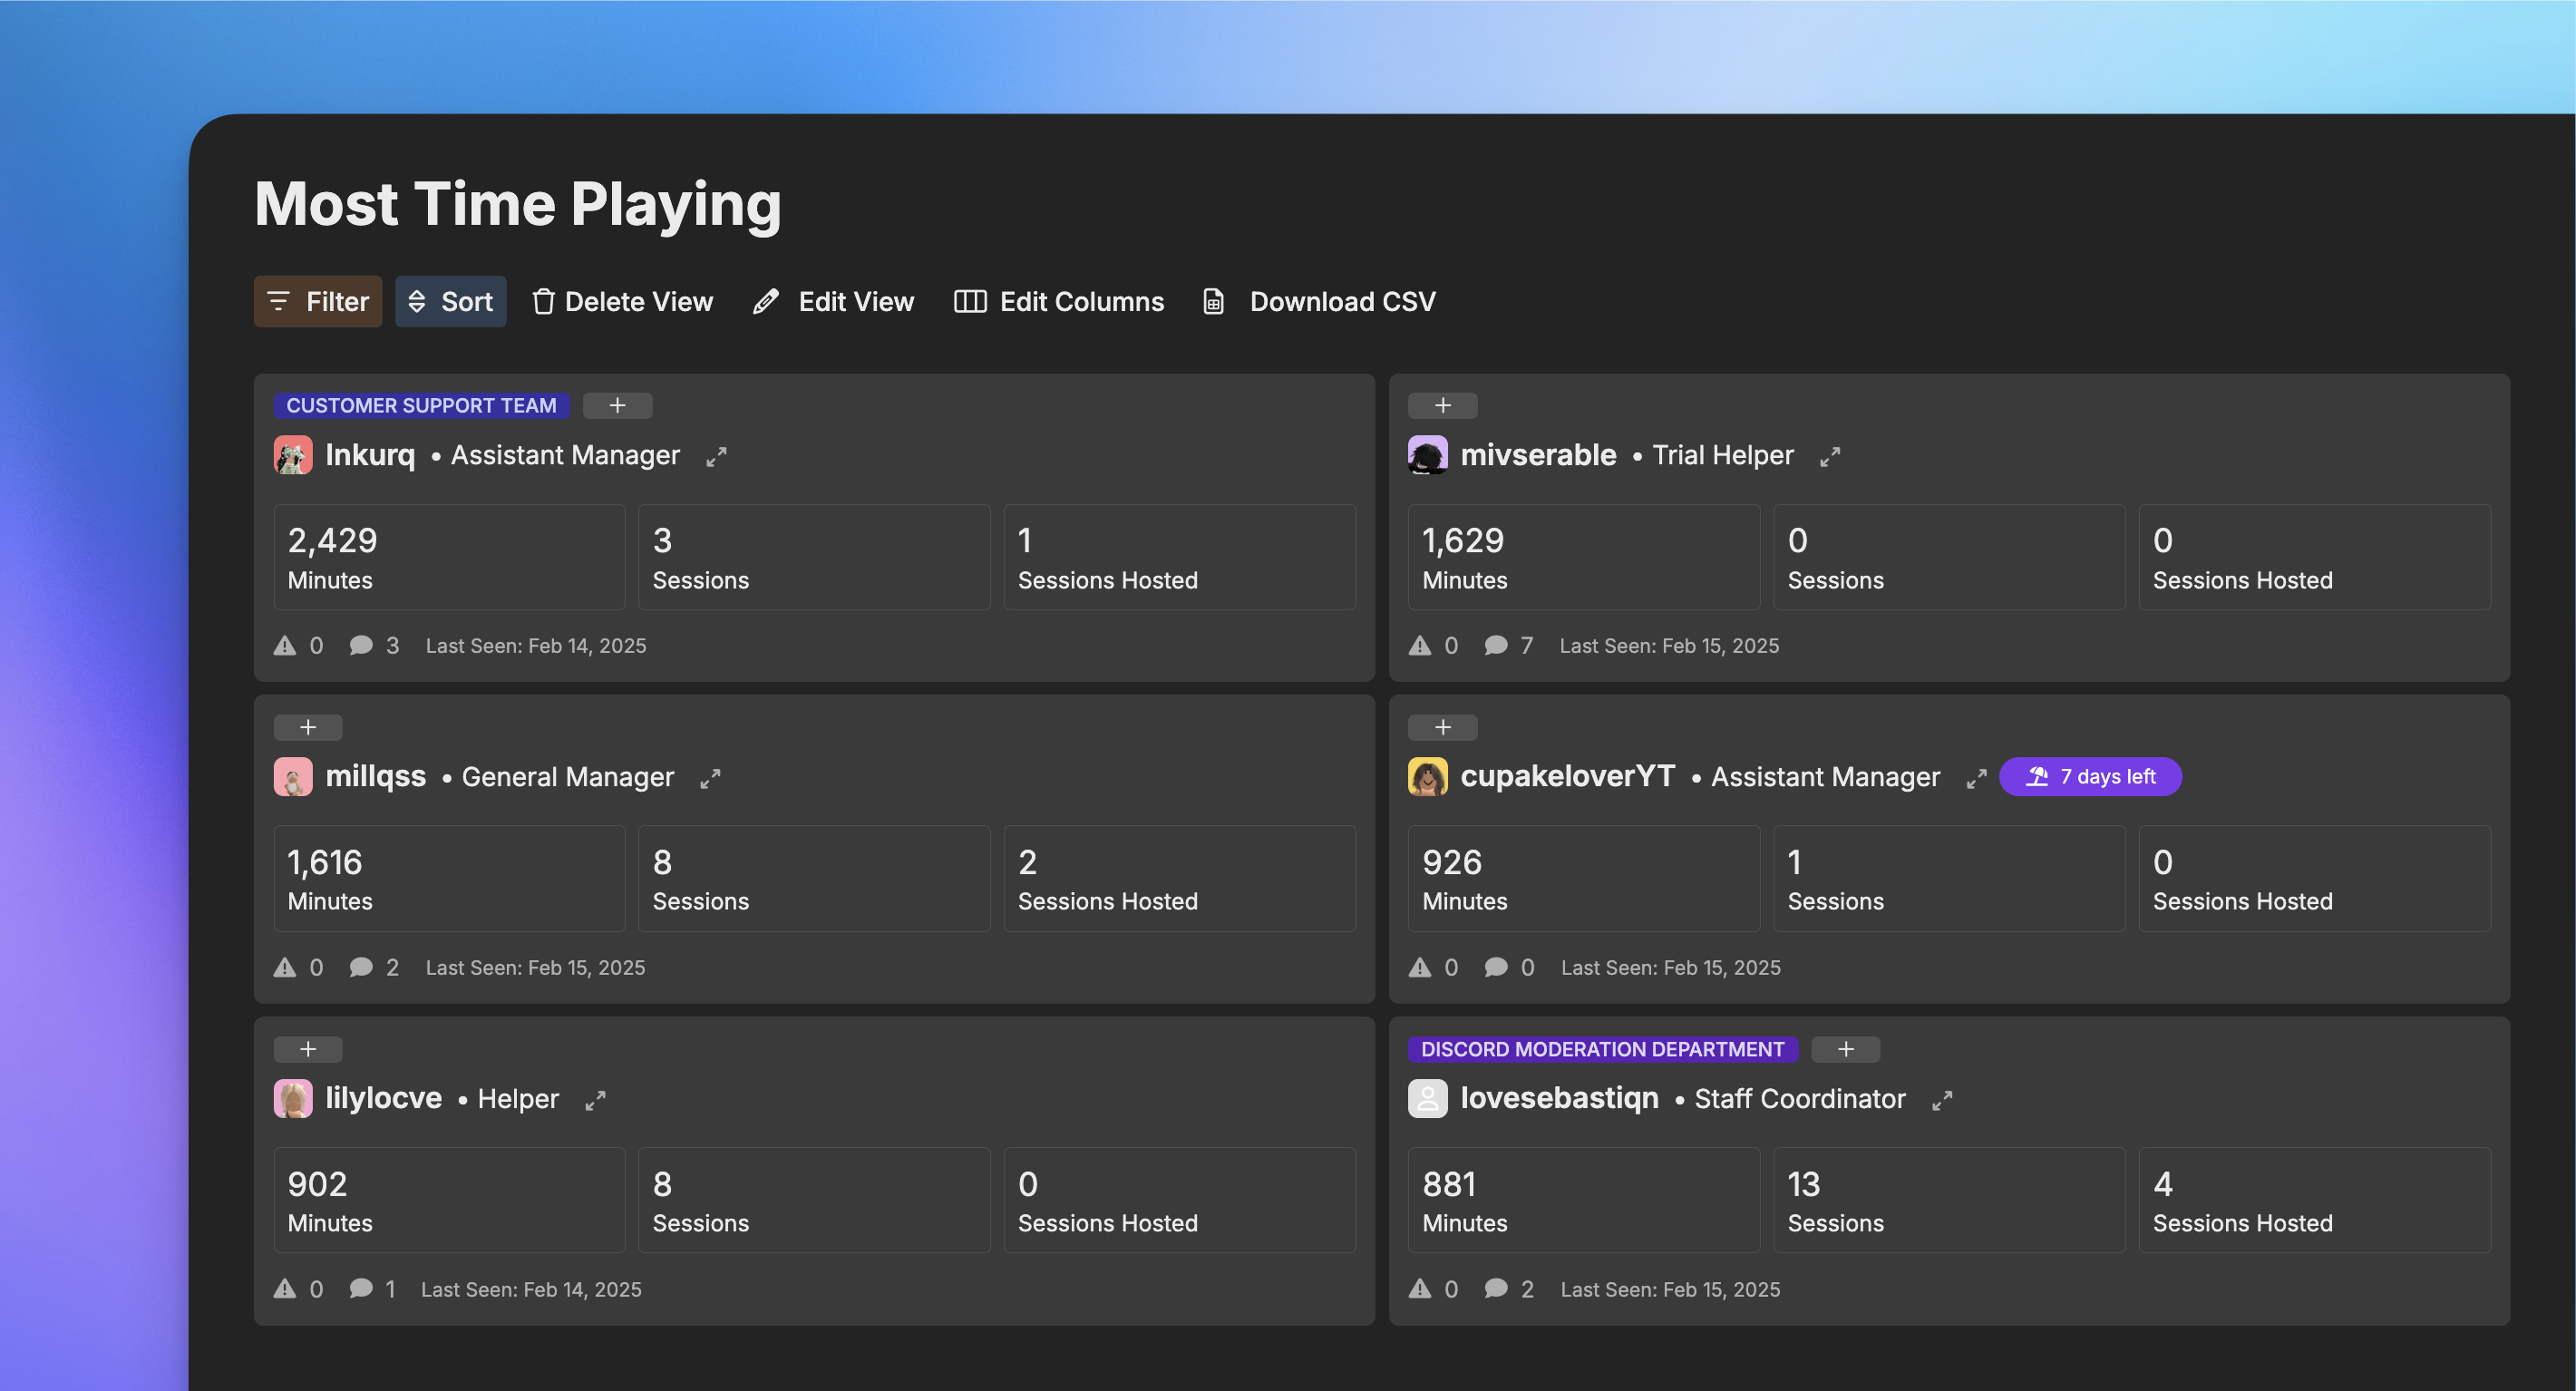 ## What are Views?
Staff views are how workspace admins can view information about their employees all at once. Hyra's design is made to help you efficiently manage your community. In this feature, you can create customized views depending on what details are most important.
## Creating a View
To create a view, follow the steps below:
To continue, you'll need the following permission: View Other Staff and{" "}
Edit Views
Firstly, go to the Staff Page by clicking the Staff Tab.
To create a View. Click the plus icon beside Views and a popout should appear.
In the popout, you can configure the view. From giving it a name, color, and icon.
Customize your View by using Filter, Sort, and Edit Columns. Let's tackle them one-by-one below.
### Filtering Staff
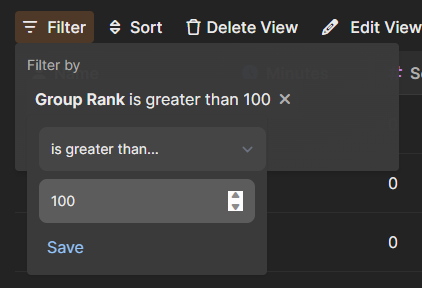
Filter allows you to filter staff that doesn't fit any of the requirements you've set. You can do this to filter which staff are at a certain rank, has a certain label, and many more!
To do this, click Filter and click Add a Filter Field, select a property that you want to filter out, select from the dropdown the filter type and it's value.
 ### Sorting Staff
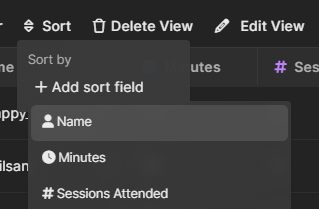
Sorting staff allows you to sort the staff, this is to neatly organize them by rank, or by their username, or more.
Please note that when sorting a property that uses numbers (e.g. Group Rank),
A -> Z means 0 -> 9, and Z -> A means 9 -> 0.
To do this, click Sort and click Add sort field, same as filter, select a property that you want to sort out, and select if the sort is A -> Z or Z -> A.
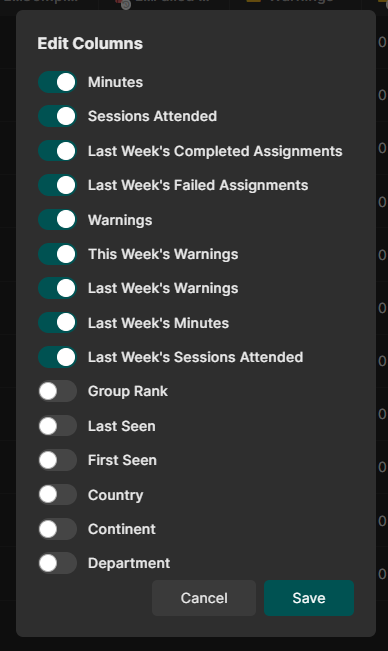
 ### Editing Columns
When creating new views, all columns will be shown by default. But sometimes it can be cluttered with information that you might not need. Editing Columns solves this issue.
Editing Columns allows you to select which columns will only be shown to the View. To do this, click Edit Columns, and toggle which columns will be shown or not.
 Hyra is the all-in-one tool for managing your staff. Everything you need to track, monitor, discipline, reward and manage your staff is here.
The quickstart guide walks you through the basics of Hyra, and how to get started.
 ## View your Activity
You can view your Activity by going to [https://app.hyra.io](https://app.hyra.io) and navigating to your Workspace. From there, click the Activity clock icon in the side navigation.
 ## Cover Image
You can upload a cover image to your homepage instead of using the default gradient. The recommended size of the cover is 1920 x 300 pixels. The image is fixed at an aspect ratio of 32:5, constrained at a minimum height of 100 pixels.
### Guidelines
In order to get the best results for your banner, you should follow these guidelines:
1. Use a high resolution image. The minimum recommended size is 1920 x 300 pixels.
2. Keep the bottom left of your image free of busy content. This is where a greeting message will be displayed.
3. Avoid using an image with a logo or text on it.
4. Use darker images. The greeting message is white, so if your image is too bright, the message may be hard to read.
5. Repeating patterns or scapes work the best. Try to avoid designs that don't look good when cropped.
 Hyra's Sessions feature allows you to automatically create events in your Discord server to let people know when your next session is.
## Setting up
 Using Hyra's Trello Integration, you can sync information from Trello card comments onto Hyra, such as warnings, suspensions, demotions, terminations and notes. The system works by matching your card comments onto Hyra using regular expression.
If you're fully Hyra for your logbook, you won't need this feature - it's only for those who have a hybrid setup.
 For them to match, be sure to have their Username or User ID as the title of the card. You are free to add any prefixes like \[MR] or \[HR].
 Once done, hit Save action to save your action.
 ## Triggering the Action
Once everything has been set up, it's time to test it out!

 It will also show `(triggered by Trello, {Trello Username})` to signify that it was created via the Trello Integration.

 # Categories
Source: https://docs.hyra.io/using-hyra/knowledge/categories
 Categories allow you to categorize your content in your Knowledge Base. From locking content to only a handful of people, you can use it for confidential documents that you don't really want someone to have access to.
## Creating Categories
To create a category, follow the steps below:
 ## Uploading and Linking Content
Uploading your files and content to Hyra couldn't be easier. To get started, you'll first need to create a category. A guide to creating categories can be found on the next article.
 Hyra's Player Bans allow you to log your permanent bans from your game to your Hyra workspace! It also allows your staff to insert evidence using Hyra's fast CDN!
 ### Adding evidence
You can use the comments feature to attach evidence to your ban
 ## Revoking a Ban
You cannot revoke a ban in the Ban Dashboard. You'll need to use an API to revoke a ban. This is for data integrity and security reasons.
For more information on the API, click [here.](https://docs.hyra.io/api-reference/players/delete-playersbans)
# Order Logging
Source: https://docs.hyra.io/using-hyra/players/order
 Hyra's Order Page allows you to show all of the Orders that has been sent to your game in Hyra. It can help you find staff that is spamming the order button to gain points.
 Hyra's Promotion Recommendation feature allows you to recommend staff members that have gone above and beyond to make the community better to high-ranking staff for a chance to get a promotion.


 ## Deleting a Promotion Recommendation

 ## What are Sessions?
Sessions are one-time or repeating events that occur in your community. For example, you could create a session for all of your training sessions, interview sessions, and many more!
## Creating a Session

 # Joining Sessions
Source: https://docs.hyra.io/using-hyra/sessions/join
 ## Joining Sessions
Joining Sessions allow you to reserve your spot on the session and automatically logs your session for your assignments!


 ## Cancelling a Session
To cancel the session, simply click the three dots
  ## Deleting a Session
The same goes to deleting a session, simply click the three dots
  # Session Roles
Source: https://docs.hyra.io/using-hyra/sessions/session-roles
How to configure Session Roles in Hyra.
 ## What are Session Roles?
Roles are the foundation of attendance at sessions. They are available to be given to one staff member and are arranged into groups. For example, you might have a role group named 'Cashier A' with 1 trainer and 3 assistants beneath it.
## Configuring Session Roles
 ## Creating a Server
To create a server, follow the steps below.
 Assignments in Hyra allows you to give out tasks to your staff. At the end of the week (either Saturday or Sunday depending on your Workspace Settings), it will be automatically checked and recorded.
## Creating an Assignment
To create an assignment, follow the steps below:
 This type of assignment will require your staff to play a specific amount of minutes in your game. You must have the Activity Tracker set up in order for your staff to start collecting minutes.
 This type of assignment will require your staff to attend a session and get logged as part of the session in the Session Calendar.
 This type of assignment will require your staff to be the Host of the session and get logged as the host of the session in the Session Calendar.
 This type of assignment will require your staff to manually press Mark as Complete in order for the assignment to be marked as passed.
 Assignments with a 0 target behave differently to other assignments - These will not display in the user's 'assigned' view, but will show everywhere else, including the user's history.
 ## What are Directory Profile?
Directory Profile on Hyra are how workspace admins can view information about each of their employees. This includes their personal details, activity, logs, and current assignments.
Their purpose is to serve each community with the best possible staff management to quickly and effectively take charge.
 ## What is Logbook?
Logbook allows you to log all of the actions taken to the staff. From warnings, promotions, demotions, even username changes.
## Creating a Post
To create a post, follow the steps below:
 Roles allow you to give permissions to your team to access your workspace, create private categories in Knowledge Base, and many many more.
## Creating a Role
To create a role, follow the steps below:
 Hyra's Time Off feature allows your staff to file an Inactivity Notice that let your department know that they will be gone for some time.
## Creating an Inactive Notices
To create an Inactive Notice, follow the steps below:
 ## What are Views?
Staff views are how workspace admins can view information about their employees all at once. Hyra's design is made to help you efficiently manage your community. In this feature, you can create customized views depending on what details are most important.
## Creating a View
To create a view, follow the steps below:
 ### Sorting Staff
Sorting staff allows you to sort the staff, this is to neatly organize them by rank, or by their username, or more.
 ### Editing Columns
When creating new views, all columns will be shown by default. But sometimes it can be cluttered with information that you might not need. Editing Columns solves this issue.
Editing Columns allows you to select which columns will only be shown to the View. To do this, click Edit Columns, and toggle which columns will be shown or not.

 ## What Are Events?
Events allow you to log specific activities within your system, making them visible and organised under the Activity tab. Common types of events include:
* **Admin Logging:** Track administrative actions, such as user commands.
* **Assistance/Help Logging:** Log help requests or assistance actions.
* **F3X Logging:** Monitor building or tool usage events.
Events are grouped by type for easy browsing, and you can ingest any custom event you need - Hyra takes care of the rest.
## Sending Events to Hyra
To send events, use the `trackEvent` function provided by the module. This function is tied to the module instance, meaning you'll need to ensure it operates within the same instance. If your scripts require sharing data, you can use [exporters](/api-reference/activity/module/creating-an-exporter) or bindable events for seamless integration.
```lua
module.trackEvent(player, eventType, eventData)
```
* `player`: The player associated with the event (e.g., `game.Players.melodrvma`).
* `eventType`: A string representing the type of event (e.g., `"Admin Logs"`).
* `eventData`: A table containing event-specific details (e.g., `{ command = ":kick xyeda" }`).
## Example: Tracking an Admin Log Event
The following example demonstrates how to log an admin action using the `trackEvent` function:
```lua
module.trackEvent(game.Players.melodrvma, "Admin Logs", {
command = ":kick xyeda"
})
```
In this example:
* The event tracks an admin's use of the `:kick` command.
* The `eventData` table includes the specific command executed.
By following this structure, you can easily add, organise, and track events in Hyra, ensuring all relevant activities are logged and accessible within the Activity tab.
# Change a Session Role
Source: https://docs.hyra.io/api-reference/activity/patch-activitysessions-change
patch /activity/sessions/{workspaceId}/{eventId}/change
Change session user
# Create User Activity
Source: https://docs.hyra.io/api-reference/activity/post-activity-user
post /activity/{workspaceId}/user/{userId}
Create a new gifted activity
# Create a Server
Source: https://docs.hyra.io/api-reference/activity/post-activitysessions-server
post /activity/sessions/{workspaceId}/{eventId}/server
Create a server for an event
# Redirect to Roblox Game
Source: https://docs.hyra.io/api-reference/connections/get-connectrobloxplay
get /connect/roblox/play
Redirect to Roblox game
# Delete a Post
Source: https://docs.hyra.io/api-reference/intranet/delete-workspaceposts-
delete /workspace/posts/{workspaceId}/{postId}
Delete a post from the intranet.
# List Posts
Source: https://docs.hyra.io/api-reference/intranet/get-workspaceposts
get /workspace/posts/{workspaceId}
Get all the posts from the intranet.
# Update a Post
Source: https://docs.hyra.io/api-reference/intranet/patch-workspaceposts-
patch /workspace/posts/{workspaceId}/{postId}
Update a post from the intranet.
# Introduction
Source: https://docs.hyra.io/api-reference/introduction
A quick introduction to the API reference documentation
Hyra's V2 monothlyic API allows you to securely interact with Hyra from outside applications. Every day, we see new and exciting integrations with Hyra, from automation from within games to interaction via Discord bots.
Our API is REST based, and uses JSON and Bearer authentication. It's the exact same API we use to power our website.
At the moment, Hyra's website uses two APIs.
* **V1 API (api-staging)**: Our original API is no longer being actively developed, but is still used by our website for some features. This API uses a different authentication method, and is not documented or supported. We cannot guanratee that this API will not change or be removed at any time.
* **V2 API (api)**: Our new API is being actively developed and more and more features are constantly being added to it. This API is the one you'll find documented here.
A full technical API reference can be found [here](https://api.hyra.io/docs/static/index.html), but the documentation here is based on the API reference, and is more user friendly.
## Authentication
Our V2 API uses Bearer authentication, which you can pass in via the `Authorization` header. You can get your API key from your Workspace Settings, under Developer API.
```http
Authorizaton: Bearer